How to Mount NFS Shares on Windows 11
You mount NFS shares on Windows 11 by enabling the NFS client feature and then connecting through File Explorer or PowerShell.
NFS (Network File System) is a protocol that lets your Windows 11 PC access files directly from a remote server, like they were local storage.
This is perfect for working with files on Linux or Unix machines from your Windows desktop. You’ll need to install the NFS Client, a feature available in Windows 11’s Optional Features.
Enable the NFS Client feature via Windows Optional Features. Then, use Command Prompt with administrator privileges and the `mount` command to connect to the NFS server and assign a drive letter.
Set Up an NFS Share First
To mount NFS shares on Windows 11, you must first set up an NFS share on a server, which is usually a Linux computer. Once the NFS share is ready on the server, you can then connect it to your Windows 11 PC. This guide assumes your NFS share is already set up and exported.
How to install and export NFS share on Ubuntu
Enable NFS Services on 🪟 Windows 11
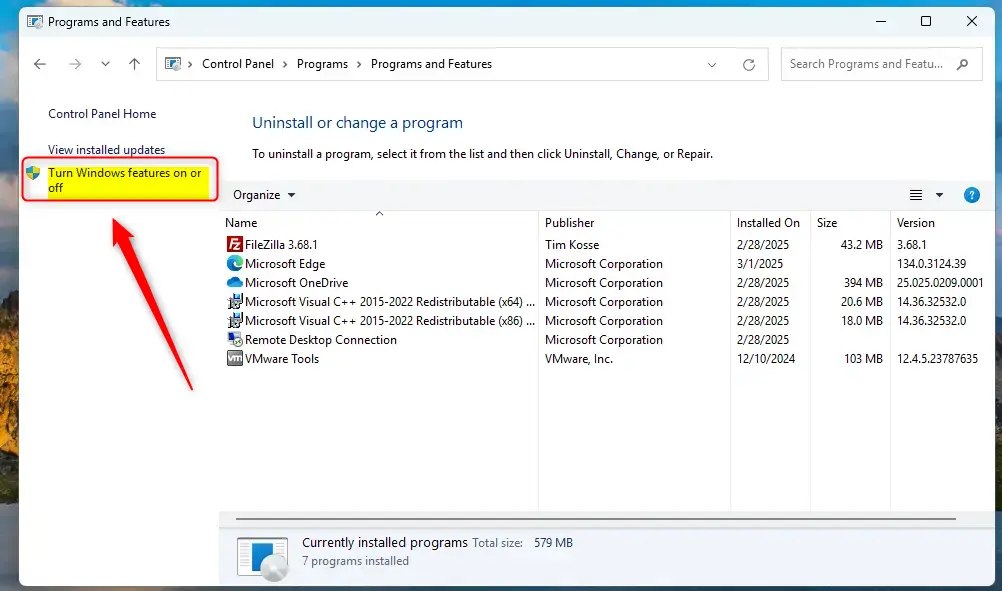
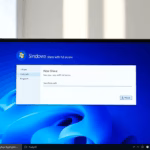
Your Windows 11 computer needs a special feature called NFS Services turned on to connect to NFS shares. To enable it, open Windows Settings, go to Programs, then Programs and Features. On the left, click ‘Turn Windows features on or off’ and check the box for NFS Services.
- Open your Windows machine.
- Go to Settings > Programs > Programs and Features.
- Click on “Turn Windows features on or off” on the left side.
- A window will open. Look for NFS Services in the list.
- Check the box next to NFS Services to enable it .
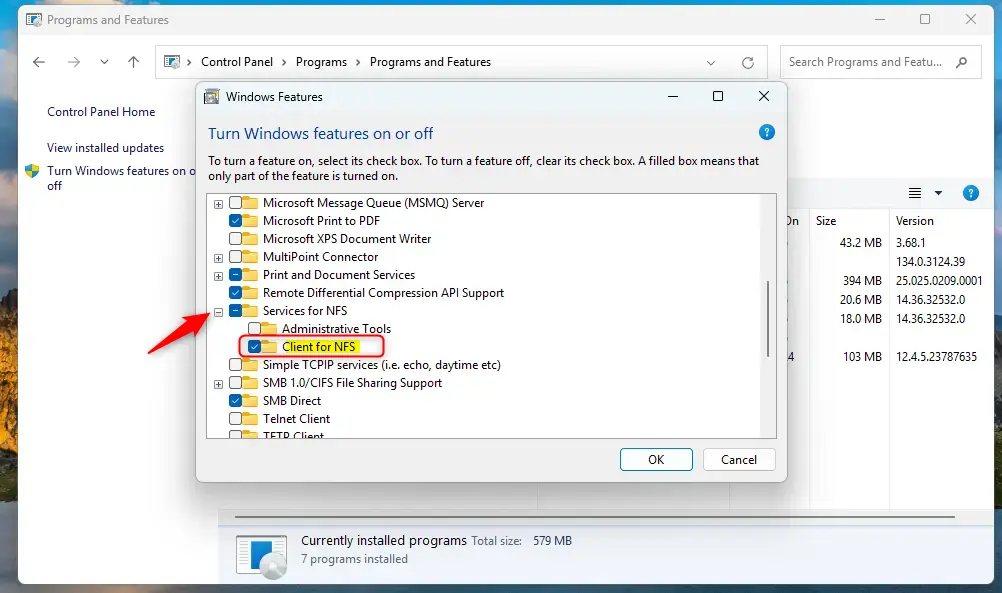
- Click OK and wait for Windows to install the feature.
- Close the window when done.
Mount the NFS Share Using Command Prompt
Once NFS Services are enabled on Windows 11, you can mount your NFS share using a simple Command Prompt command. Open Command Prompt as an administrator by right-clicking it and choosing ‘Run as administrator.’ Then, type the command to mount the share, replacing the server address with your actual server’s IP address or name.
Now your Windows machine is ready to access NFS shares. Follow these steps:
- Open Command Prompt as Administrator. ( Right-click on Command Prompt and select “Run as administrator.”)
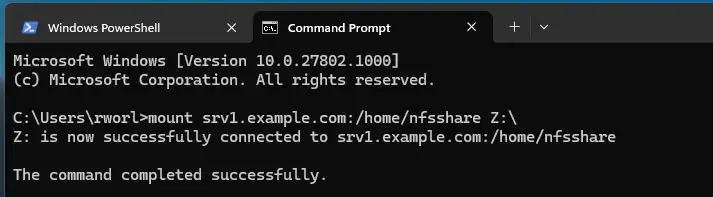
- Type the following command to mount the NFS share. Replace the server address and paths with your actual NFS server details:Code
mount 192.168.1.100:/home/nfsshare Z: - Press Enter.
What happens? Windows connects to your NFS server and links the shared folder to drive letter Z. You should see a message confirming the mount was successful.
Access Your Mounted NFS Share
After you successfully mount an NFS share on Windows 11, you can access it easily through File Explorer, just like any other drive. Open File Explorer and find the drive letter you assigned when mounting the share, such as Z:. Clicking this drive lets you see and manage files stored on your NFS server.
- Open File Explorer on your Windows machine.
- Look for the mounted drive (labeled as Z: or whatever letter you chose).
- Click on it to view and use the files stored on your NFS server.
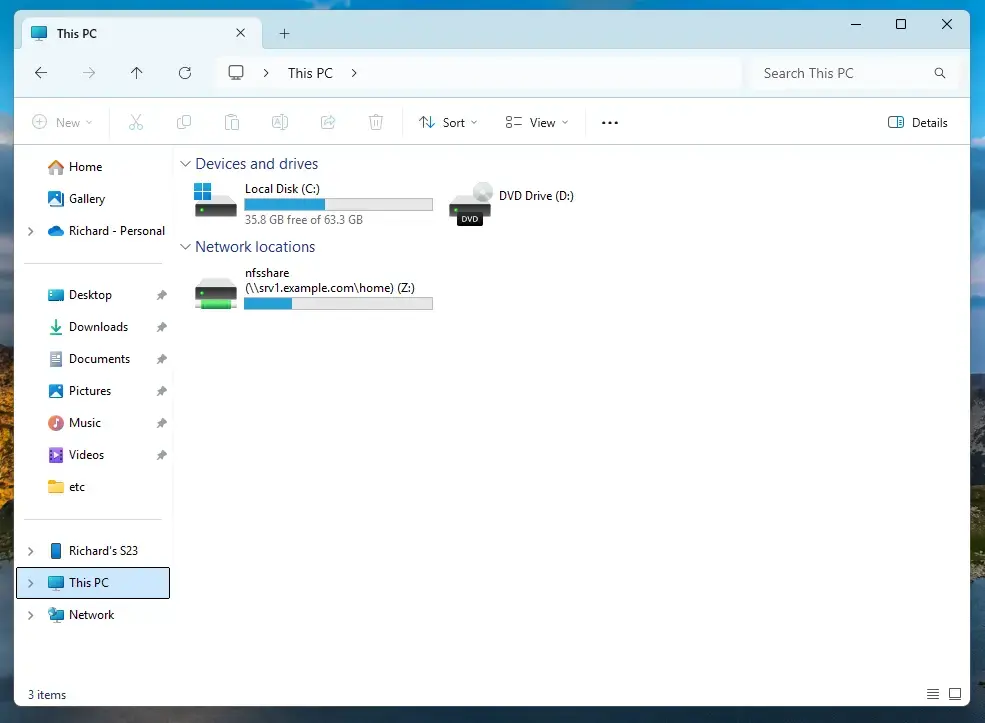
That’s it! You can now read, write, and manage files on the NFS share just like any other folder on your computer.
Summary
NFS lets computers share files over a network, and you can mount NFS shares on Windows 11 by enabling NFS Services and using the Command Prompt.Can 🪟 Windows 11 mount an NFS share?
The Network File System (NFS) is a widely used file-sharing protocol in Linux environments. However, many Windows administrators may not know you can mount an NFS share easily on Windows 11 and Windows Server.
How do I mount NFS persistently in 🪟 Windows 11?
Mount NFS Share Persistently: Open Command Prompt as an administrator. Create a directory where you want to mount the NFS share, e.g., 📁C:\NFS_Share. To make the mount persistent, add the mount command to the Startup folder or create a scheduled task that runs at startup.
Was this guide helpful?

About the Author
Richard
Tech Writer, IT Professional
Richard, a writer for Geek Rewind, is a tech enthusiast who loves breaking down complex IT topics into simple, easy-to-understand ideas. With years of hands-on experience in system administration and enterprise IT operations, he’s developed a knack for offering practical tips and solutions. Richard aims to make technology more accessible and actionable. He's deeply committed to the Geek Rewind community, always ready to answer questions and engage in discussions.


The mount command in windows 10 gives returns an error without the \\ before the ip address
Hi! Thank you for the article! Could you change from `mount 10.0.2.7/home Z:\` to `mount 10.0.2.7:/home Z:\` how on your screenshot, please.
Done… Thanks for that
on my W10, after mounting my share it did not appear under “This PC” I just mapped manually
thanks
Didn’t really work for my needs, not possible to edit existing files. I tried for hours to get real write permissions but it isn’t possible
@Kross – try this to enable write permissions – refer https://graspingtech.com/mount-nfs-share-windows-10/
I can see the directory but the files in the directory are not visible from windows. I have a network with a couple of linux machines and the 2nd linux box can see the files but windows cannot:
T:\>dir
Volume in drive T has no label.
Volume Serial Number is 0000-0000
Directory of T:\
17/11/2018 01:15 ..
17/11/2018 01:15 .
0 File(s) 8,192 bytes
2 Dir(s) 160,240,812,032 bytes free
T:\>mount \\192.168.1.5\export\video T:
fred@HTPC-A:/mnt/video$ ls -al
total 48
drwxrwxr-x 12 fred fred 4096 May 3 2019 .
drwxr-xr-x 7 root root 4096 Nov 7 2018 ..
drwxrwxr-x 2 fred fred 4096 May 8 2019 CNNs
drwxrwxr-x 9 fred fred 4096 Mar 23 2017 GoPro
drwxrwxr-x 13 fred fred 4096 Mar 23 2017 Music
drwxrwxr-x 14 fred fred 4096 Mar 23 2017 TV
fred@HTPC-A:/mnt/video$
Really thank you I have passed my exam because of your tutorial 🙂