
This guide will help you easily turn on or off access to your camera for apps on Windows 11. This keeps your privacy safe and only lets apps use your camera when you want them to.
What is Camera Access?
Camera access means apps can use your device’s built-in or connected camera. This lets you take pictures, record videos, make video calls, or use camera features inside apps.
You can decide which apps are allowed to use your camera by changing your privacy settings. This way, apps that don’t need the camera won’t be able to use it, keeping your information safe.
How to Turn Off the Webcam on Windows 11
Follow these simple steps to turn your camera on or off for all apps:
- Open Settings:
- You can open Windows Settings by pressing Windows key + I on your keyboard, or by clicking the Start button and then Settings.
- Go to Privacy & Security:
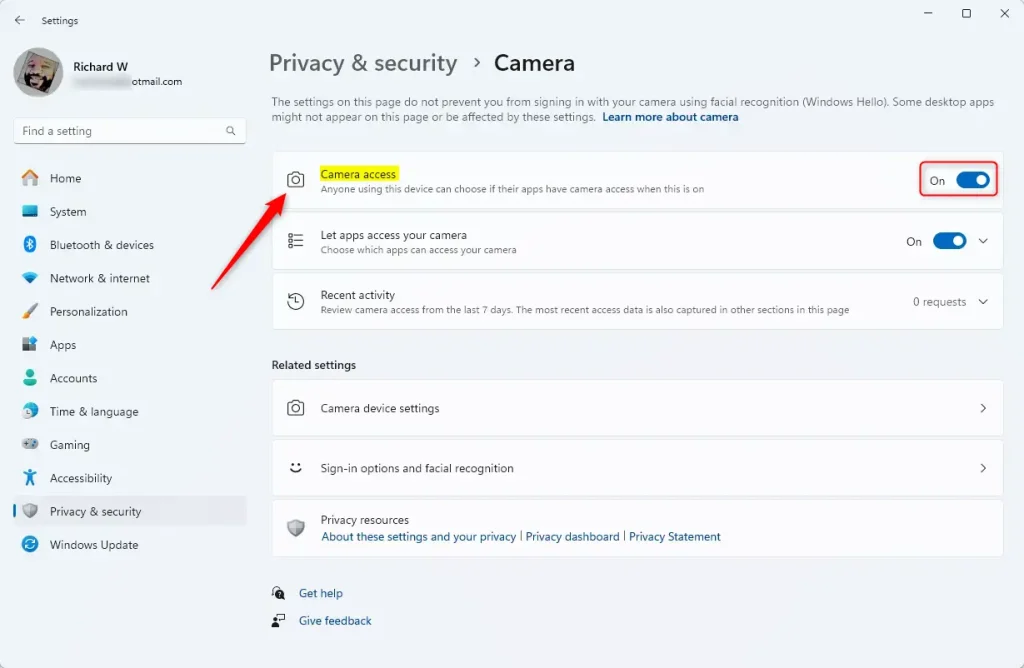
- In the Settings window, click Privacy & Security from the left menu.
- Select Camera:
- Now click on Camera on the right side to see camera settings.
- Turn camera access On or Off:
- At the top, you’ll see a switch for Camera access. Click it to turn camera access on or off for all apps.
Allow or Block Camera Access for Individual Apps
If you want to control camera access app by app, here’s how:
- On the same Camera settings page, scroll down to Let apps access your camera.
- Click the arrow or tile to expand the list of apps.
- Use the switches next to each app to allow or block camera access for that specific app.
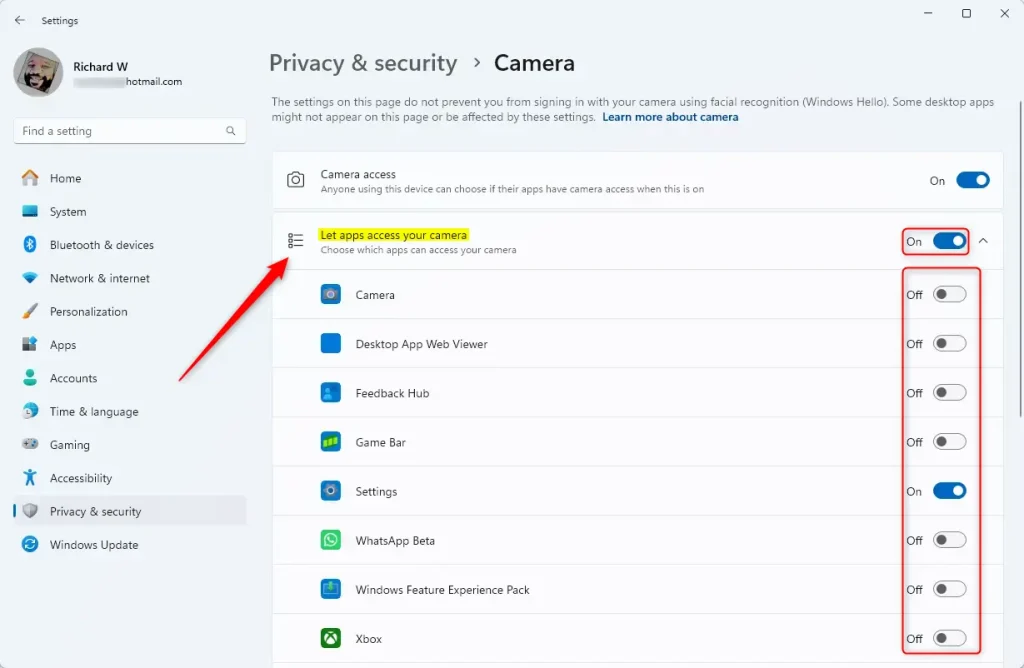
Apps not given permission here won’t be able to use your camera.
Summary
- Turning camera access on or off helps keep your privacy safe.
- You can easily control which apps can use your camera in Windows 11.
- Changing these settings is simple using the Settings app.
- You can choose to allow or block camera access for all apps or just some apps.
- It’s a good idea to check these settings regularly for better security.
For more tips on using Windows 11, visit this easy guide.


Leave a Reply Cancel reply