This article explains how to install LibreNMS with Nginx on Ubuntu 24.04.
LibreNMS is an open-source network monitoring system that provides a powerful and flexible way to monitor network devices, servers, and services. It supports various devices through SNMP (Simple Network Management Protocol) and offers features like alerts, performance graphs, and device discovery.
Nginx is known for its high performance and low resource consumption compared to other web servers. This makes it particularly suitable for serving dynamic content like LibreNMS, which displays much real-time data.
Using LibreNMS with Nginx on Ubuntu can provide a robust, secure, and efficient network monitoring solution tailored to your environment.
Install Nginx HTTP server on Ubuntu
LibreNMS requires a web server. This post will install and use the Nginx web server to run LibreNMS.
To do that, open the Ubuntu terminal and run the commands below to install the Nginx web server.
sudo apt update
sudo apt install nginx
Once Nginx is installed, the commands below can start, stop, and enable the Nginx web server to start automatically when your server boots up.
sudo systemctl stop nginx
sudo systemctl start nginx
sudo systemctl enable nginx
You can test the Nginx web server by opening your web browser and browsing to the server’s localhost or IP address.
http://localhost
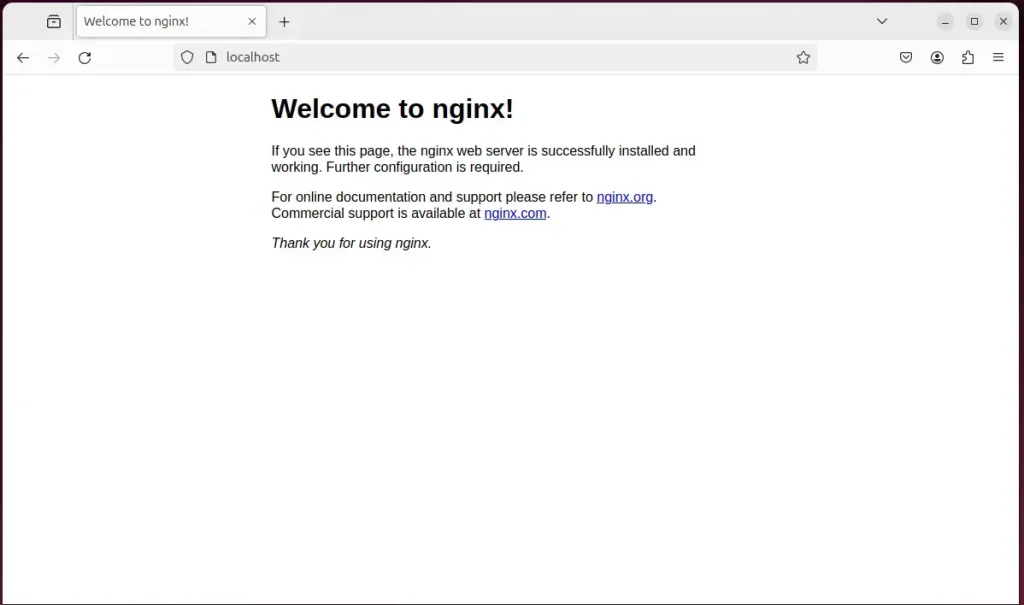
When you see the Welcome to nginx!, it means the Nginx HTTP server is successfully installed.
Additional help on installing Nginx on Ubuntu is in the link below.
How to install Nginx on Ubuntu
Install the MariaDB database server on Ubuntu
The next component required to run LibreNMS is a database server. This post will install and use the MariaDB database server.
To install and use the MariaDB database server, use the instructions below.
Open the Ubuntu terminal and run the commands below to install the MariaDB database server.
sudo apt update
sudo apt install mariadb-server
Once the MariaDB database server is installed, use the commands below to stop, start, and enable the MariaDB server to start automatically when the server boots.
sudo systemctl stop mariadb
sudo systemctl start mariadb
sudo systemctl enable mariadb
Run the following commands to validate and test if the MariaDB database server is installed successfully.
sudo mariadb
Once you run the commands above, it will log you onto the MariaDB console and display a message similar to the one below.
Welcome to the MariaDB monitor.  Commands end with ; or g.
Your MariaDB connection id is 32
Server version: 10.11.2-MariaDB-1 Ubuntu 23.04

Copyright (c) 2000, 2018, Oracle, MariaDB Corporation Ab and others.

Type 'help;' or 'h' for help. Type 'c' to clear the current input statement.

MariaDB [(none)]>
The message tells you that the server is installed successfully.
Additional help on installing MariaDB.
Create a LibreNMS database
Upon successfully installing the MariaDB database server, create a blank database on the server specifically for the LibreNMS application.
As part of the setup, we will create a librenmsdb database and a user account called librenmsdbuser.
Finally, we’ll grant the librenmsdbuser full access to the librenmsdb database.
All the database steps above can be done using the commands below:
But first, log on to the MariaDB database server:
sudo mariadb
Then run the commands below to complete the steps:
CREATE DATABASE librenmsdb CHARACTER SET utf8mb4 COLLATE utf8mb4_unicode_ci;
CREATE USER librenmsdbuser@localhost IDENTIFIED BY 'type_your_password_here';
GRANT ALL ON librenmsdb.* TO librenmsdbuser@localhost WITH GRANT OPTION;
FLUSH PRIVILEGES;
exit
Ensure to replace ‘type_your_password_here ‘with your password.
Install PHP and Python modules
PHP and Python modules will be the last components you will need to run LibreNMS. The LibreNMS application is PHP-based and supports the latest versions of PHP.
Then, run the commands below to install the latest PHP version.
sudo apt install php-fpm php-intl php-mysql php-curl php-cli php-zip php-xml php-gd php-common php-mbstring php-xmlrpc php-bcmath php-json php-sqlite3 php-soap php-zip php-ldap php-imap php-redis acl curl fping git graphviz imagemagick mtr-tiny nmap php-gmp php-snmp rrdtool snmp snmpd unzip python3-command-runner python3-pymysql python3-dotenv python3-redis python3-setuptools python3-psutil python3-systemd python3-pip whois traceroute
Additional help on installing PHP
How to install PHP on Ubuntu Linux
Download and install LibreNMS files
Let’s begin downloading and configuring the LibreNMS files on Ubuntu Linux.
First, create a new account called ‘librenms‘ for LibreNMS to run its services.
sudo useradd librenms -d /opt/librenms -M -r -s "$(which bash)"
Next, navigate to the /opt directory and use the git command to download the content for LibreNMS.
cd /opt
sudo git clone https://github.com/librenms/librenms.git
After creating the LibreNMS account and downloading its content, execute the commands below to set the correct permissions for files and directories.
sudo chown -R librenms:librenms /opt/librenms
sudo chmod 771 /opt/librenms
sudo setfacl -d -m g::rwx /opt/librenms/rrd /opt/librenms/logs /opt/librenms/bootstrap/cache/ /opt/librenms/storage/
sudo setfacl -R -m g::rwx /opt/librenms/rrd /opt/librenms/logs /opt/librenms/bootstrap/cache/ /opt/librenms/storage/
Next, switch to the librenms account and run the command below to download the required dependencies for LibreNMS.
sudo su - librenms
./scripts/composer_wrapper.php install --no-dev
exit
Next, open the PHP configuration file and update the system’s timezone. Ensure that PHP has the same timezone as the server.
sudo nano /etc/php/8.3/fpm/php.ini
sudo nano /etc/php/8.3/cli/php.ini
Update the data.timezone line in the file.
[Date]
; Defines the default timezone used by the date functions
; https://php.net/date.timezone
date.timezone = America/Chicago
Remember to set the system timezone as well.
sudo timedatectl set-timezone "America/Chicago"
Once you have completed all the above steps, continue configuring the Nginx web server below to serve the LibreNMS content.
Run the commands below to create an nginx virtual host file for LibreNMS.
sudo nano /etc/nginx/sites-available/librenms.conf
Then, copy and paste the content block below into the Nginx server block.
server {
    listen 80;
    listen [::]:80;
    root /opt/librenms/html;
    index  index.php;
    server_name  librenms.example.com;

    access_log /var/log/nginx/example.com.access.log;
    error_log /var/log/nginx/example.com.error.log;

    location / {
        try_files $uri $uri/ /index.php?$query_string;
    }

    location ~ .php$ {
         include snippets/fastcgi-php.conf;
         fastcgi_pass unix:/var/run/php/php8.3-fpm.sock;
         fastcgi_param SCRIPT_FILENAME $document_root$fastcgi_script_name;
         include fastcgi_params;
    }
}
Save the file.
After that, add the www-data account to the librenms group by running the command below.
sudo usermod -a -G librenms www-data
Then, run the commands below to enable the virtual host and restart the Nginx server.
sudo ln -s /etc/nginx/sites-available/librenms.conf /etc/nginx/sites-enabled/
sudo systemctl restart nginx.service
sudo systemctl restart php8.3-fpm
Setup Let’s Encrypt SSL/TLS for LibreNMS
You may want to install an SSL/TLS certificate to secure your LibreNMS site. Secure your LibreNMS installation with HTTPS from Let’s Encrypt.
Please read the post below for additional resources on installing and creating Let’s Encrypt SSL certificates for Nginx.
How to set up Let’s Encrypt SSL certificate for Nginx on Ubuntu Linux
Once you have restarted the Nginx web server, open your browser and browse to the server hostname or IP address defined in the Nginx server block.
http://librenms.example.com/install
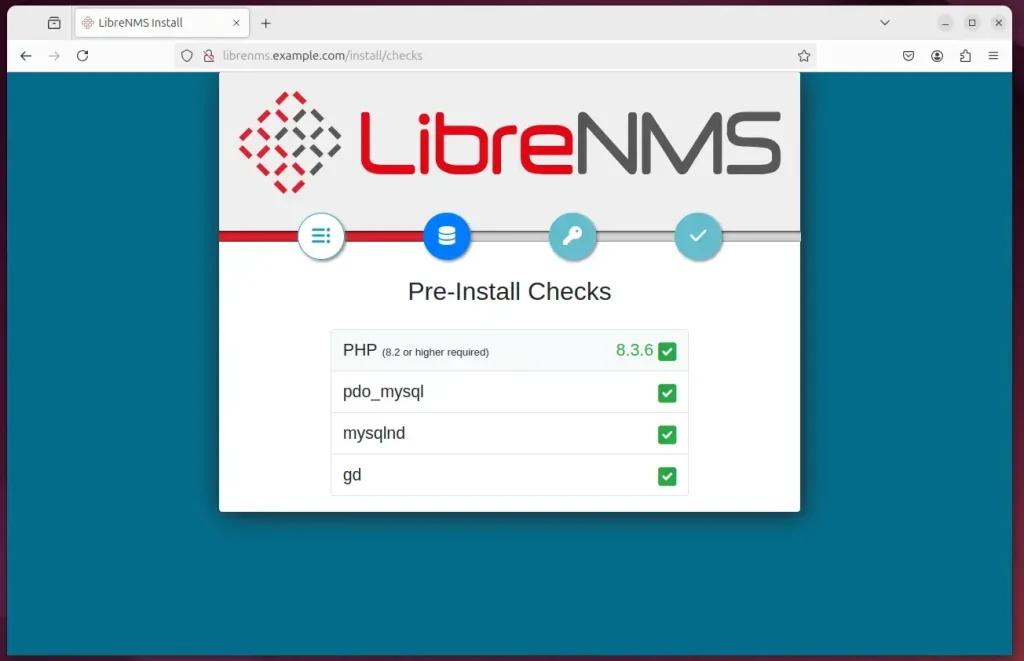
The LibreNMS installation wizard should appear.
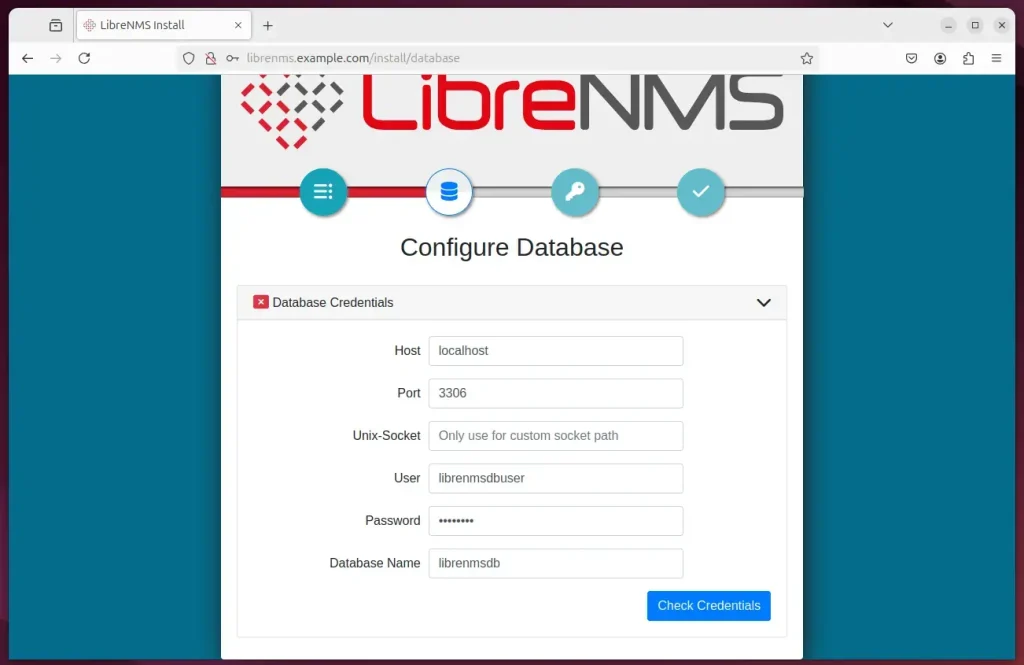
Click on the database icon to continue. Then, type in the database name and password.
Build the database when prompted.
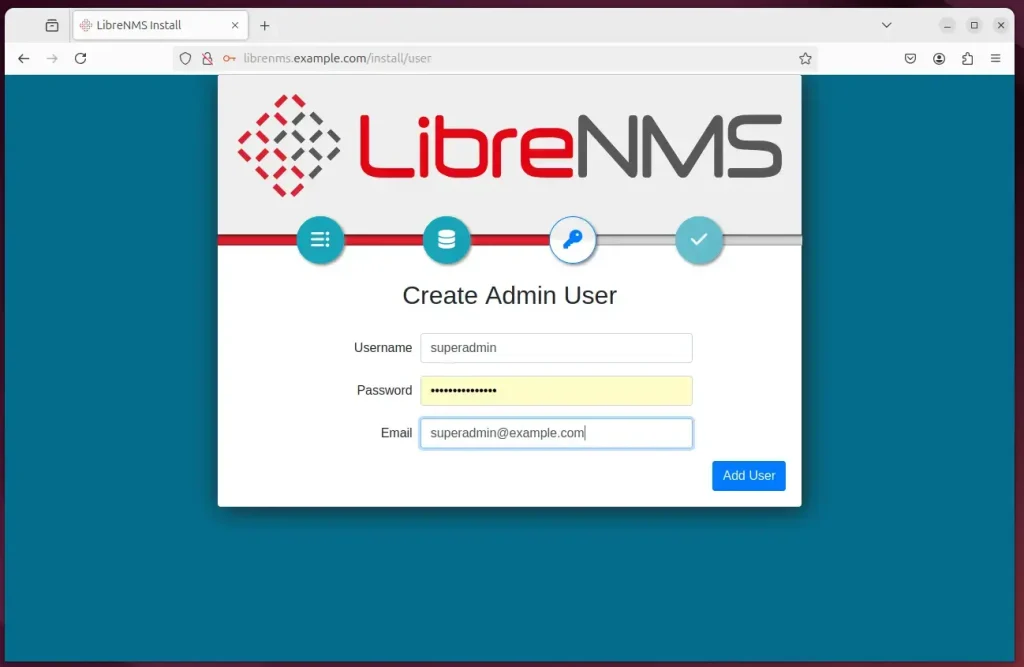
Create an admin account and continue.
Finish the installation.
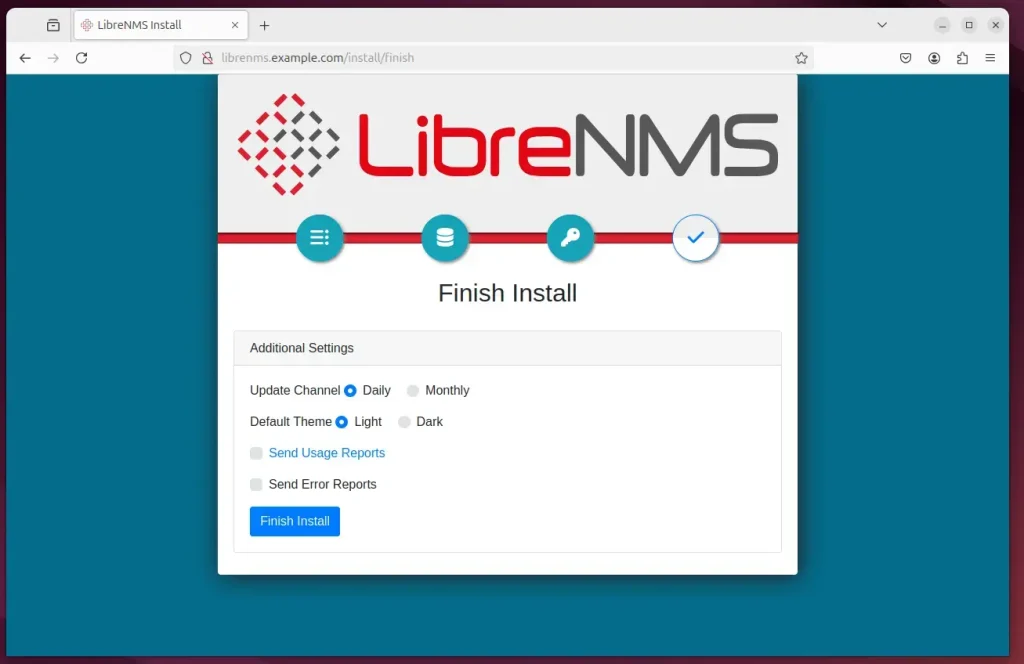
LibreNMS should be ready to use.
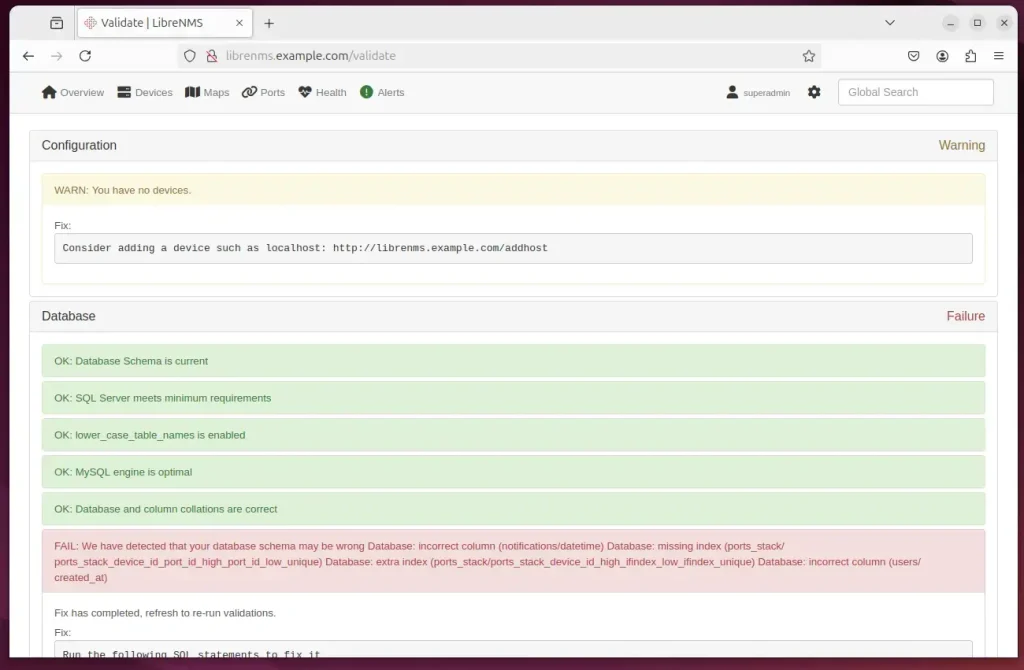
Fix all warnings in the portal.
That should do it!
Conclusion
- Comprehensive Network Monitoring: LibreNMS provides a robust solution for effectively monitoring network devices, servers, and services.
- Seamless Integration: When paired with Nginx, LibreNMS showcases enhanced performance and efficient resource usage.
- Security Enhancements: Implementing SSL/TLS via Let’s Encrypt secures your LibreNMS installation, protecting data transmitted over the network.
- User-Friendly Installation: The step-by-step setup guide allows users to configure LibreNMS on Ubuntu easily, ensuring a hassle-free deployment process.
- Active Community Support: Being an open-source project, LibreNMS benefits from a vibrant community, offering support and continuous improvements.
With these features and enhancements, LibreNMS is an excellent choice for anyone seeking to implement an effective network monitoring solution.



Leave a Reply