
This post outlines the steps to configure WordPress to utilize Redis for object caching, enhancing the speed of database queries and PHP dynamic calls.
To improve the performance of WordPress sites, always enable caching and implement other performance-enhancing configurations.
Using Redis with WordPress can significantly enhance your website’s performance. Redis is an in-memory data structure store that functions as a database, cache, and message broker. By caching database queries and dynamic PHP calls, Redis minimizes the frequency of database access by WordPress, thereby enhancing your website’s speed.
This leads to quicker page load times, enhanced user experience, and better search engine rankings. By following the steps outlined previously, you can easily configure WordPress to utilize Redis and enjoy its benefits.
How to install the latest Redis server on Ubuntu Linux
After installing WordPress, run the commands below to install the latest version of Redis.
The default version of Redis on Ubuntu isn’t the latest. To install the most recent version, add the following PPA and install it from there.
To do that, run the commands below:
sudo apt-get install software-properties-common
Once that package is installed, run the commands below to add the PPA containing the latest Redis version.
sudo add-apt-repository ppa:chris-lea/redis-server
After adding the repository, run the command below to install Redis.
sudo apt-get update
sudo apt-get install redis-server php-redis
Verify that you have version 4 of Redis installed with the following command:
redis-server --version
You should see the Redis version installed on your system.
How to set up the Redis eviction policy
Now that Redis is installed, use the commands below to open its configuration file.
sudo nano /etc/redis/redis.conf
Then, uncomment the lines below to allow memory and an eviction policy. You’ll have to scroll through the lines to find these. Then, set them up as shown below:
maxmemory 256mb
maxmemory-policy allkeys-lfu
Finally, save the file and exit.
Once completed, execute the following commands to restart Redis and PHP. If you are using Apache2, restart both Apache2 and the Redis server.
sudo systemctl restart redis-server
sudo systemctl restart php7.2-fpm
How to configure WordPress with Redis
After the above steps, run the commands below to open the WordPress wp-config.php file in your WordPress root directory.
sudo nano /var/www/html/wordpress/wp-config.php
Then, add these lines below the WordPress unique Keys and Salts section.
define( 'WP_CACHE_KEY_SALT', 'example.com' );
define( 'WP_CACHE', true );
After that, save the file and exit.
How to install Redis Object Cache Plugin
The final step is to install the WordPress Redis Object Cache Plugin. To do that, navigate to the plugin page and install it in WordPress.
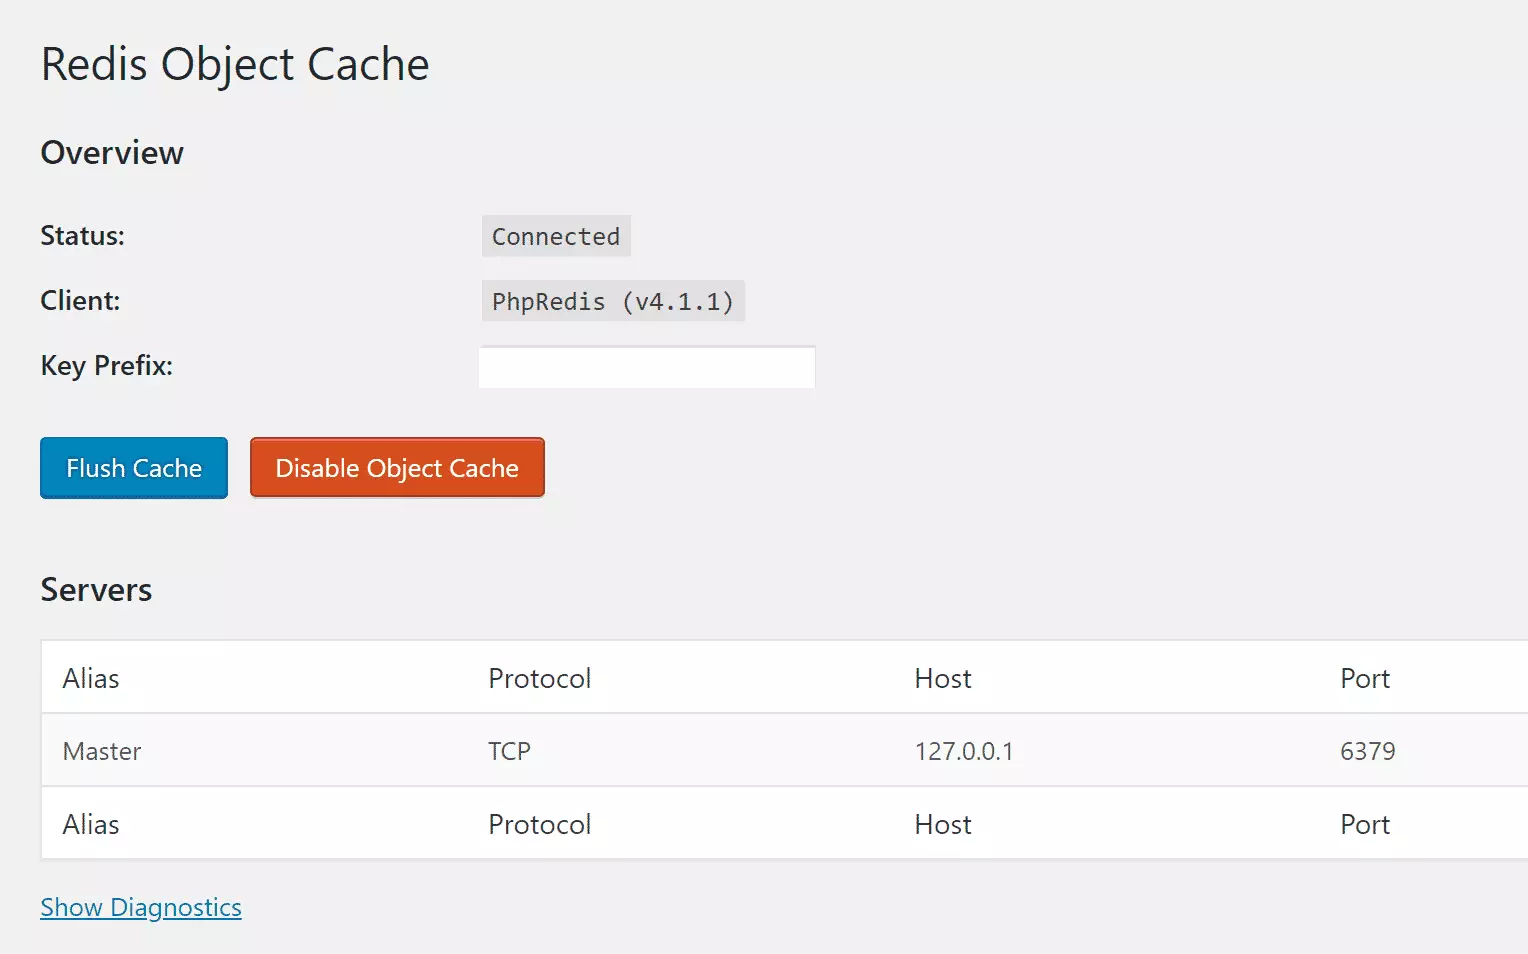
After installation, activate and enable the plugin. Once completed, navigate to the plugin settings page. If everything is configured correctly, you should see something similar to the image below:
That should do it!
Your WordPress setup should now use Redis object caching to help speed up your site.
Conclusion:
- Implementing Redis for object caching optimizes WordPress performance.
- Enhanced speed leads to quicker page load times and improved user experience.
- Reduced database queries lower the load on your server.
- Better caching strategies can positively impact your website’s search engine rankings.
- Following the outlined configuration steps allows for easy integration of Redis with WordPress.
- Regular updates and monitoring of your caching setup will ensure optimal performance over time.
Leave a Reply