

This article explains how to verify if your computer is protected via the Local Security Authority (LSA) on Windows 11.
Local Security Authority Protection (LSA) is a security feature in Windows designed to protect the Local Security Authority (LSA) process from attacks and tampering by running it in a protected mode.
Running LSA in a protected mode makes it less vulnerable to malicious attacks that could compromise the system’s security.
Core isolation is another feature in Windows that protects your device’s core processes from malicious software by isolating them in memory, similar to LSA.
If you want to find out if LSA is enabled and protecting your device, you can use the Event Viewer to check if LSA started in protected mode when Windows started.
The steps below show you how to do that.
Check if LSA protection in Windows
As mentioned, you can check if your device is protected by LSA on Windows using the steps below.
Here’s how:
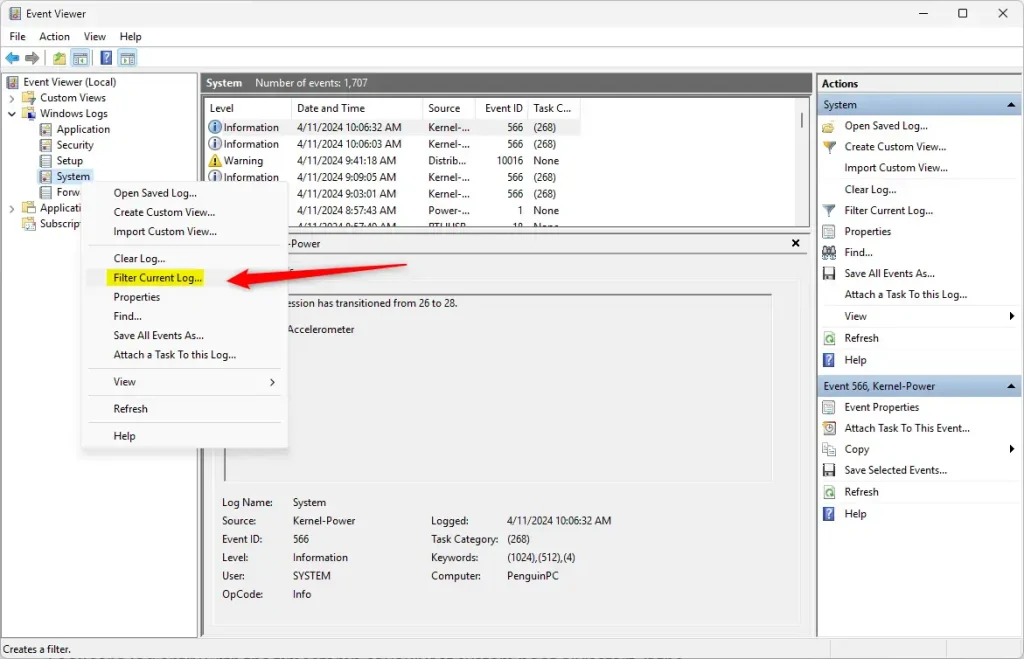
First, open the Windows Event Viewer (eventvwr.msc). In the left pane, expand Windows Logs and click on System.

Next, right-click on System in the left pane and select “Filter Current Log.”
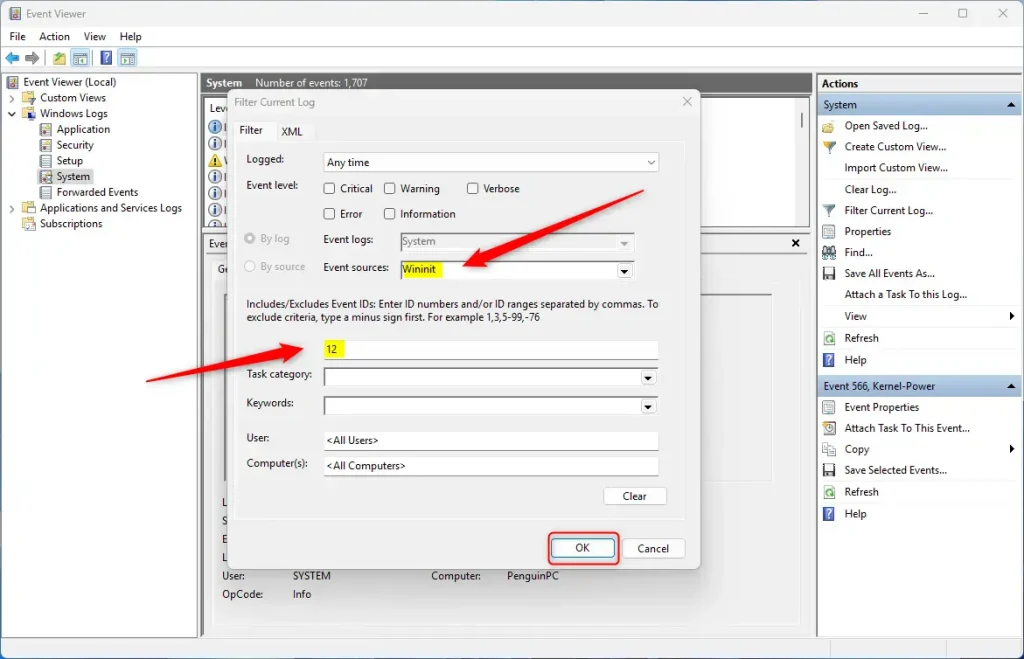
Then, type “12” in the filter dialog box, select “Wininit” from the Event sources drop-down menu, and click OK.
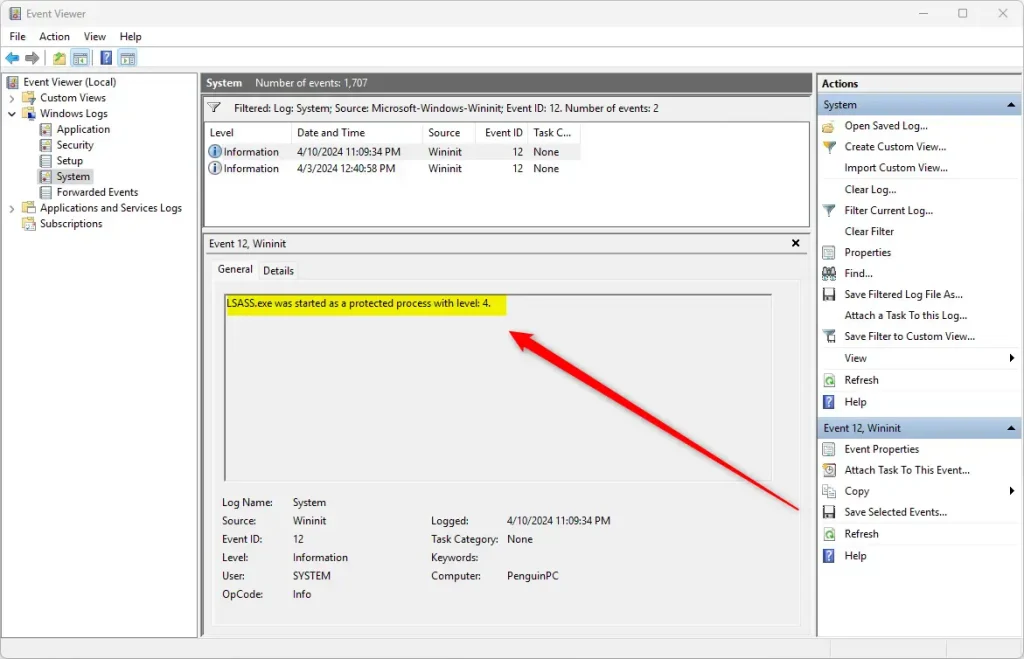
If the log shows “LSASS.exe was started as a protected process with level 4,” it means LSA protection is active.
That should do it!
Conclusion:
- Verifying the protection status of the Local Security Authority (LSA) is crucial for ensuring the security of a Windows device.
- Using the Event Viewer and specific filtering techniques, users can confirm if LSA protection is active, providing peace of mind regarding the security of their system.
- Regularly checking the LSA protection status adds a layer of security to safeguard against potential malicious attacks targeting the LSA process.

Leave a Reply Cancel reply