
This post describes steps to enable or disable the Night light schedule in Windows 11.
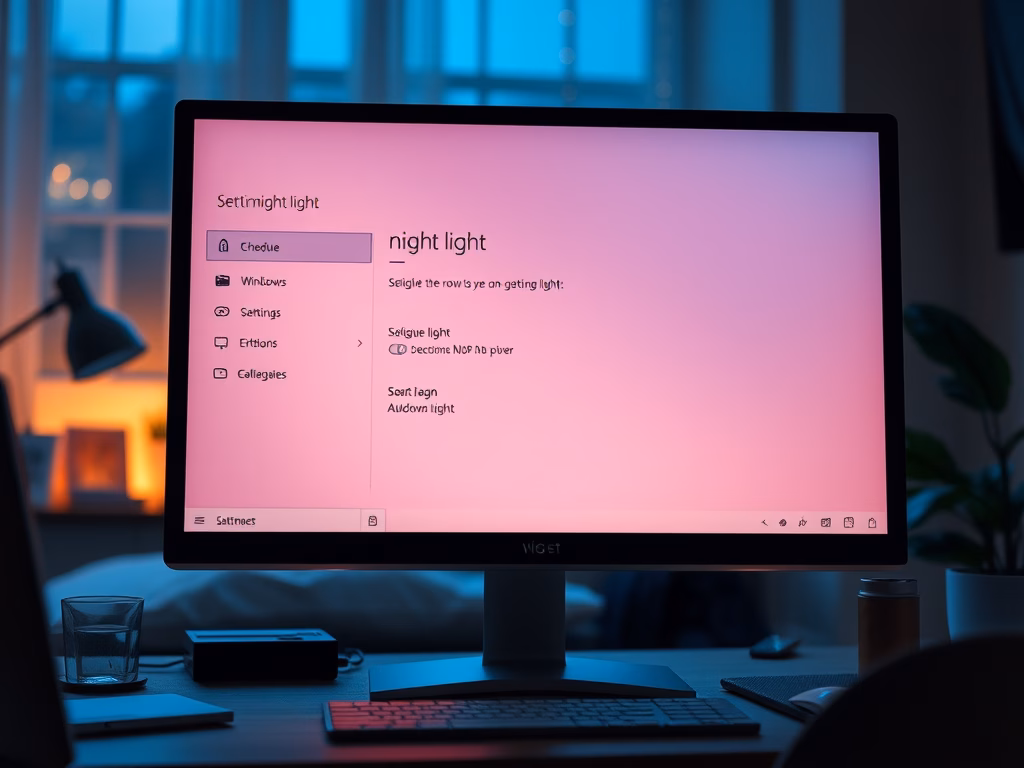
Windows 11 comes with a feature called Night light that may help you resolve some of the eye issues you may be experiencing at Night in front of your screen. Night Light changes the colors displayed on your screen into warmer versions that are easier on your eyes.
Our previous post on Night lights showed you how to turn them On or Off at Night light manually. You can not only turn On or Off the Night light, but you can also schedule it to turn on or off automatically.
When you turn on Night light schedules, you can select Sunset to sunrise or set hours and enter custom times for the night light to turn on and off automatically.
Below is how to turn on or off to schedule the Night light.
How to schedule Night light to turn on or off in Windows 11 automatically
As mentioned above, Night light in Windows can resolve some eye issues by changing the colors displayed on your screen into warmer versions that are easier on your eyes.
You can schedule the Night light in Windows to turn on or off automatically, and the steps below show you how to do that.
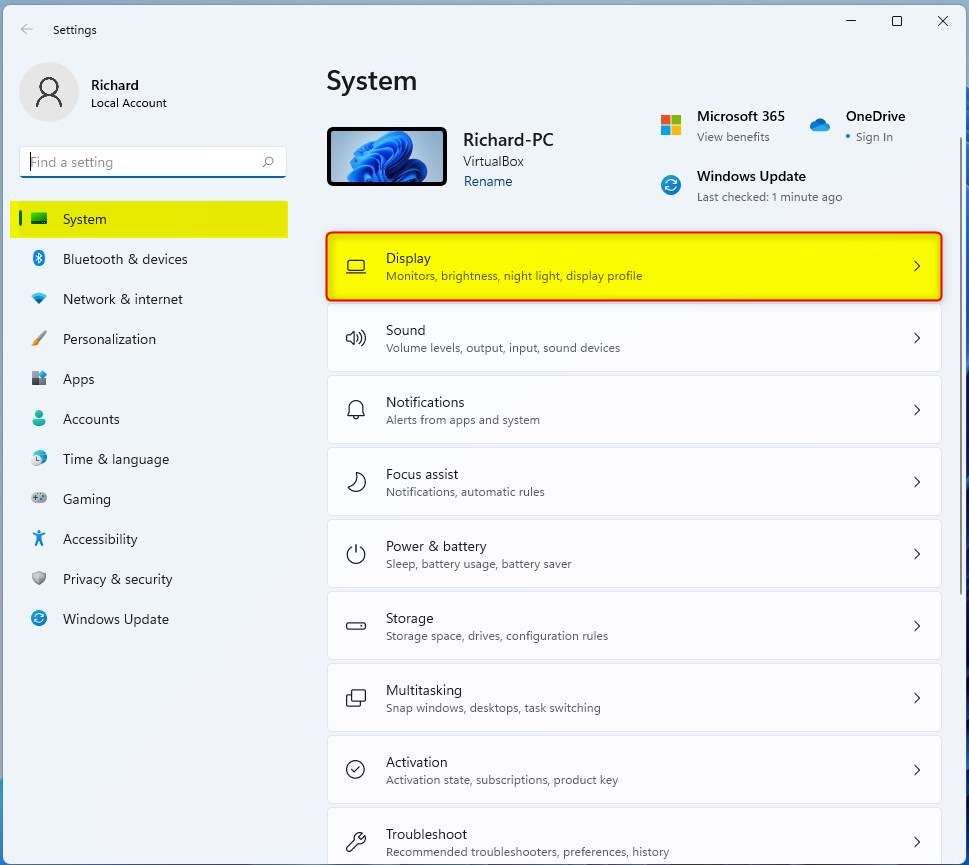
Windows 11 has a centralized location for the majority of its settings. As a result, everything can be done, from system configurations to creating new users and updating Windows from its System Settings pane.
To get to System Settings, you can use the Windows key + I shortcut or click on Start ==> Settings, as shown in the image below:

Alternatively, you can use the search box on the taskbar and search for Settings. Then select to open it.
Windows Settings pane should look similar to the image below. On the Windows Settings app, click the System on the left, then select the Display tile on the right pane, as highlighted in the image below.
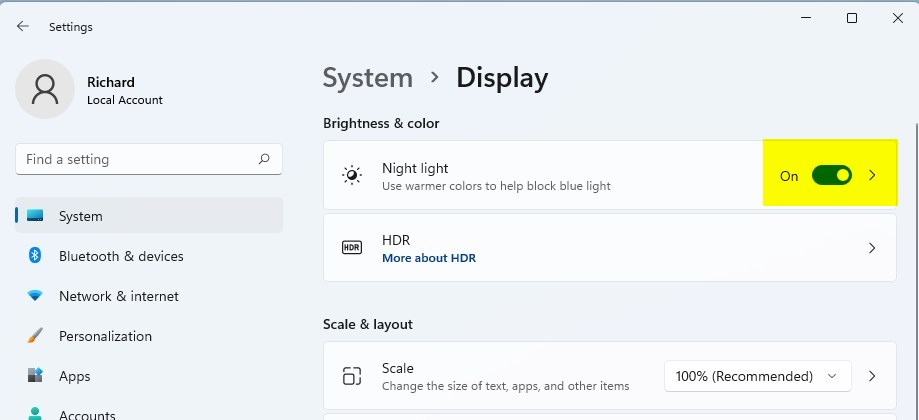
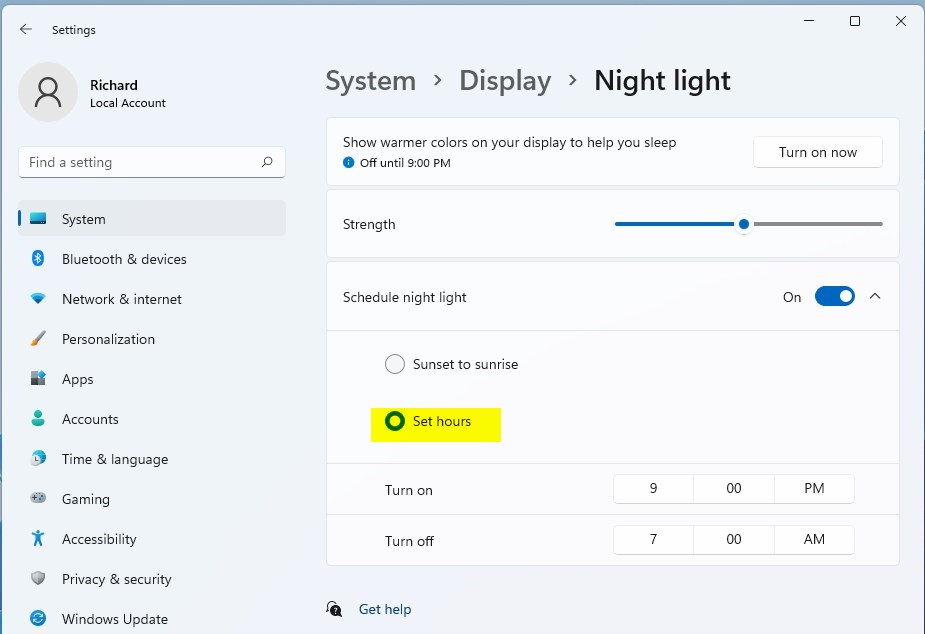
On the System > Display settings pane, under Brightness & color, select the Night light tile to expand.
Under the Night light, toggle the Schedule night light tile switch button to turn on the schedule.
Under Schedule night light, you can choose Sunset to sunrise or Set hours for when you want the night light to turn on and off automatically.
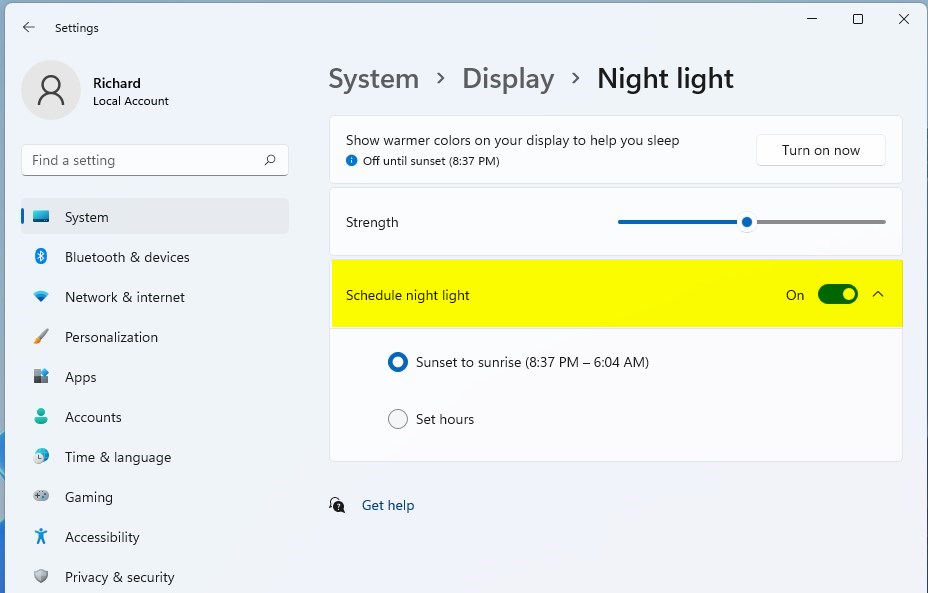
Sunset to sunrise requires Location services to be turned on.
If you set hours, you can choose when the Night light comes on and goes off.
That should do it! You can now close the Windows settings app.
Conclusion:
- Enabling the Night light schedule in Windows 11 can help reduce eye strain during nighttime computer use.
- Following the simple steps outlined in this guide, users can schedule the Night light to turn on and off automatically, thus promoting healthier screen viewing habits.
- Whether opting for the “Sunset to sunrise” setting or customizing specific hours, Windows 11 provides convenient options for managing the Night light schedule.
Leave a Reply Cancel reply