
This simple guide will help you turn Public folder sharing on or off on your Windows 11 computer.
What Are Public Folders?
Public folders are special folders on your PC that make it easy to share files with other people using the same computer or other computers on your network.
These folders are empty until you or someone else adds files to them. They are sorted into different types like these:
C:\Users\Public\Public DocumentsC:\Users\Public\Public DownloadsC:\Users\Public\Public MusicC:\Users\Public\Public PicturesC:Users\Public\Public Videos
What Does Turning On Public Folder Sharing Do?
When you turn on Public folder sharing, anyone on your computer and anyone on the same network can open and see the files in these folders, just like they are on their own PC.
If you allow them to change files, then any edits or deletes they make will happen to the files on your computer.
If you turn off Public folder sharing, only people who log in to your computer can access these folders.
Note: You need to be signed in as an administrator to change these settings.
How to Turn On or Off Public Folder Sharing in Settings (Windows 11 22H2 or later)
- Press Windows key + I to open Settings.
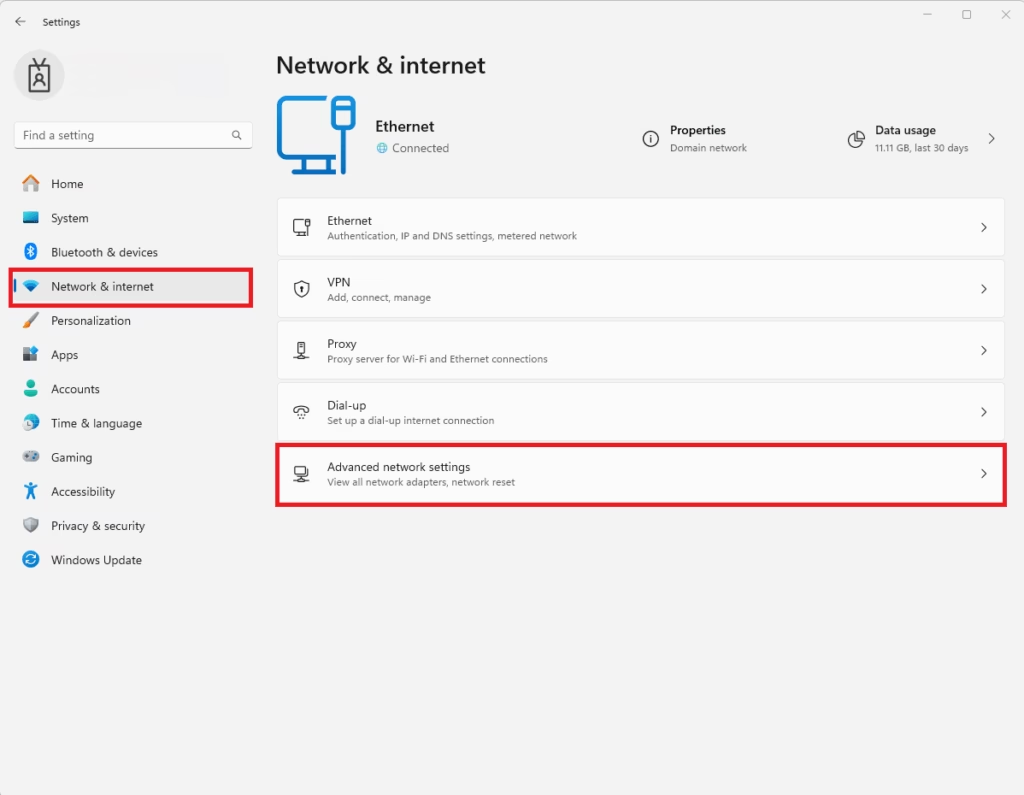
- Click Network & internet on the left menu.
- On the right side, click Advanced network settings.
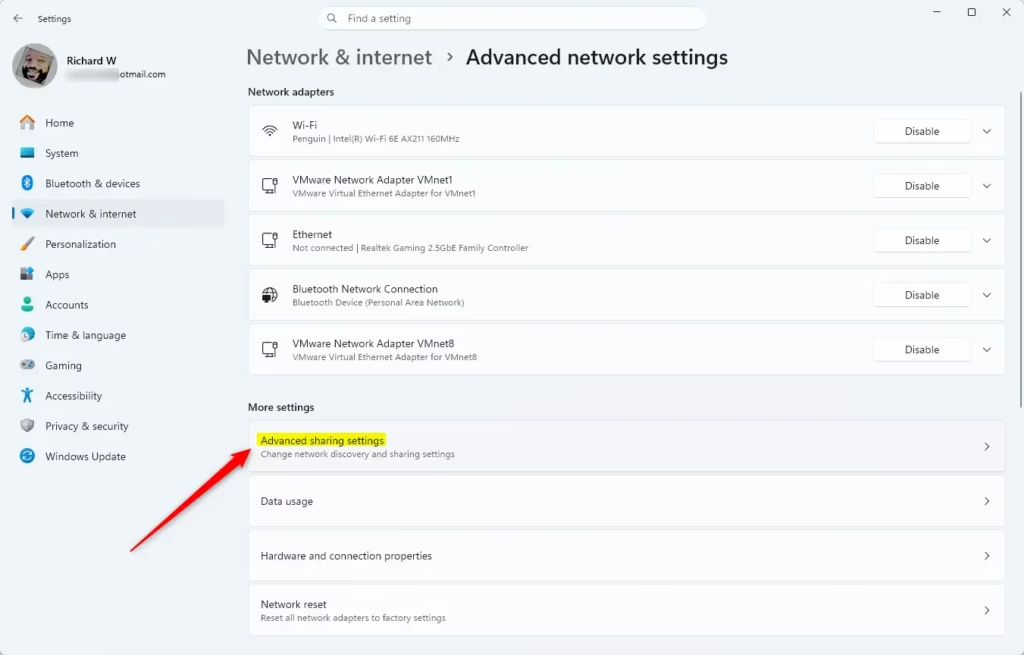
- Then click Advanced sharing settings.
- Find and expand the section called All networks.
- Under Public folder sharing, choose to turn it On or Off (Off is the default).
- Close the Settings window when done.
Here are some screenshots to help you:

You can also open Advanced sharing settings directly here.
How to Turn On or Off Public Folder Sharing in Control Panel (Older Windows 11 Builds)
Note: This option may not be available in newer Windows 11 builds starting from build 22509.1011.
- Open the Control Panel (choose “Large icons” or “Small icons” view).
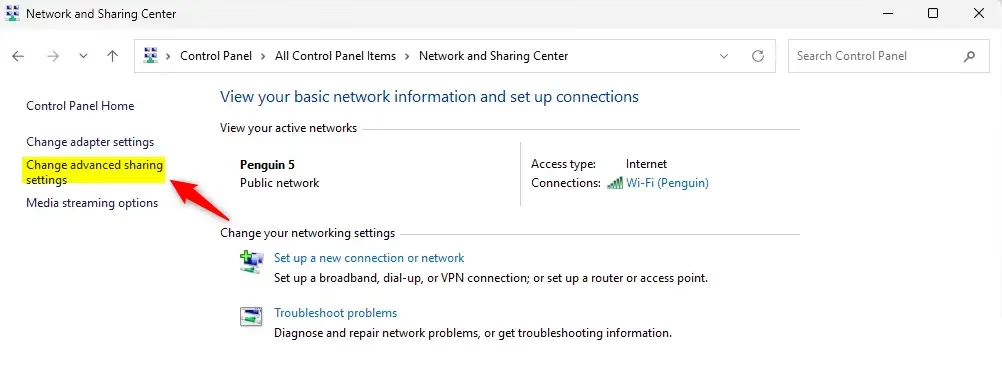
- Click on Network and Sharing Center.
- On the left side, click Change advanced sharing settings.
- Expand the All networks section.
- Under Public folder sharing, choose Turn on sharing… or Turn off Public folder sharing (default).
- Click Save changes.
- Close the Control Panel when finished.
Summary
- Public folders make sharing files easy between users on the same PC and network.
- Public folder sharing is off by default to keep your files private and safe.
- You must be an administrator to change sharing settings.
- In newer Windows 11 versions, use Settings to manage sharing; older versions may use Control Panel.
- Be careful when turning sharing on. People with permission can change or delete your files.
Now you know how to control Public folder sharing on your Windows 11 computer. Use this to share files safely and easily!


Leave a Reply Cancel reply