
This post describes steps to turn On or Off a feature to lower screen brightness when using a battery saver in Windows 11.
When you enable a battery saver, Windows will turn off some features, dim your screen brightness, reduce background activity, and limit most system notifications.
By default, the battery saver turns on automatically when your battery reaches 20% power or less and automatically turns off when the computer is connected to a power source.
While using a battery saver, the Display brightness is automatically reduced to 30% by default. All these measures prolong your Windows device’s battery life while in battery saver mode.
Lower screen brightness when using a battery saver is another feature that you can turn on or off if using battery saver. However, for the best HDR video experience, you should turn off “Lower screen brightness when using battery saver,” even in battery saver mode.
How to enable or disable lower screen brightness when using battery saver in Windows 11
As mentioned, Windows can automatically reduce features to prolong the device’s battery life when running in battery-saving mode.
If you still want to view high-quality video while using a battery saver, you can turn off “Lower screen brightness when using battery saver.”
Below is how to do that.
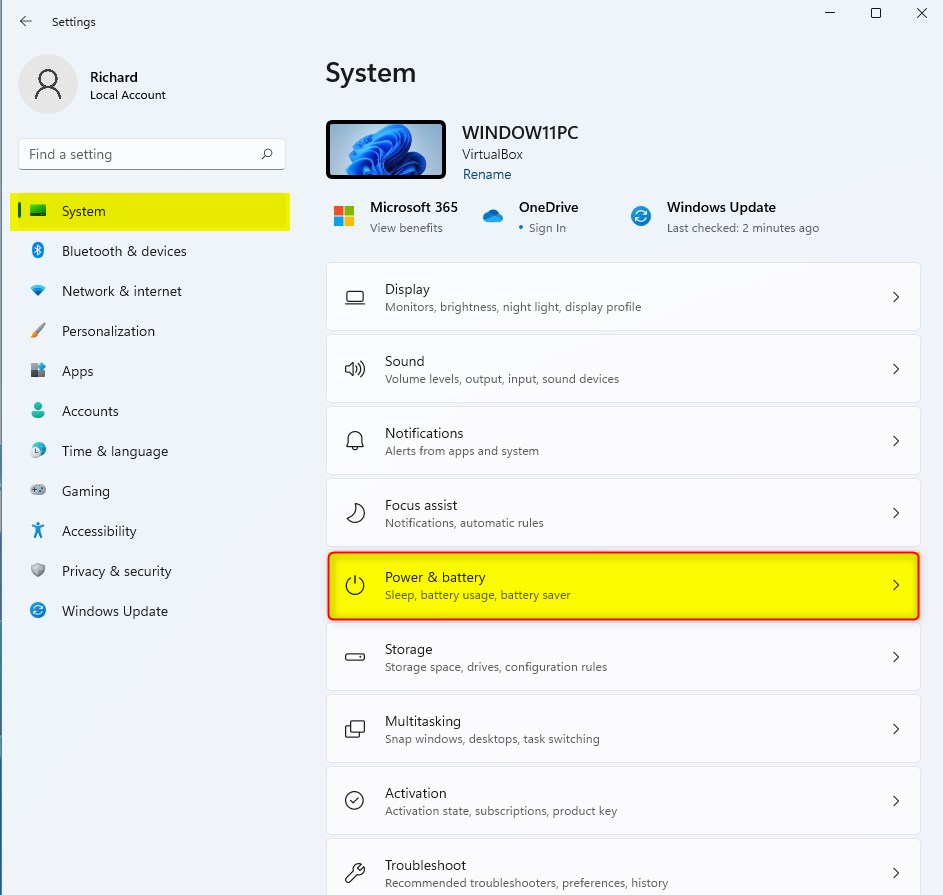
Windows 11 has a centralized location for the majority of its settings. As a result, everything can be done, from system configurations to creating new users and updating Windows from its System Settings pane.
To get to System Settings, you can use the Windows key + I shortcut or click on Start ==> Settings, as shown in the image below:

Alternatively, you can use the search box on the taskbar and search for Settings. Then select to open it.
Windows Settings pane should look similar to the image below. On the Windows Settings app, click the System on the left, then select the Power & battery tile on the right pane, as highlighted in the image below.
Click on the Battery saver tile to expand on the System > Power & battery settings pane. Under the Battery saver tile, toggle the switch button for “Lower screen brightness when using battery saver” to On or Off to enable or disable this feature.
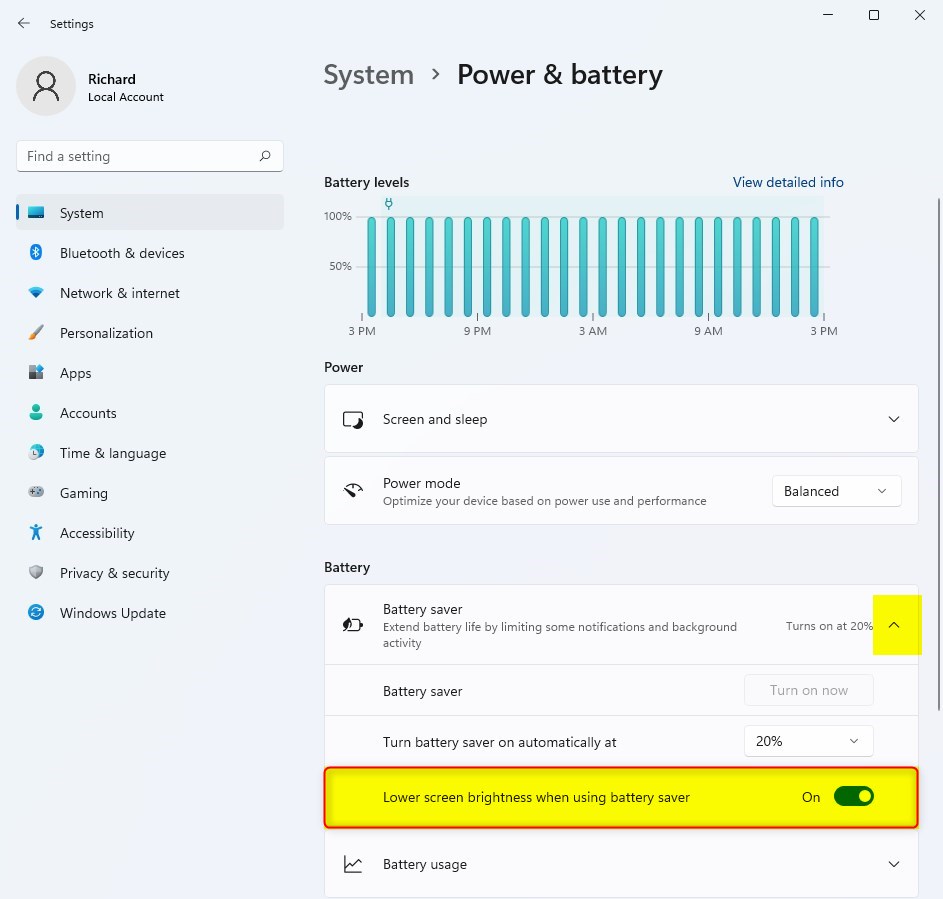
If the switch is On, Windows will automatically dim the screen brightness in battery saver mode. If Off, the screen brightness will remain the save.
That should do it! You can now close the Windows settings app.
Conclusion:
- Windows 11 automatically adjusts settings to preserve battery life when the battery saver is activated, including reducing screen brightness and background activity.
- You can manually enable or disable the “Lower screen brightness when using battery saver” feature to customize your viewing experience while in battery saver mode.
- For the optimal HDR video experience, it’s recommended to disable the “Lower screen brightness when using battery saver” feature, even when in battery saver mode.


Leave a Reply Cancel reply