
This article explains how to turn on or off “Aero Shake” or “Title bar window shake” when using Windows 11.
First introduced in Windows 7, Aero Shake minimizes all open app windows on your desktop except the one you’re holding with your mouse.
It allows you to de-clutter the desktop by grabbing and shaking a window to minimize all other apps, and simply shaking again restores the minimized windows.
Aero Shake is easy to use if you haven’t used it before. Grabbing the app window, you want to keep open by selecting its title bar would be best. You can grab it by clicking and holding down the left mouse button.
While holding the app windows, shake the mouse, and all other windows will minimize in the background. Hold the same window and shake again to restore all the minimized windows in the background.
The steps below show you how to turn it on or off.
How to turn Aero Shake on or off on Windows 11
As mentioned above, Aero Shake is disabled by default. To enable it, follow the steps below.
Windows 11 has a centralized location for the majority of its settings app. From system configurations to creating new users and updating Windows, all can be done from the System Settings pane.
To get to System Settings, you can use the Windows key + I shortcut or click on Start ==> Settings, as shown in the image below:

Alternatively, you can use the search box on the taskbar to search for Settings. Then select to open it.
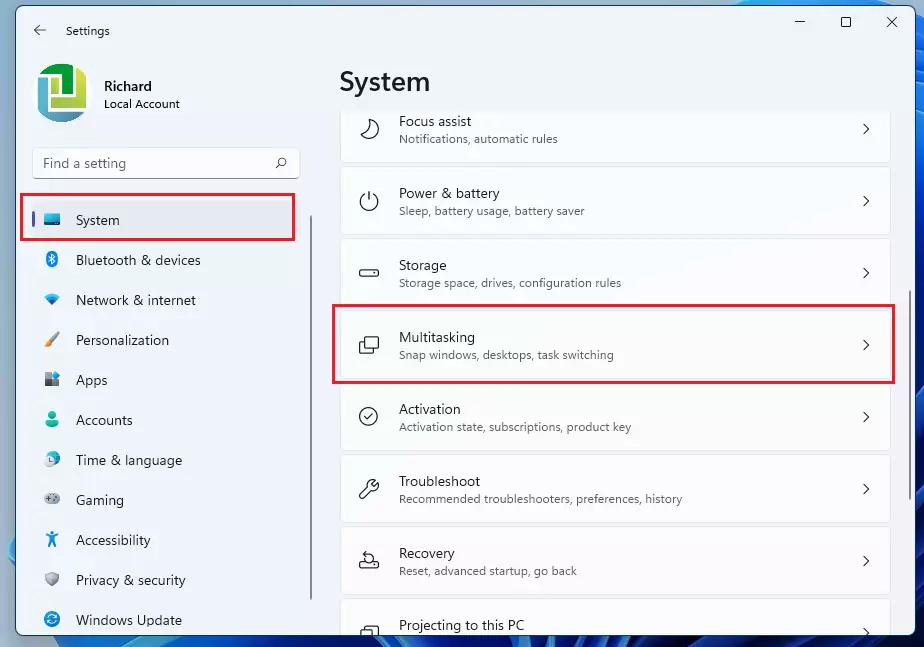
In Windows Settings, click System, and select Multitasking on the right pane of your screen, as shown in the image below.
On the Multitasking settings pane, toggle the “Title bar windows shake” button to the On or Off position to enable or disable Aero Shake.
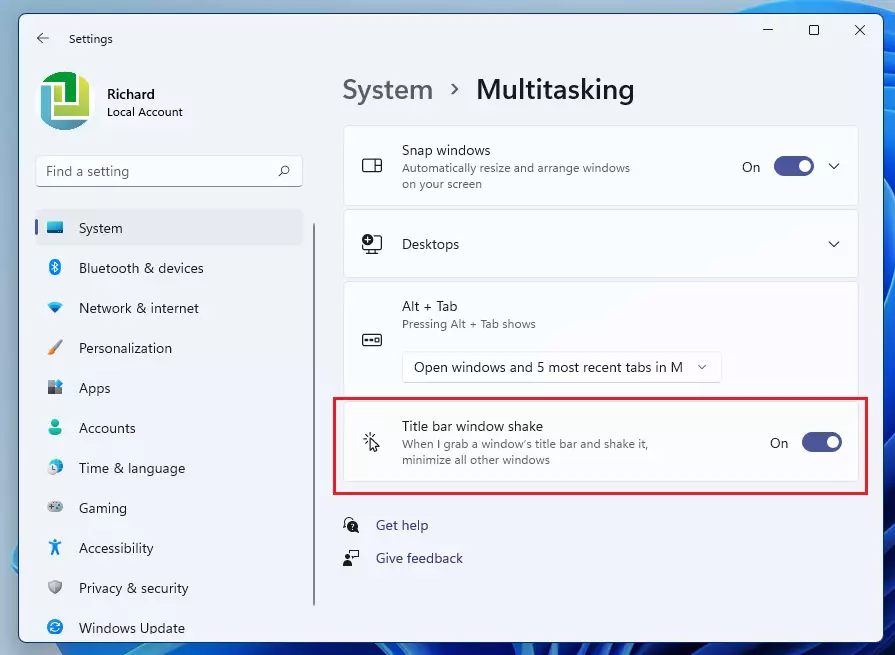
Exit the settings pane, and you’re done.
That’s it!
Conclusion:
- Aero Shake is a handy feature for quickly managing your desktop’s clutter.
- Simply shaking it allows you to minimize all windows except the one you want to focus on.
- Enabling or disabling Aero Shake in Windows 11 is straightforward through the System Settings.
- Follow the outlined steps to customize your multitasking experience according to your preferences.
- Enjoy a cleaner and more organized workspace with this useful Windows feature.

Leave a Reply