

Do you struggle to find your mouse pointer on the screen? This is especially common if you use a large monitor or multiple screens. The good news is simple: you can add a shadow beneath your pointer. This shadow makes the mouse stand out so you can spot it right away.
Windows 11 comes with a small white mouse pointer by default. For some people, this is hard to see. Adding a pointer shadow is an easy fix.
Want to make your mouse pointer bigger or change its color? Check out these easy guides:
Change Mouse Pointer Size in Windows 11
Change Mouse Pointer Color in Windows 11
Steps to Turn On Mouse Pointer Shadow
Follow these simple steps to add a shadow under your mouse pointer:
- Open Windows Settings:
- Press Windows key + I on your keyboard.
- Or click the Start button, then click Settings.

- Go to Mouse Settings:
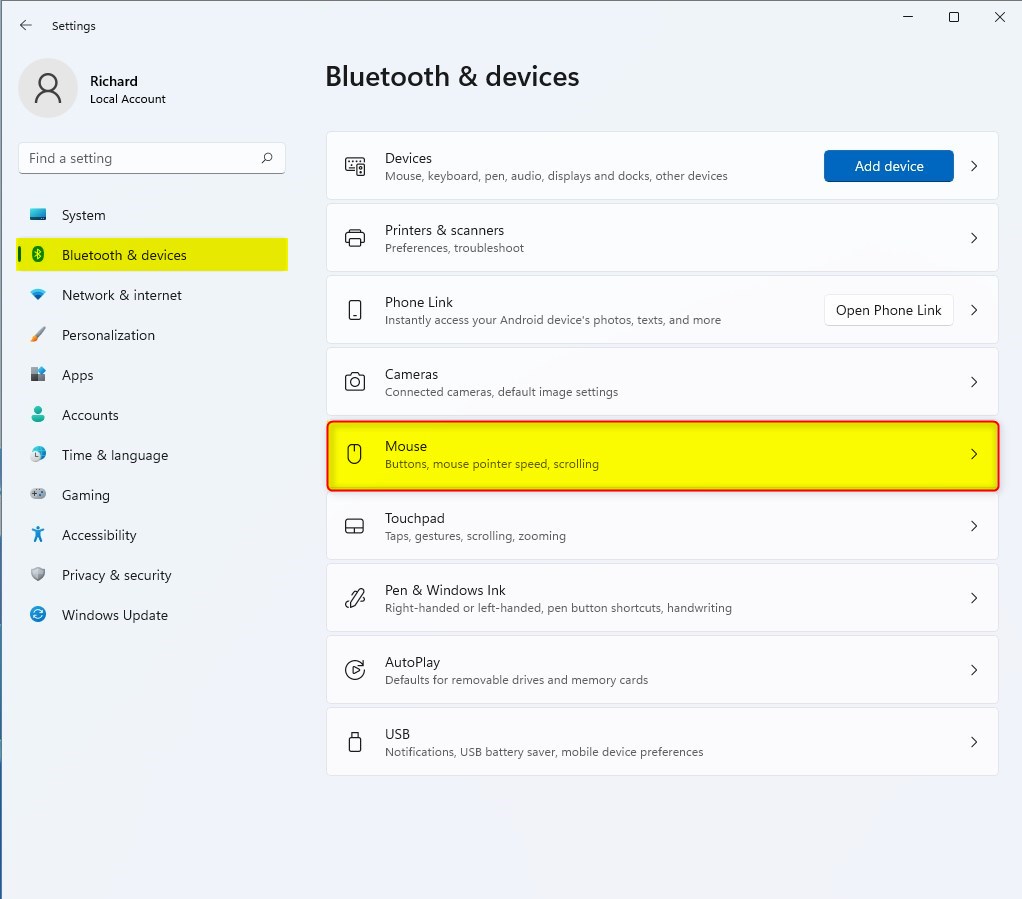
- In the Settings window, click Bluetooth & devices on the left side.
- Then click Mouse on the right.
- Open Additional Mouse Settings:
- Scroll down and click Additional mouse settings under Related settings.

- Enable Pointer Shadow:
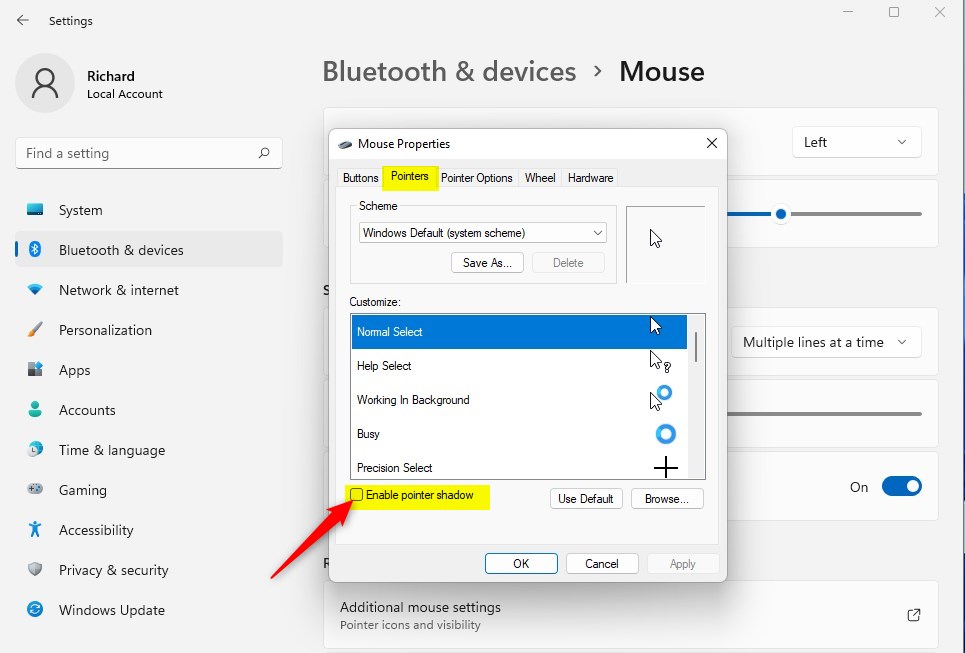
- In the Mouse Properties window, click the Pointers tab.
- Find the box labeled Enable pointer shadow and check it to turn on the shadow.
- Click OK to save.
Alternative Way Using Run Command
If you prefer, you can also use the Run command to open the settings:
- Click Start, then search for and open Run.
- Type
SystemPropertiesPerformance.exeand press Enter.
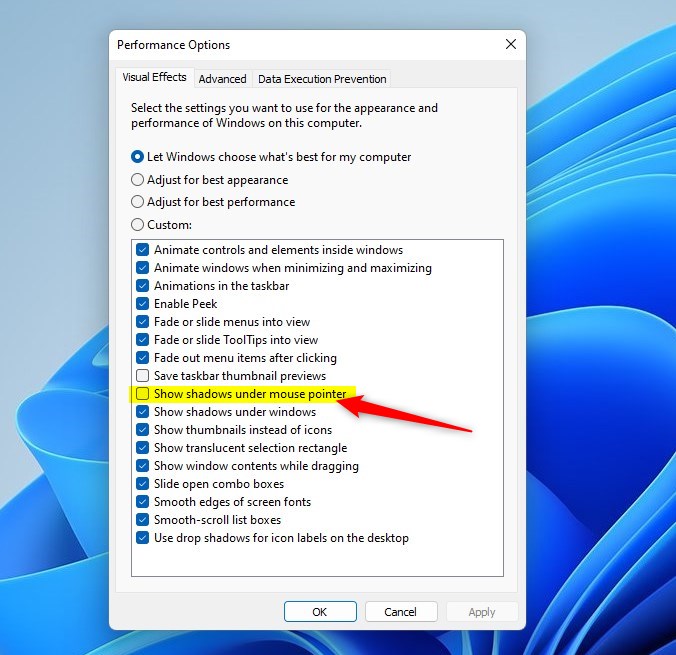
- In the Performance Options window, under the Visual Effects tab, find and check the box for Show shadows under mouse pointer. Click OK to apply.
And that’s it! Your mouse pointer will now have a shadow, making it easier to see.
Why Use Pointer Shadow?
- It helps make the mouse pointer easier to spot, especially on large or multiple screens.
- Good for people who have trouble seeing small or plain pointers.
- Easy to turn on or off anytime through Settings.
Try it out and enjoy a clearer view of your mouse!
Summary
Adding a mouse pointer shadow in Windows 11 is a quick way to make your cursor easier to find on the screen. You can enable it through Windows Settings by going to Bluetooth & devices > Mouse > Additional mouse settings > Pointers tab, then checking Enable pointer shadow. Alternatively, you can use the Run command to open SystemPropertiesPerformance.exe and enable the shadow from the Visual Effects tab. This simple feature is especially helpful for people with large monitors or those who have difficulty spotting a plain pointer.


Leave a Reply Cancel reply