
What is BitLocker?
BitLocker is a security feature is a tool built into Windows 11. It locks your main drive (usually the C: drive) with strong encryption. Think of it like putting a lock on a filing cabinet. If your computer is lost or stolen, others can’t easily see your personal files.
Why use BitLocker? It protects your files from being stolen or viewed by others if your computer goes missing.
What happens when you turn it on? Any new files you save on the locked drive are automatically protected. If you copy those files to another device without BitLocker, they will unlock so you can use them normally.
BitLocker also checks your computer every time it starts up. If it notices something strange, like changes to your computer’s basic software, it will lock the drive. You’ll need to enter a special recovery key to unlock it.
You can choose how to unlock your drive when you start your computer:
- Enter a PIN code
- Insert a USB flash drive
- Use a special chip inside your computer called tpm-version-on-windows-11-easily/” class=”sal-link” rel=”noopener” target=”_blank” data-sal-id=”3478″>TPM (Trusted Platform Module)
Note: BitLocker turns on automatically on some tablets or 2-in-1 devices that support Modern Standby.
Before You Start
- You must be signed in as an administrator (someone who can make changes to the computer)
- BitLocker is only available in Windows 11 Pro, Enterprise, and Education editions
Step-by-Step Guide to Turn On BitLocker
Step 1: Open File Explorer
Press Win + E on your keyboard to open File Explorer. Click on This PC.
Step 2: Find Your Operating System Drive
This is usually the C: drive. Right-click it and select Turn on BitLocker.

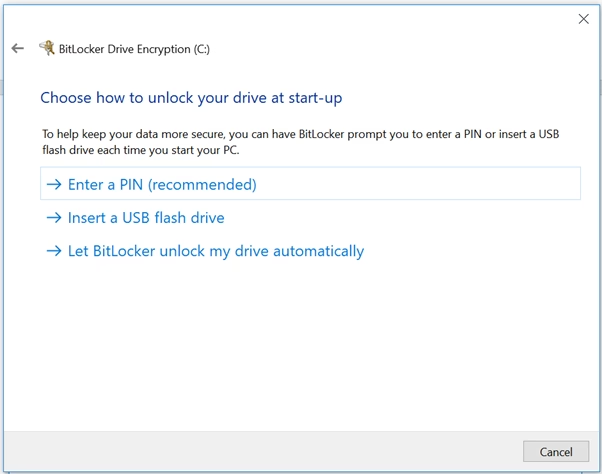
Step 3: Choose How to Unlock Your Drive at Startup
Pick one of these methods:
- Enter a PIN: You’ll type a 6 to 20 digit number each time your PC starts
- Insert a USB flash drive: BitLocker will unlock your drive automatically when this USB is plugged in
- Automatically with TPM: BitLocker will unlock your drive without any action needed from you
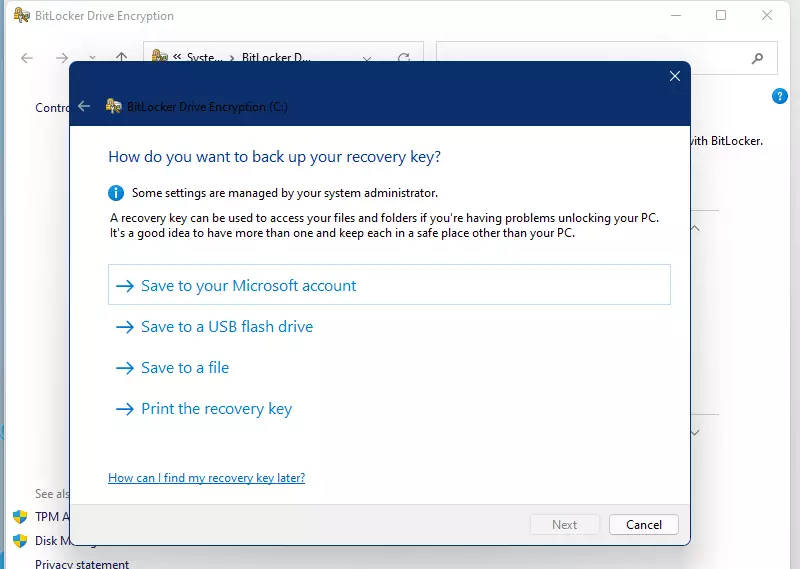
Step 4: Back Up Your Recovery Key
This is very important! If you ever forget your PIN or lose your USB key, you’ll need this special recovery key to unlock your drive.
You can save your recovery key in one or more of these ways:
- Microsoft Account: Save it online by signing in with your Microsoft account. You can find your key later at https://account.microsoft.com/devices/recoverykey
- Save to a file: Save the key as a text file on another USB or drive
- Print it: Print the recovery key and keep it somewhere safe
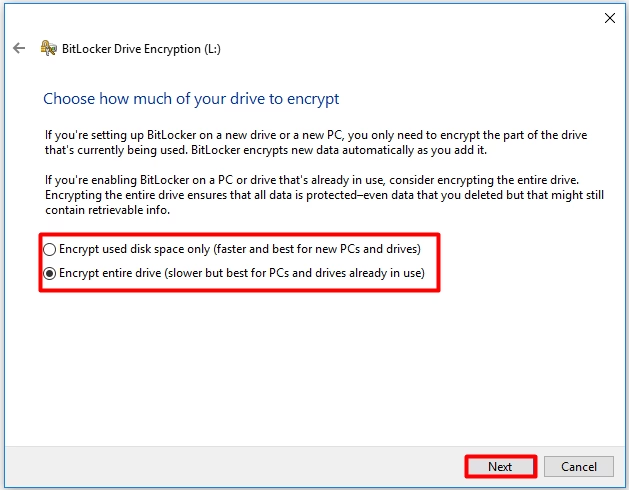
Step 5: Choose How Much of Your Drive to Encrypt
Select one of these:
- Encrypt used disk space only: Faster option. Good if your PC is new or mostly empty
- Encrypt entire drive: Recommended for the best protection
Step 6: Choose Encryption Mode
If available, choose one of these:
- New encryption mode: Best for Windows 10 or 11 devices
- Compatible mode: Use this if you want to use the drive on older Windows versions

Step 7: Run BitLocker System Check
Make sure the box for Run BitLocker system check is checked. This is recommended. Click Continue and then Restart now when prompted.
⚠️ Flag: Admin privileges required
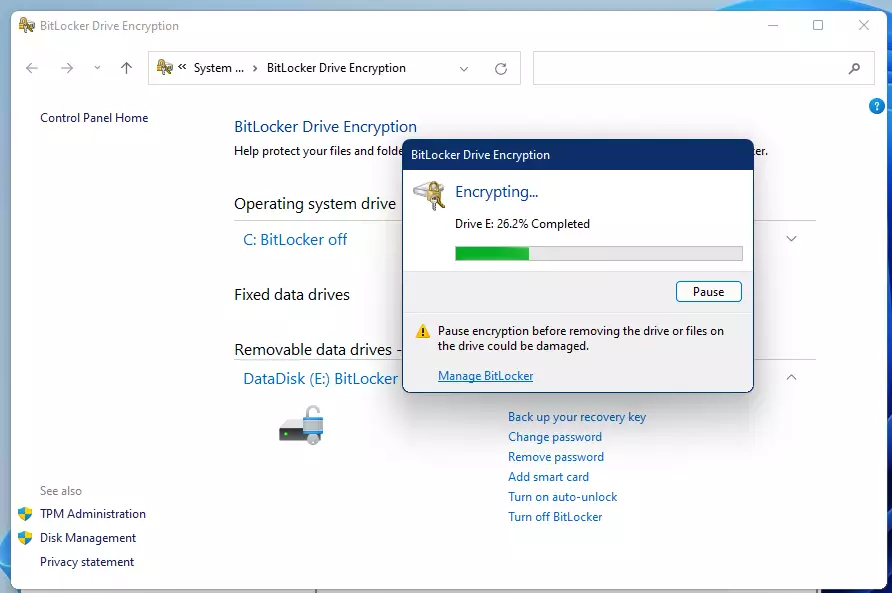
Step 8: Encryption Starts
After restarting, BitLocker will begin encrypting your drive. This might take some time depending on how large your drive is and how much data you have.
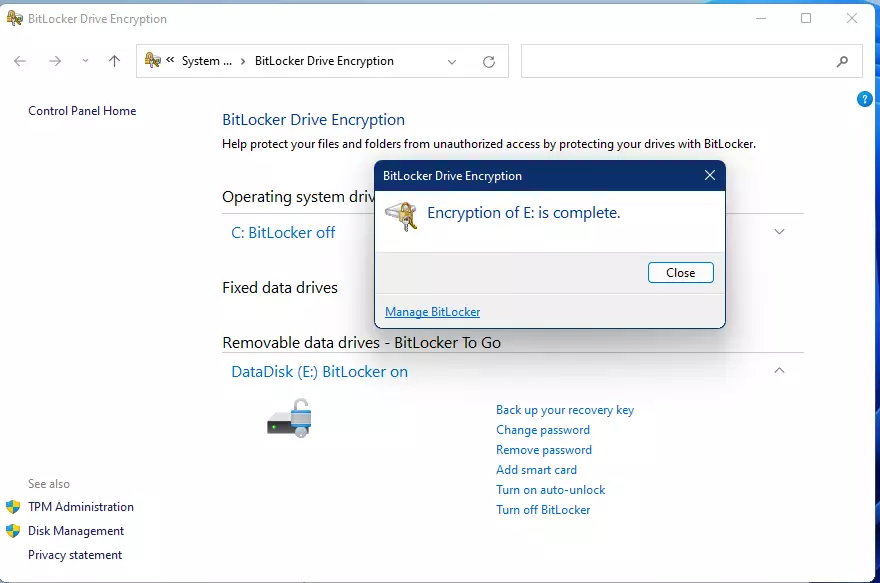
Step 9: Finish
When encryption is done, click Close.
Summary
- BitLocker protects your files by locking your main drive with encryption
- You need to be an administrator and use Windows 11 Pro, Enterprise, or Education editions
- You can unlock your drive with a PIN, USB key, or automatically with TPM
- Always back up your recovery key safely to avoid losing access to your drive
- Follow these simple steps to turn on BitLocker and keep your data safe
For more information, visit the official Microsoft BitLocker page: https://docs.microsoft.com/en-us/windows/security/information-protection/bitlocker/bitlocker-overview


Leave a Reply Cancel reply