
This article explains how to turn “Include system audio by default when a screen recording starts” on or off with the Snipping Tool on Windows 11.
The Snipping Tool is a built-in screenshot tool in Windows that allows you to capture screenshots of any part of your screen, including full-screen captures, individual windows, or user-defined capture areas.
Starting with Snipping Tool version 11.2307.44.0, Microsoft added support for optionally recording your PC audio and voice overs using a microphone. The new app settings let you configure the default audio recording settings for new screen recordings.
You may want to turn “Include system audio by default when a screen recording starts” on or off with the Snipping Tool on Windows 11. For instance, if you’re making a tutorial video and want to include audio from your computer’s speakers, you must turn this feature on.
Alternatively, if you’re recording a video that doesn’t require audio, you may want to turn this feature off to save disk space.
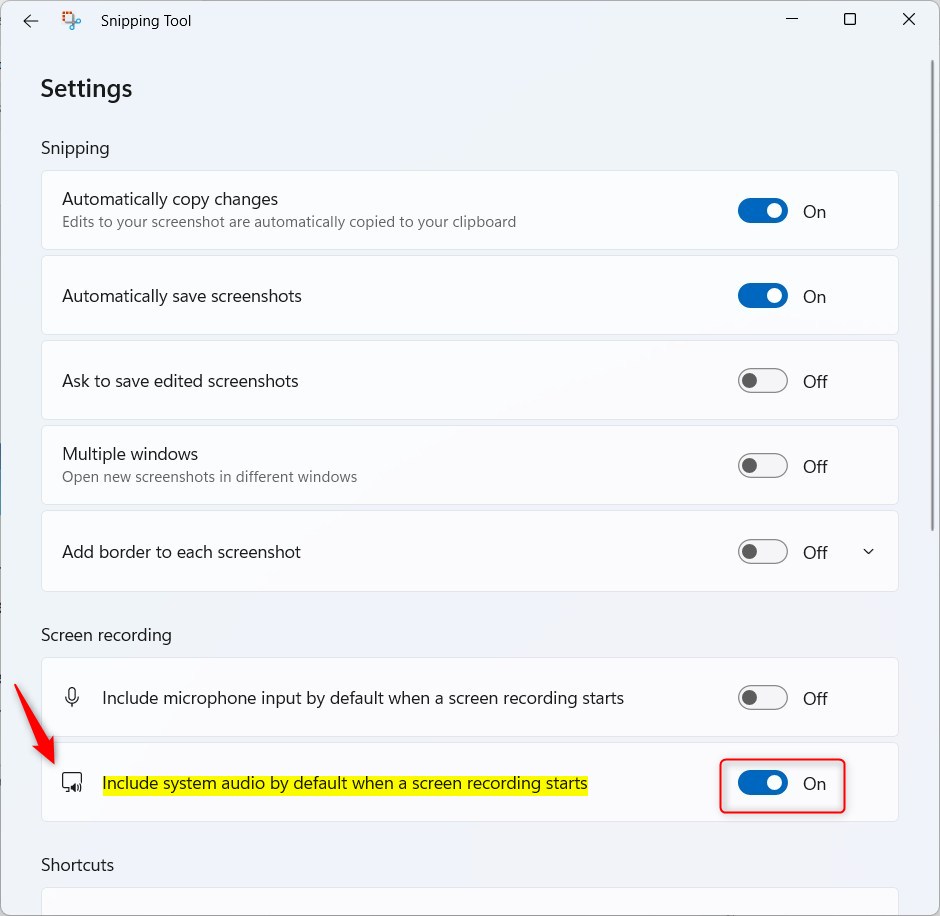
Turn “Include system audio by default when a screen recording starts” on or off with Snipping Tool
As mentioned above, you can turn “Include system audio by default when a screen recording starts” on or off with the Snipping Tool.
Here’s how to do it.
First, open the Snipping Tool app. (Windows key + Shift + S)
Then click the Settings and more (three dots) button, and select Settings.

On the Settings page, screen down and select “Include microphone input by default when a screen recording starts” tile.
Then, toggle the switch button to the On position to enable it. To disable it, toggle the switch button to the Off position.
That should do it!
Conclusion:
- Enabling system audio by default in screen recordings can enhance tutorial videos and other content.
- Disabling this feature conserves disk space and eliminates unwanted audio from recordings.
- The Snipping Tool on Windows 11 offers flexibility in configuring default audio recording settings for screen captures.
- Following the steps outlined can help users easily toggle the inclusion of system audio when starting a screen recording.


Leave a Reply Cancel reply