

This article explains how to suspend or resume BitLocker protection for a drive in Windows 11.
BitLocker helps protect computer data so only authorized users can access it. New files created on a BitLocker-enabled drive will also be protected.
Users can protect external, fixed, and operating system drives using BitLocker. When you enable BitLocker to protect the OS drive, it automatically unlocks the drive at startup using a TPM chip.
You can suspend BitLocker protection for a drive encrypted by BitLocker or Device Encryption and resume protection anytime.
When you suspend BitLocker, you temporarily disable this protection, a necessary step for certain system operations like hardware modifications or OS upgrades. However, it’s important to remember that this is a temporary measure, and you should re-enable BitLocker as soon as possible to ensure your data’s ongoing security, reassuring you that your information remains safeguarded.
Suspend or resume BitLocker protection in Windows
As mentioned, users can suspend and resume BitLocker protection for drives anytime.
There are multiple ways to do it in Windows. Below are a few examples of suspending and resuming BitLocker drive protection.
First, open the Control Panel and select System and Security -> BitLocker Drive Encryption.
Control Panel -> System and Security -> BitLocker Drive Encryption
On the BitLocker Drive Encryption settings page, under Operating system drive, click the “Suspend protection” link for the drive you wish to suspend protection on.
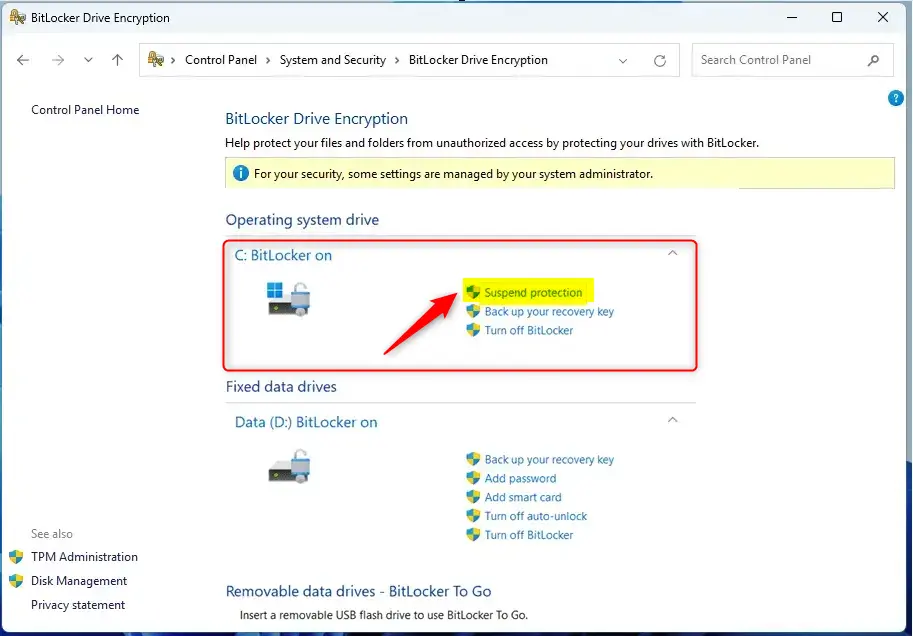
When prompted, click Yes if you want to suspend BitLocker protection in a pop-up window.
For OS drives protected with BitLocker encryption, the drive will remain suspended until you manually resume or restart the computer.
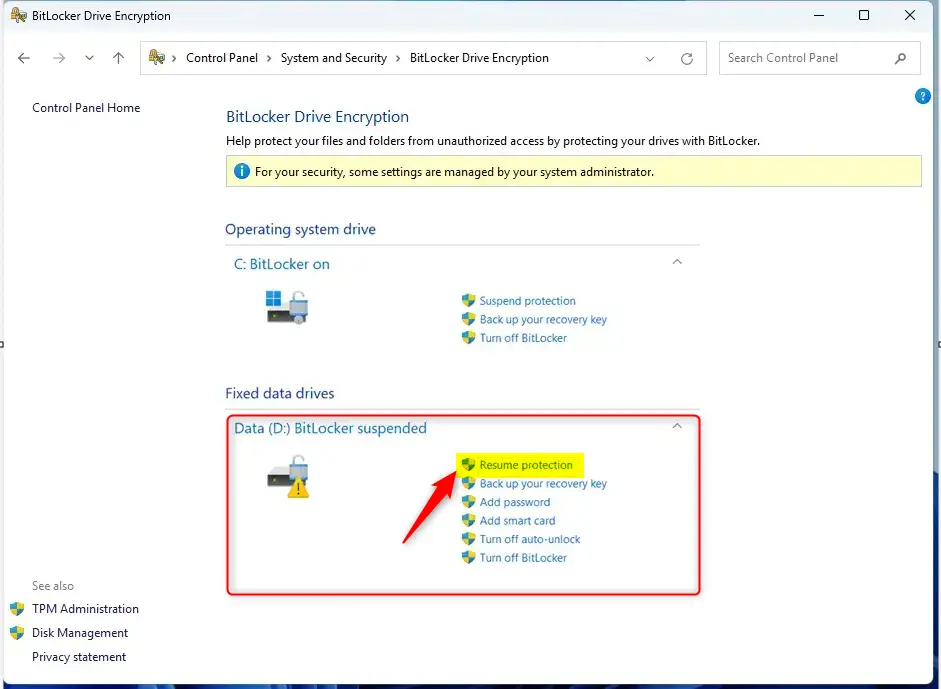
BitLocker will remain suspended for fixed and removable drives until manually resumed, even after a reboot.
To resume BitLocker for a drive in suspended state, follow the same steps and click “Resume protection.”
Control Panel -> System and Security -> BitLocker Drive Encryption
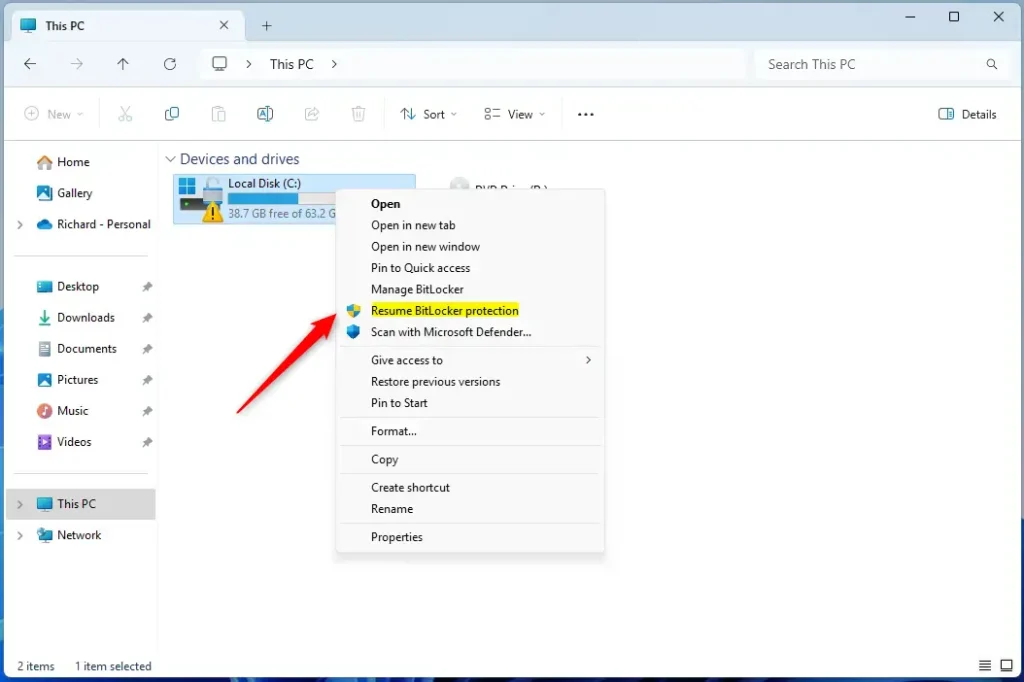
Another way to resume BitLocker protection is to use File Explorer.
Then, right-click on the drive, select “Show more options,” and click “Resume BitLocker protection” on the context menu.
Suspend or resume BitLocker protection using PowerShell
You can Windows PowerShell to suspend or resume BitLocker protection for a drive in Windows.
First, open Windows Terminal as administrator and select the PowerShell tab.
Then, use the command format below to suspend BitLocker protection for a drive.
manage-bde -protectors -disable <drive letter>:
Replacing ‘<drive letter>‘ with the appropriate drive letter.
Example:
manage-bde -protectors -disable C:
To resume BitLocker protection, run the command below.
manage-bde -protectors -enable C:
To suspend protection for all drives, run the command below.
Get-BitLockerVolume | Suspend-BitLocker
To resume protection for all drives, run the command below.
Get-BitLockerVolume | Resume-BitLocker
Suspend BitLocker protection with reboot for OS drive
As mentioned above, when you suspend BitLocker for the OS drive, protection will resume when you reboot. You can get around this by using the command with the “RebootCount” option.
Suspend-BitLocker -MountPoint "C:" -RebootCount <restarts #>
Substitute <restarts #> in the command with a number between 0 and 15 for how many times to restart the computer before automatically restoring BitLocker protection for this OS drive.
Suspend-BitLocker -MountPoint "C:" -RebootCount 0
The number zero (0) will suspend protection until you manually turn it on for the OS drive.
That should do it!
Conclusion:
- BitLocker provides necessary security for computer data, ensuring only authorized access and protection for new files created on the drive.
- Through BitLocker, users can protect external, fixed, and operating system drives. The latter are automatically unlocked at startup using a TPM chip.
- Suspending BitLocker is crucial for system operations like hardware modifications or OS upgrades, but it’s also important to promptly resume protection for ongoing data security.
- There are multiple methods to suspend or resume BitLocker protection, including through the Control Panel, File Explorer, and Windows PowerShell.
- For OS drives, using the “RebootCount” option in the command allows users to specify the number of restarts before BitLocker protection automatically restores.


Leave a Reply Cancel reply