
This article explains how to stop Zoom video and audio automatically on screen lock in Windows 11.
Zoom is a video conferencing and online meeting platform that allows users to connect remotely. It offers video and audio conferencing, screen sharing, and recording features.
There are many settings one can configure in the Zoom app on Windows. Users can download and install, start Zoom automatically when Windows starts, use dual monitors, and more.
When you use Zoom on Windows, your video and audio will continue to be active even if your device screen locks. There’s a setting to turn it on or off.
There are a few reasons someone might want to turn off Zoom video and audio when their screen locks. For example, if you’re in a meeting and need to step away from your computer for a moment, it can distract other participants if your video feed is still active while you’re gone.
Additionally, if you’re concerned about privacy, you may not want your video to continue broadcasting if you’re not actively using your computer.
These are good reasons to turn off video and audio when your computer locks during Zoom meetings.
Automatically turn off Zoom meeting video and audio when the screen locks
As mentioned above, there are good reasons why you might want to automatically stop recording and broadcasting your device video and audio when you are in a Zoom meeting and the screen locks.
Here’s how to turn it on or off.
First, open the Zoom app. You can do that by clicking Start and selecting the ‘All apps’ button on the Start menu.
Under All apps, scroll down alphabetically to the bottom and open the Zoom app.

When the Zoom app opens, click the Settings (gear) to open its Setting pane.

Alternatively, click on your profile image at the top right and select Settings on the context menu.

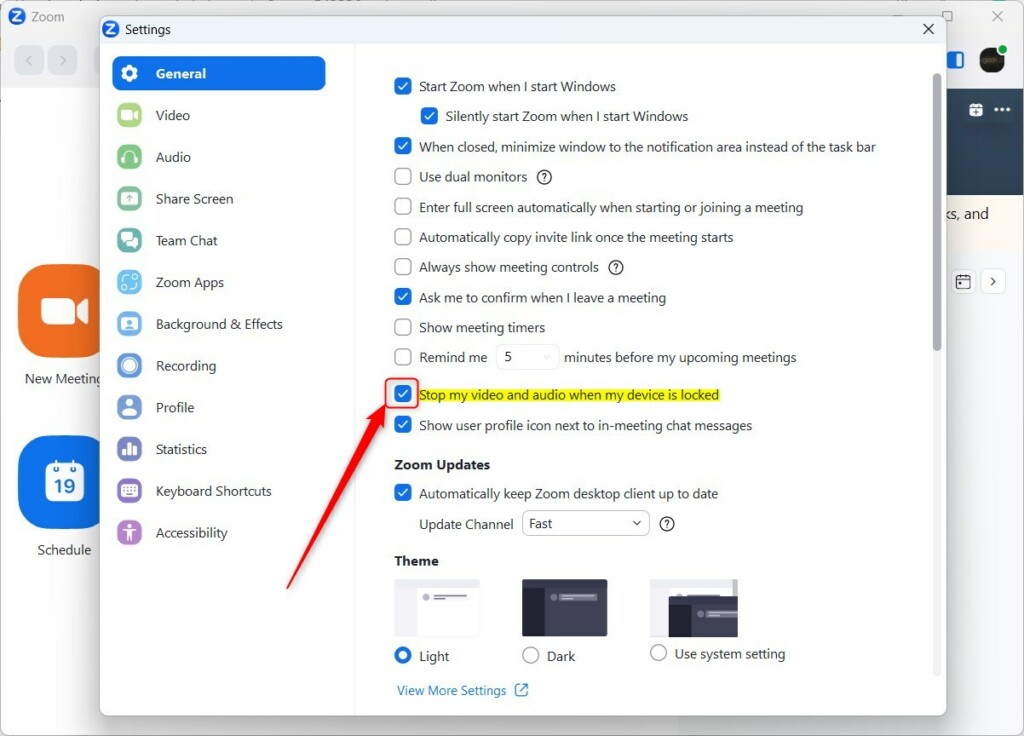
When the Settings pane opens, under General, check the box next to the line that reads “Stop my video and audio when my device is locked” to enable this feature.
To disable it, uncheck the box.
Exit the Zoom app to save your changes.
That should do it!
Conclusion:
- This article demonstrates how to stop video and audio automatically when your device screen locks during Zoom meetings.
- It is important to consider privacy and minimizing distractions when enabling this setting in your Zoom app.
- Following the steps outlined in this guide, you can easily configure your Zoom app to enhance your meeting experience and ensure privacy when your device is not actively used.
Leave a Reply