This article describes the steps to add or remove the Network folder on the show or hide drive letters in File Explorer navigation pane in Windows 11.
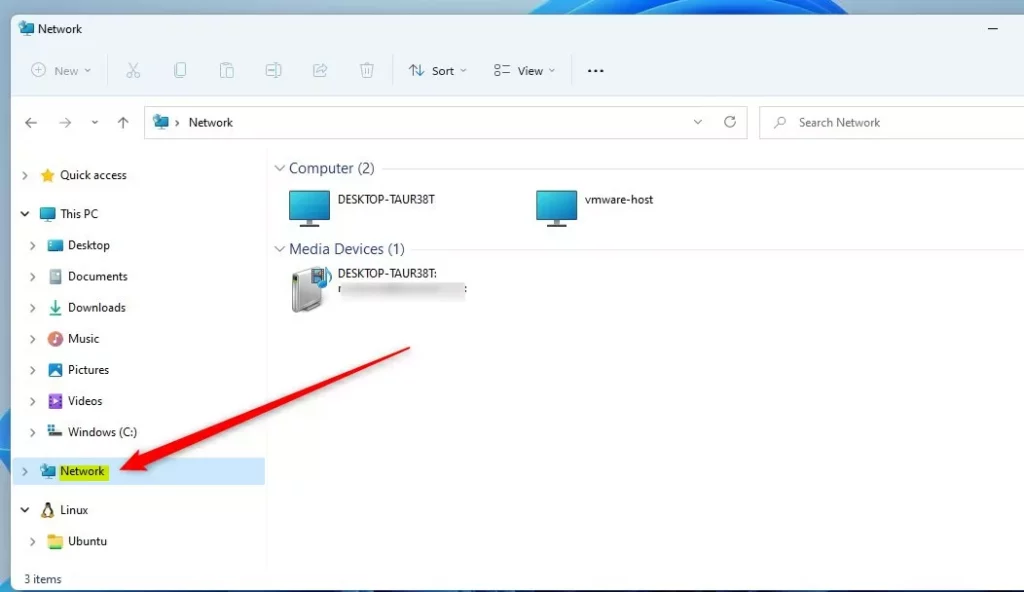
By default, the Network folder is automatically added to the navigation pane in File Explorer for easy access and a quick way to browse the Network.
In most cases, users should find having the Network folder in Windows 11 in the File Explorer navigation pane helpful. However, if you find the Network folder distracting or useless, remove it using the steps below.
Removing the folder from there won’t disable networking in your Windows. On the other hand, if you don’t see the Network folder on the navigation pane in File Explorer and want to add it again, use the steps below to add it.
How to show or hide the Network folder on the File Explorer navigation pane in Windows 11
As mentioned above, by default, the Network folder is automatically added to the navigation pane in File Explorer for easy access and a quick way to browse the Network.
The Network folder on the File Explorer navigation pane picture below:
Here’s how to hide or show the folder in Windows 11
Show or hide the Network folder using the File Explorer navigation pane
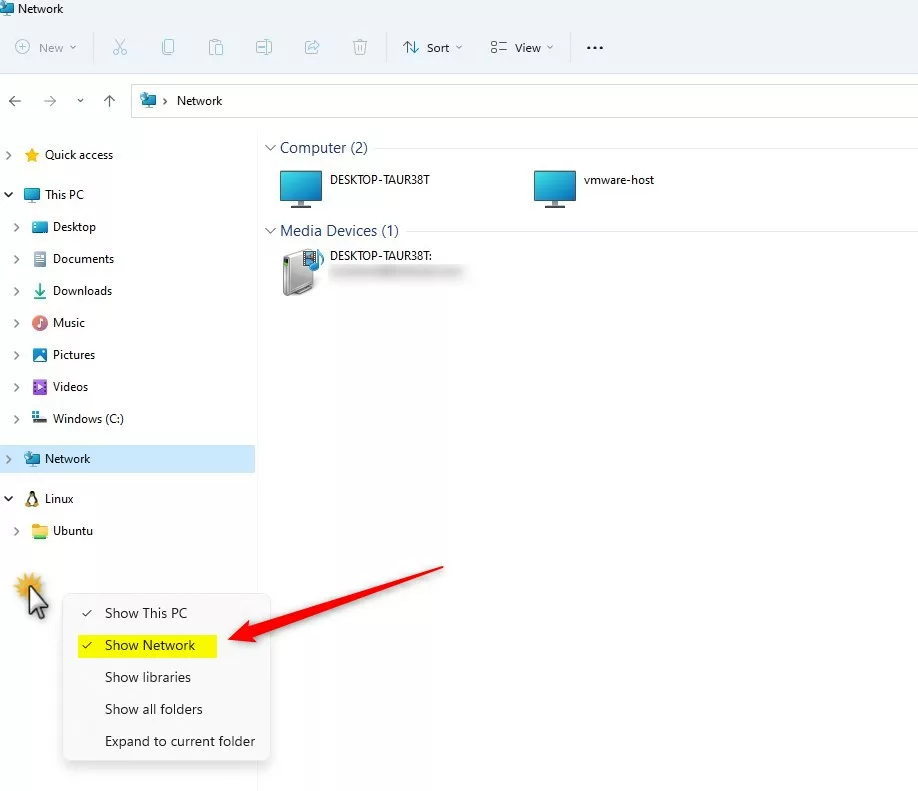
The quickest way to hide or show the Network folder in File Explorer is to right-click on a blank area in the navigation pane and choose to reveal or hide the Network folder.
Right-click on a blank area of the navigation pane in File Explorer, then select Check Show Network to show the folder.
Uncheck the hide the Network folder.
Show or hide the Network folder via File Explorer Folder Options
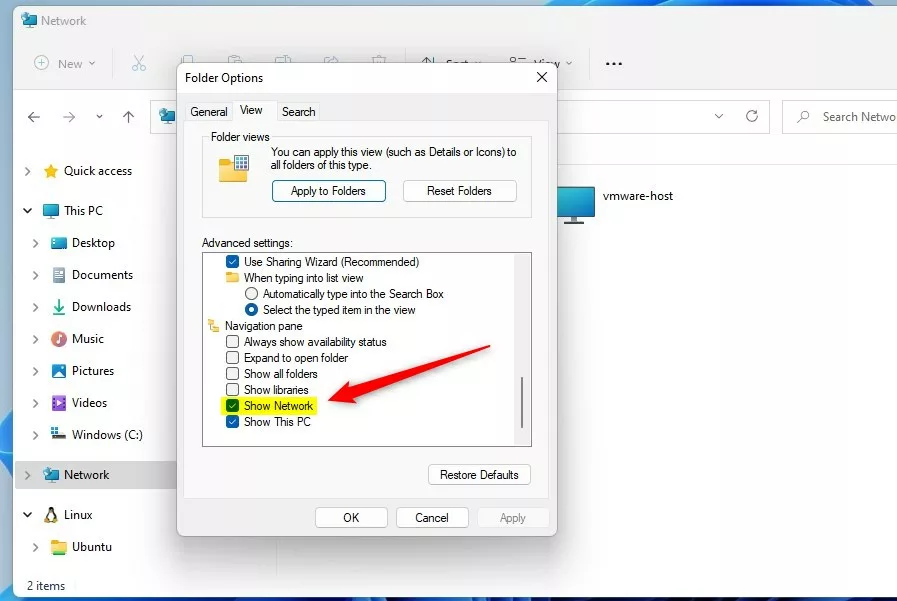
Another way to show or hide the network folder is to use the File Explorer Folder Option.
Open File Explorer Folder Options, then select the View tab on the Folder Options window.
Under Advanced settings -> Navigation pane, check the box next to Show Network to show the Network folder.
Uncheck to hide the Network folder.
Show or hide the Network folder in File Explorer via Windows Registry
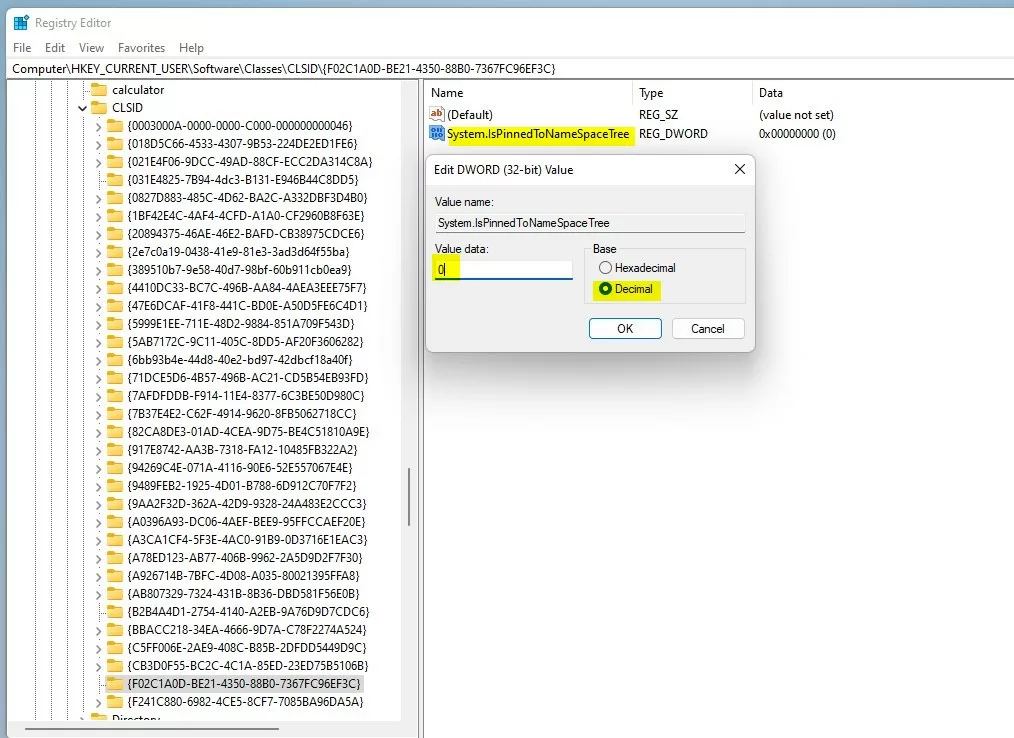
Yet, another way to show or hide the Network folder in the navigation pane of File Explorer is to use Windows Registry.
First, open the Windows Registry, and navigate to the folder key path listed below.
HKEY_CURRENT_USER\Software\Classes\CLSID\{F02C1A0D-BE21-4350-88B0-7367FC96EF3C}
If you don’t see the {F02C1A0D-BE21-4350-88B0-7367FC96EF3C} folder key, right-click on the CLSID key, then create the subkey {F02C1A0D-BE21-4350-88B0-7367FC96EF3C} folders.

On the right pane of the {F02C1A0D-BE21-4350-88B0-7367FC96EF3C} folder key, right-click and select New -> DWORD (32-bit) Value. Type a new key named System.IsPinnedToNameSpaceTree.
Double-click the new value name (System.IsPinnedToNameSpaceTree) and enter the Value data as 1 to show the Network folder on the File Explorer navigation pane in Windows 11.
A Value data of 0 will hide the Network folder on the File Explorer navigation pane in Windows 11.
Close out and restart your machine to apply the changes.
That should do it!
Conclusion:
- In Windows 11, the Network folder can be easily shown or hidden in File Explorer for quick access and browsing.
- Users have multiple methods, including right-clicking on the navigation pane, utilizing File Explorer Folder Options, and accessing the Windows Registry.
- Whether the Network folder is displayed or concealed, these steps enable users to customize their File Explorer navigation pane according to their preferences.


Leave a Reply Cancel reply