
Do you work or talk with people in different parts of the world? Maybe family, friends, or coworkers live far away. It’s handy to see their time zones right on your computer. This way, you won’t call someone while they’re asleep or miss meetings because of time differences.
Here’s a simple guide to help you add and see multiple time zones on your Windows 11 PC.
Step 1: Open Windows Settings
First, you need to open the Settings app on your computer.
- Click the Start button (the Windows icon on the bottom left).
- Then, click Settings.
- Or, press the Windows key + I on your keyboard to open Settings quickly.
Learn more about opening Settings
Step 2: Go to Date & Time Settings
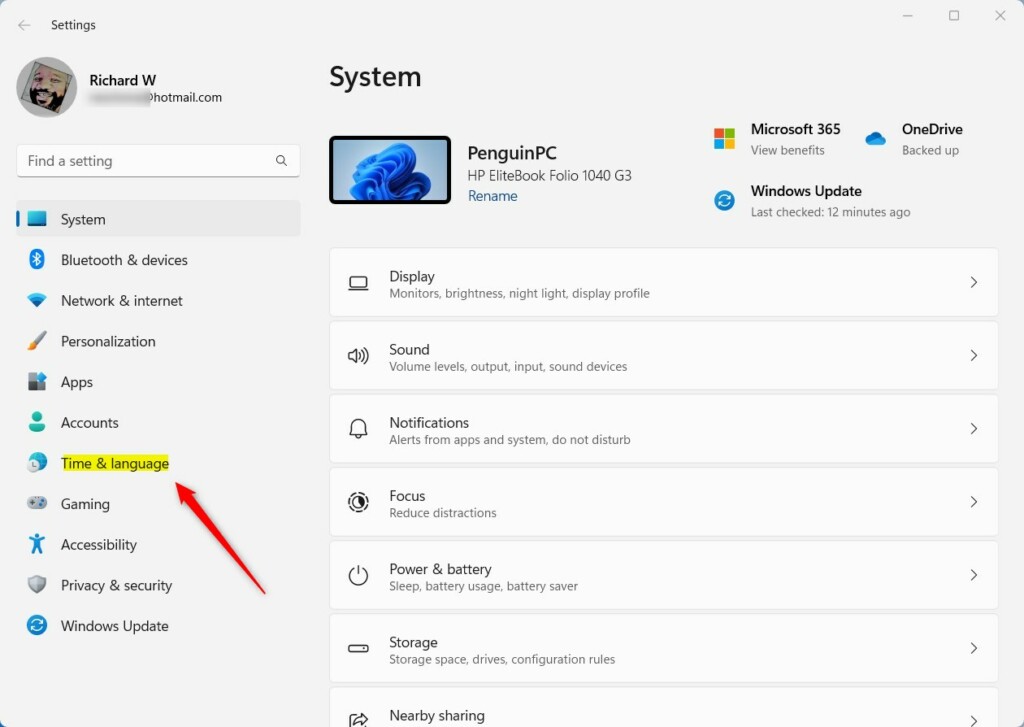
Inside Settings, click on Time & language on the left menu.
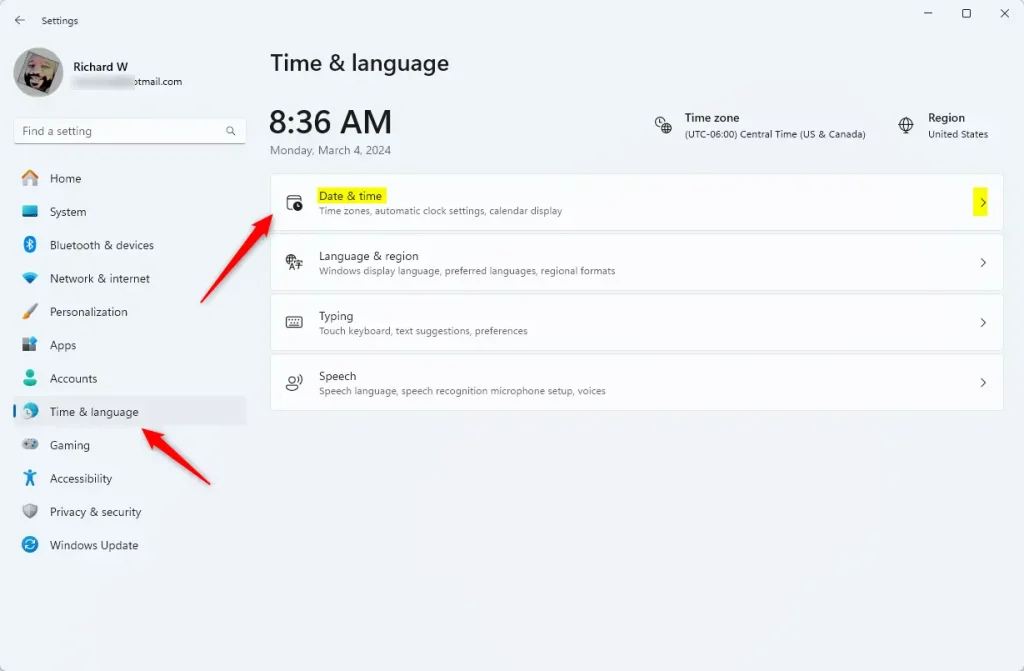
On the right, click the Date & time box.
Step 3: Add Extra Clocks for Different Time Zones
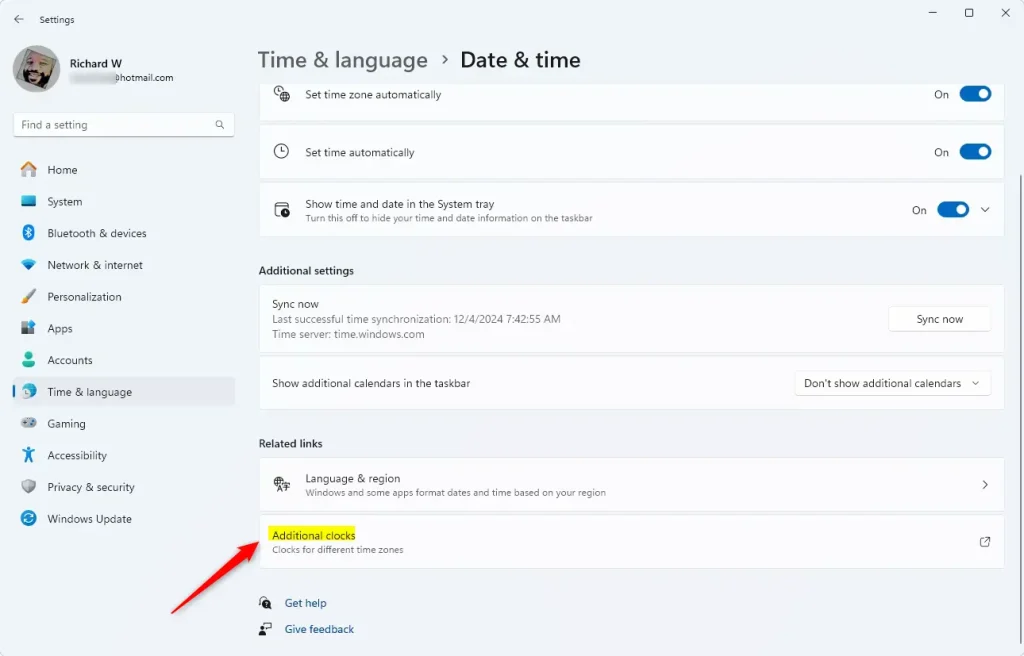
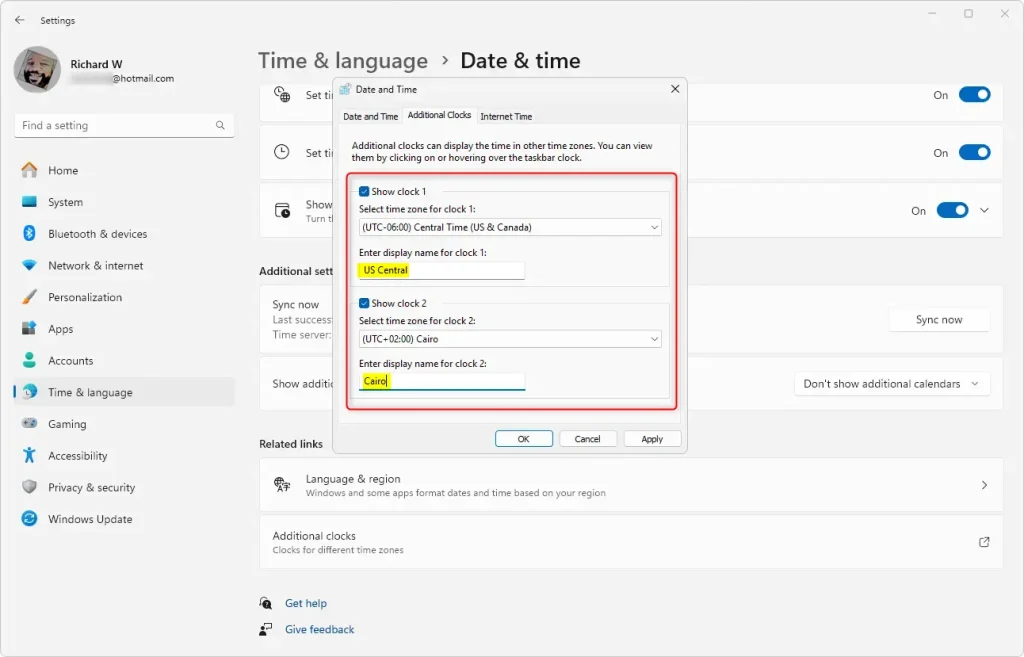
Scroll down to find Related links and click Additional clocks.
A small window will pop up. Here’s what to do:
- Check the box for Show this clock for Clock 1 (and Clock 2 if you want).
- Pick the time zone you want to see from the dropdown menu.
- Type a name for the clock like “New York” or “London” so you know which city it is.
- Click OK to save your settings.
Now, when you hover your mouse over the clock at the bottom right of your screen (on the Taskbar), you’ll see your extra clocks and their times.
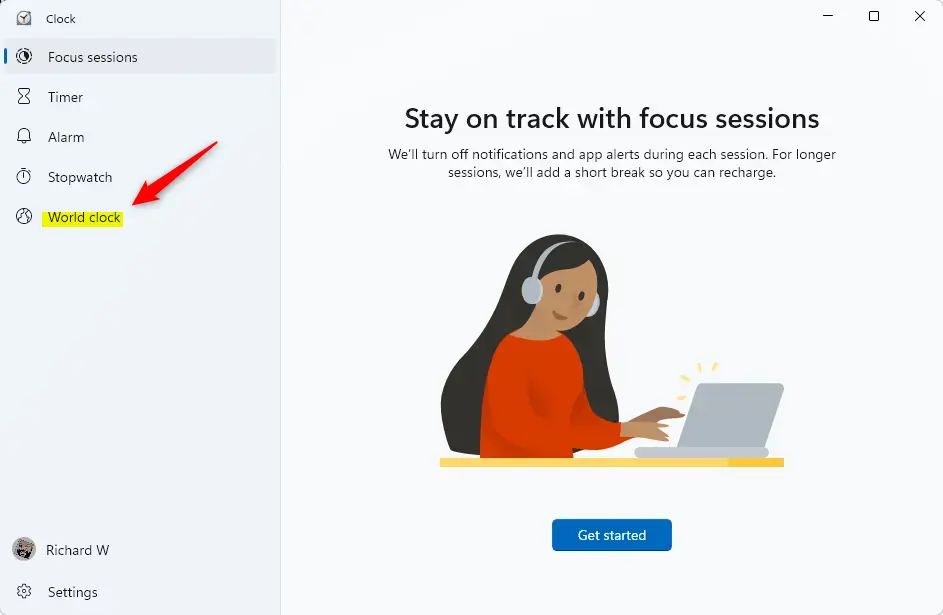
Step 4: Use the Windows Clock App to See Many Time Zones
If you want to see even more places at once, try the Windows Clock app:
- Click Start, then search for and open the Clock app.
- On the left side, click World clock.
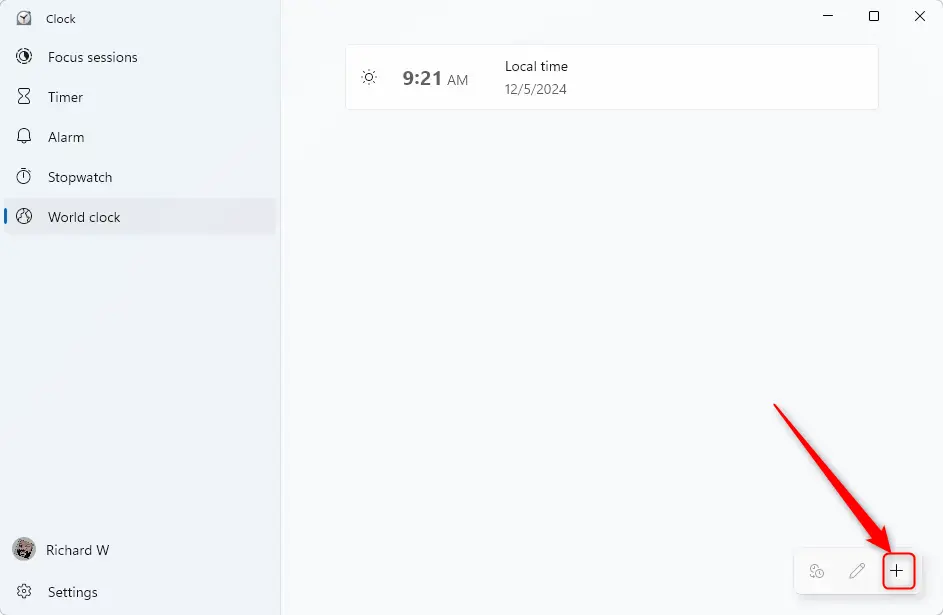
- At the bottom left, click the + button to add cities.
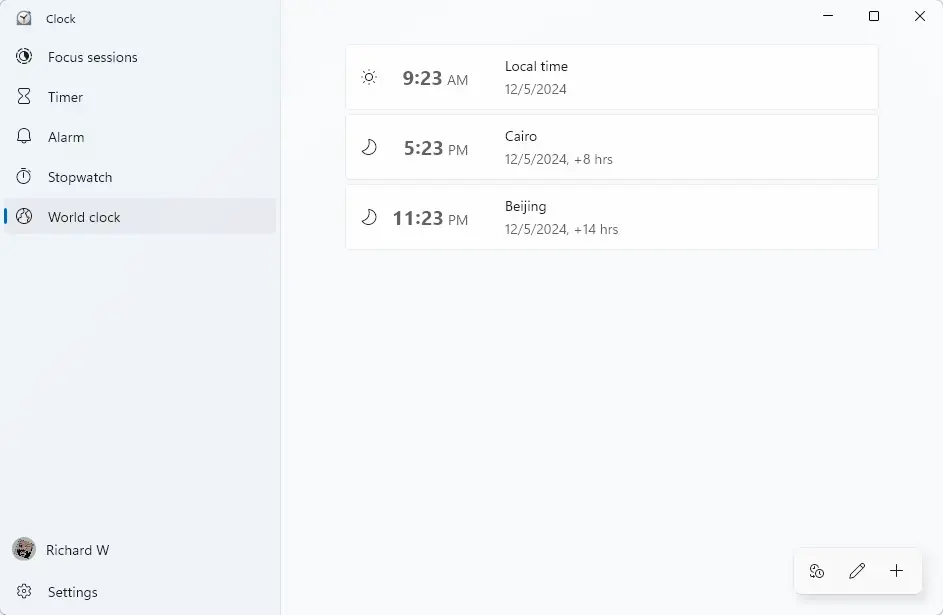
- Type the city or place you want and select it.
- Repeat to add as many as you like.
Why Use Multiple Time Zones?
- Easy to check times for your friends, family, or coworkers in different places.
- Helps you plan calls and meetings without waking anyone up or missing appointments.
- Great for travelers to keep track of home time and local time.
- Simple to set up with just a few clicks.
Summary
Showing multiple time zones on Windows 11 is easy and useful. You can add up to two extra clocks directly in your Settings by going to Time & language, then Date & time, and clicking Additional clocks. For even more time zones, use the Windows Clock app and add as many cities as you need. Once set up, just hover over the clock on your Taskbar to see all your times at a glance. This simple setup helps you stay connected with people around the world without missing important calls or meetings.
Frequently Asked Questions
Why Use Multiple Time Zones?
Leave a Reply Cancel reply