This article describes how to reveal hidden files and file name extensions in File Explorer on a Windows 11 desktop.
Windows File Explorer enables users to hide and unhide files easily. Certain files and file extensions are hidden by default in Windows.
Revealing hidden files and file extensions in Windows 11 can be beneficial for several reasons. For example, it enables you to view and access files that are normally hidden, which can be helpful if you need to troubleshoot issues or modify specific files.
Displaying file extensions can help you identify the type of file and determine which program is needed to open it. This is especially useful when you receive a file with an unfamiliar extension and need to figure out how to access it.
Show hidden files in Windows 11
Not all files are displayed in the normal File Explorer views by default. Some files are hidden, while others are not. If you want to view hidden files in File Explorer, follow the guide below.
There are multiple ways to show hidden files in File Explorer. You can use the File Explorer command bar or File Explorer options.
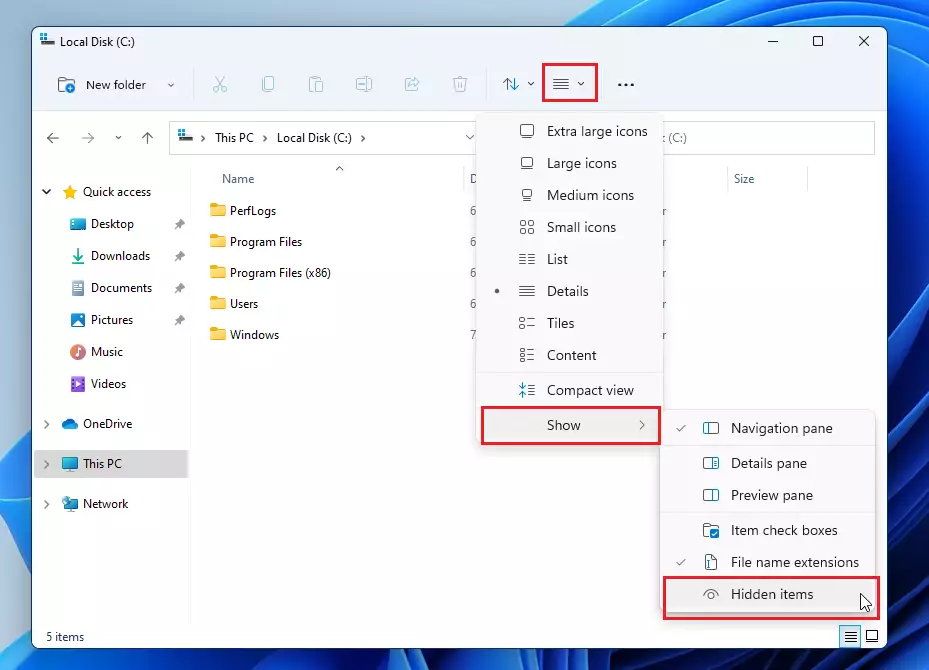
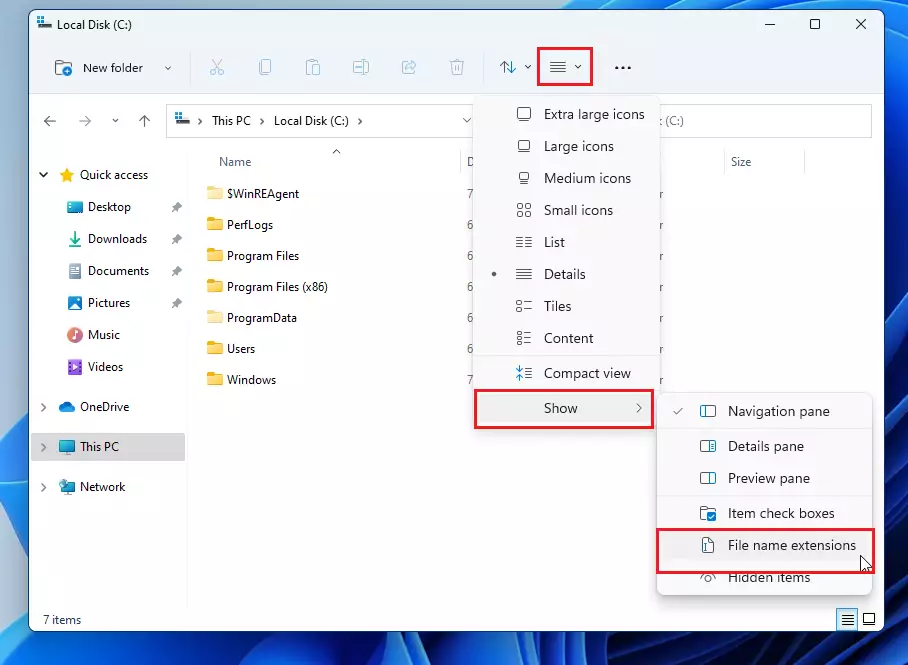
Open File Explorer and click the ‘Layout and view options’ icon on the File Explorer ribbon to show hidden files.
Then, hover over the ‘Show‘ option on the overlay menu and select the ‘Hidden items‘ option to show hidden files and folders.
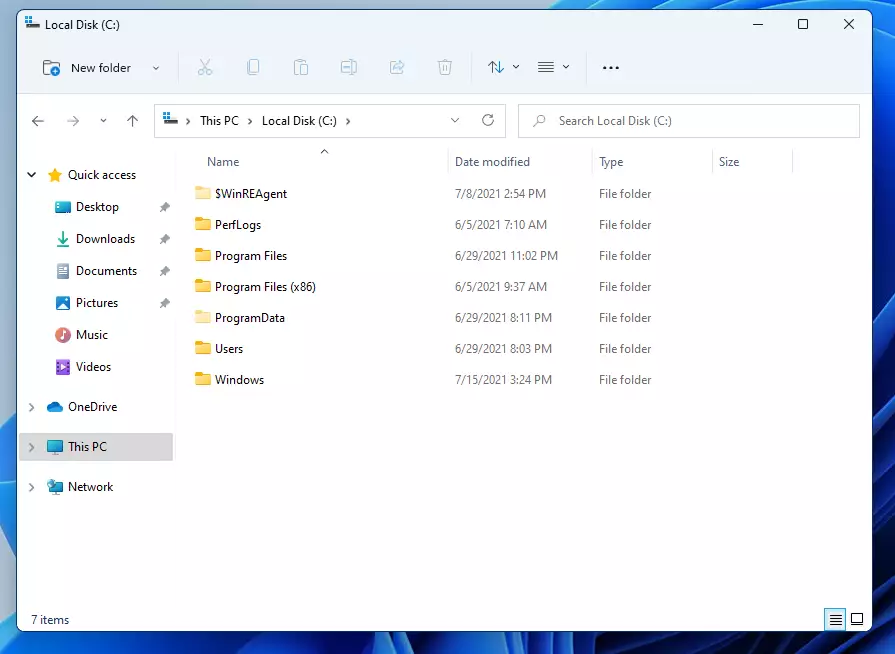
This will show hidden files and folders in File Explorer.
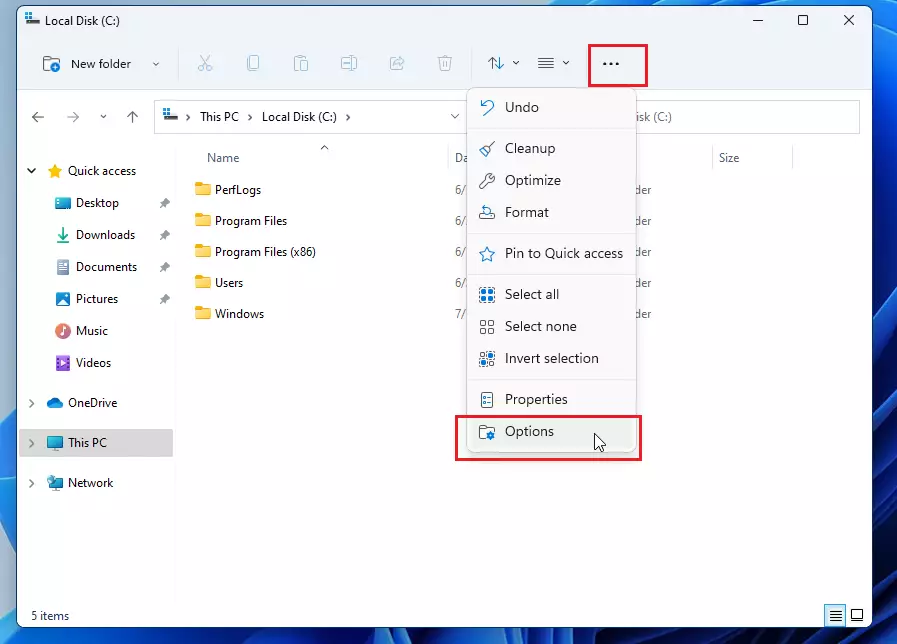
Another way to unhide hidden files is by using the File Explorer Option from the ribbon menu. To do that, click the ellipsis (three horizontal dots) on the File Explorer ribbon, then select ‘Options‘ from the overlay menu.
When the Folder Options open, select the View tab and choose the highlighted option below to Show hidden files, folders, and drivers.
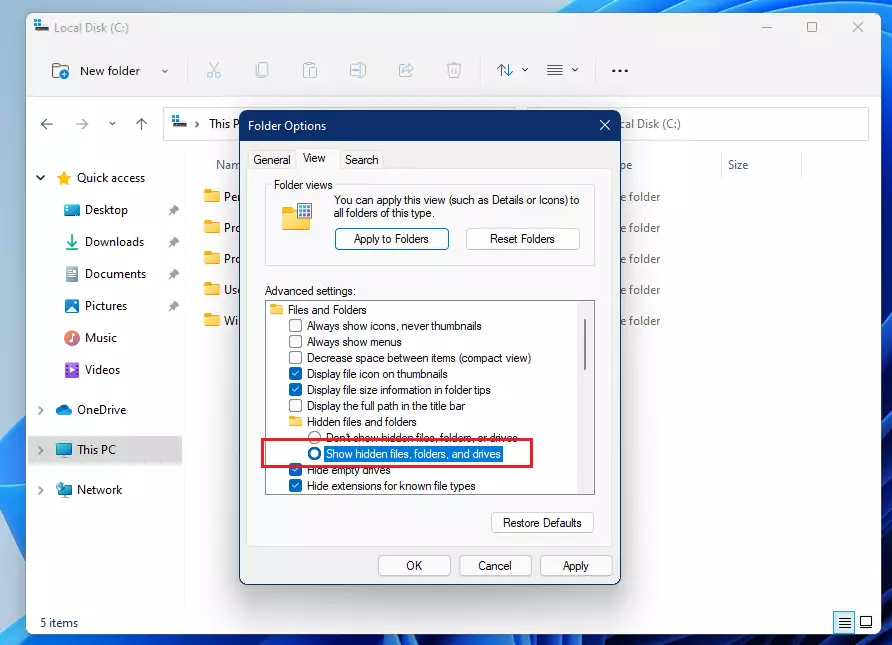
Click OK and apply, and that should do it!
How to show file name extensions in File Explorer
You can also show file name extensions in File Explorer when using Windows 11. File name extension is how Windows identifies files and recommends the correct program to open and view the files. File name extensions also help users identify files and which program to open and read the files.
By default, file name extensions are hidden in Windows 11. However, the steps to show hidden file extensions are similar to those above for showing hidden files.
Open File Explorer and click the ‘Layout and view options’ icon on the ribbon to show hidden file extensions. Then, hover over the ‘Show’ option on the overlay menu and select the ‘File name extensions’ option to show hidden files and folders.
You can also use the File Explorer Option from the ribbon menu to view file name extensions. To do that, click the ellipsis (three horizontal dots) on the File Explorer ribbon, then select ‘Options‘ from the overlay menu.
Then, on the Folder Options, select the View tab, and under Advanced settings, uncheck or deselect the line that reads Hide extensions for known file types.

Click OK to apply your changes and exit.
That should do it!
Conclusion:
- Showing hidden files and file extensions in Windows 11 enhances your file management experience.
- It allows for greater control when troubleshooting or modifying files.
- Understanding file types through their extensions can prevent issues when opening unfamiliar files.
- Enabling these features can streamline your navigation and organization within File Explorer.
- Following the outlined steps makes it easy to view hidden files and file extensions according to your preferences.


Leave a Reply Cancel reply