
Do you have more than one microphone plugged into your Windows 11 computer? You can pick one as your main microphone. Then all your apps will use the same one without you having to choose every time.
Why Set a Default Microphone?
When you have multiple microphones connected, Windows doesn’t know which one you want to use. Setting a default microphone saves you time. You won’t have to pick the right one each time you use an app.
How to Choose Your Default Microphone
Follow these simple steps to set your default microphone for all apps:
- Open Settings: Press the Windows key + I on your keyboard. Or click the Start button and then click Settings.
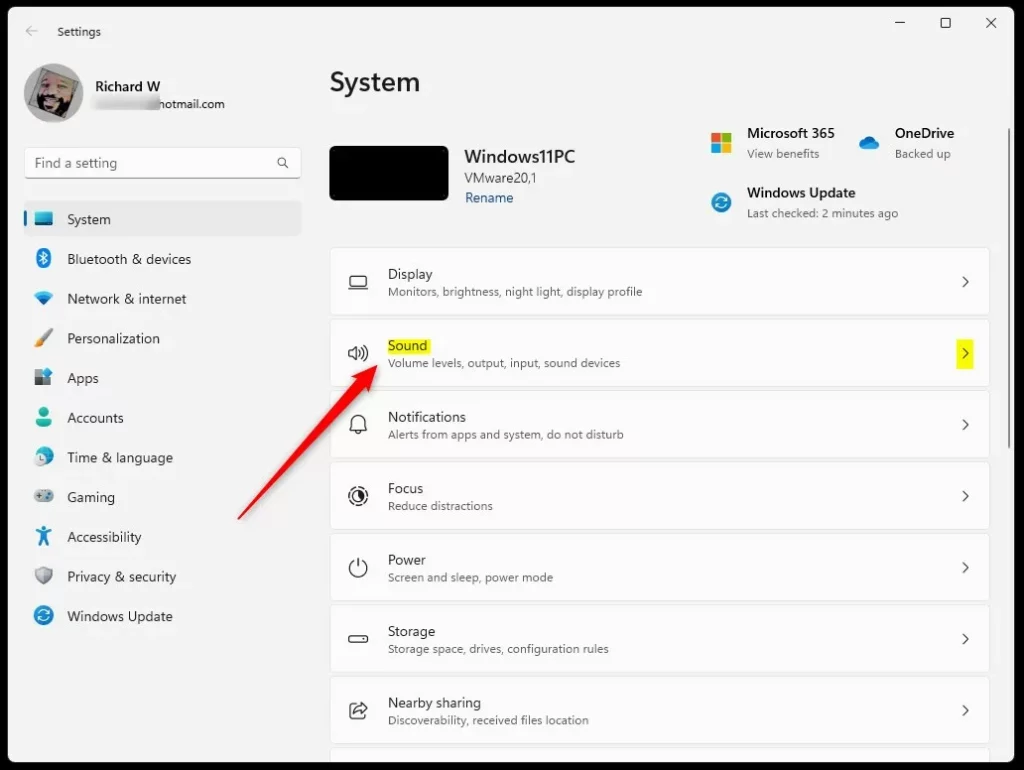
Here’s what it looks like when you click Start and open Settings:
- Click on System: In the Settings window, click on System from the left menu.
- Click on Sound: Now, click on Sound from the right side.
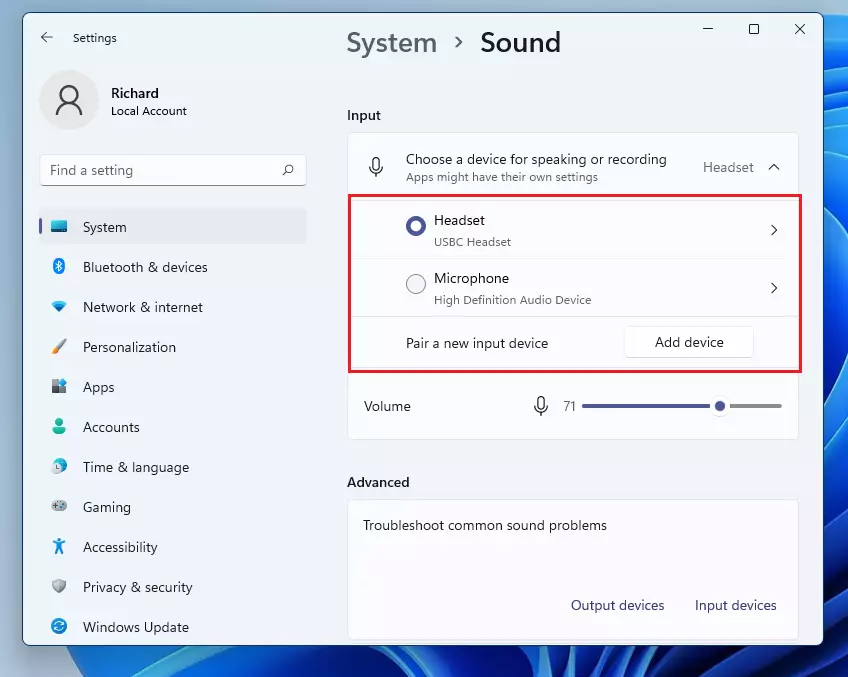
- Find your input device: Under the Input section, click the dropdown menu labeled Choose your input device.
- Pick your microphone: Select the microphone you want to use as your default.
Here’s what the Sound settings page looks like:
For example, you might see options like “Headset Microphone” or “Built-in Microphone.”
Once you pick your mic here, all apps will use it by default. Some apps might still let you choose a different microphone inside their own settings.
Quick Way to Switch Microphones Using the Taskbar
You can also change your microphone fast without opening Settings:
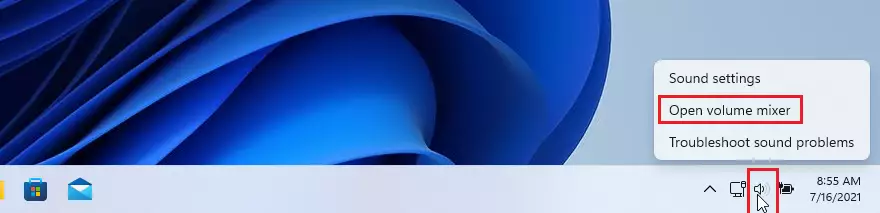
- Right-click the speaker icon: Right-click the little speaker icon in the bottom-right corner of your screen (taskbar).
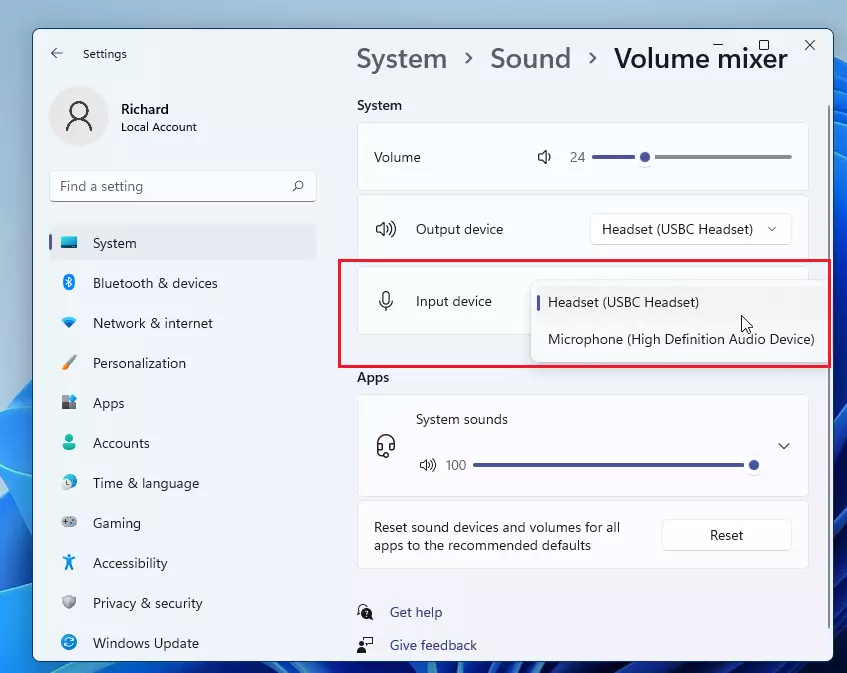
- Open the volume mixer: Click Open volume mixer from the menu.
- Pick your microphone: In the volume mixer window, find the input device dropdown and pick the microphone you want to use.
- Close the window: Close the window when you’re done.
Note: If your microphone does not show up here, it might not be properly connected or recognized by Windows. Try unplugging and plugging it back in or restarting your computer.
Make Sure Your Apps Can Use the Microphone
Windows 11 has privacy settings to control which apps can use your microphone. If your mic isn’t working in some apps, check these settings:
- Open Settings again: Press Windows key + I.
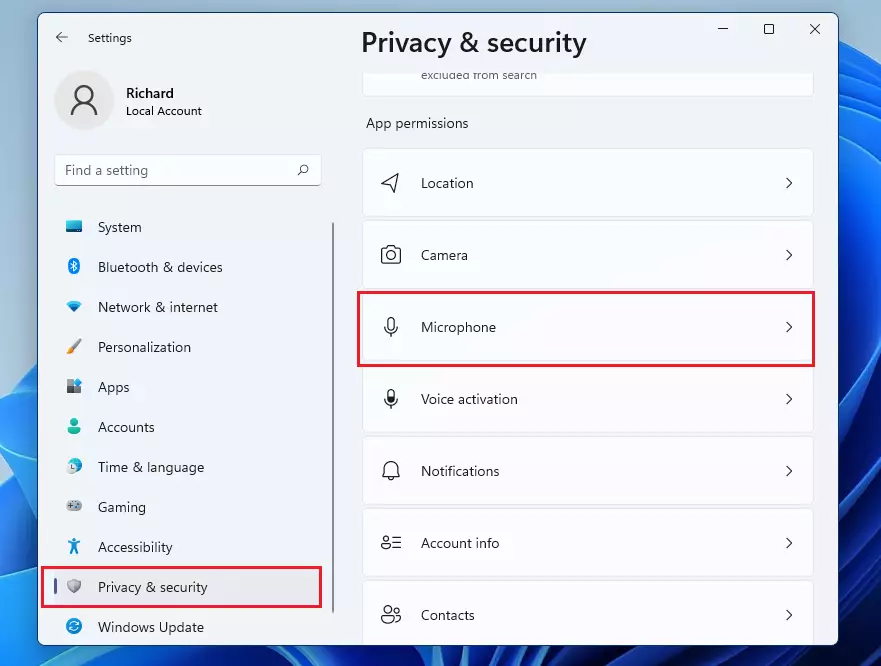
- Go to privacy settings: Go to System > Privacy & Security > Microphone.
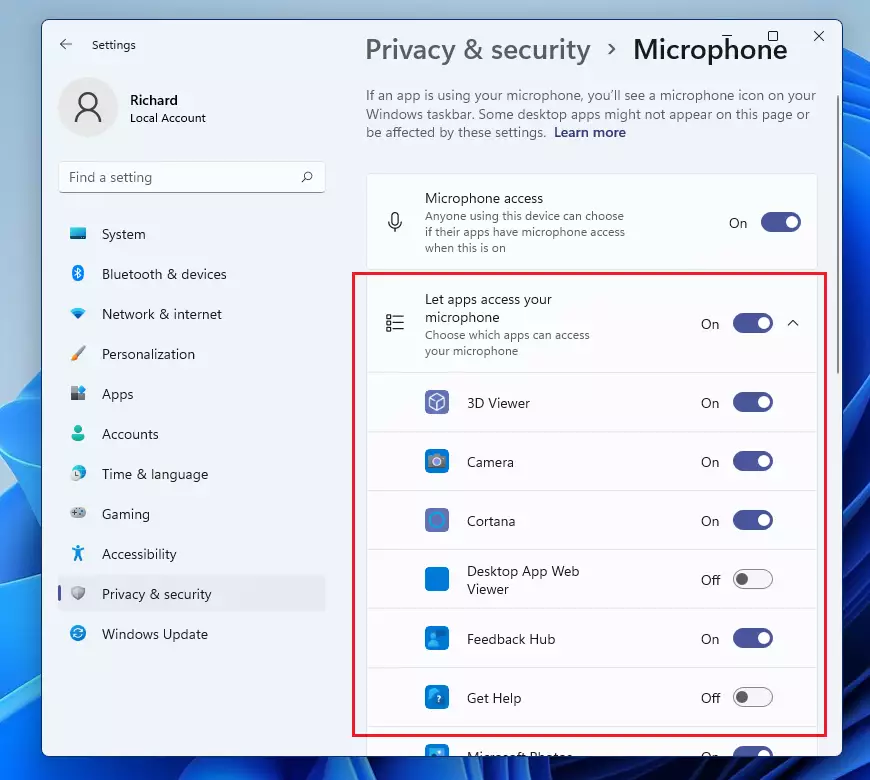
- Turn on microphone access: Make sure the switch under Microphone access is turned on.
- Allow apps to use your mic: Below that, turn on access for the apps you want to use the microphone.
After that, test your microphone again. It should work fine now!
Summary
- Setting a default microphone makes it easier to use sound apps since all use the same mic.
- You can change your mic settings in Windows Settings or quickly from the taskbar volume mixer.
- Make sure your apps are allowed to use the microphone in privacy settings.
- Regularly check your mic settings to avoid issues with calls or recordings.
- If your mic doesn’t show up, try reconnecting it or troubleshooting your device.
If you want more help with Windows 11 sound settings, you can visit the official Microsoft support page here: Fix microphone problems in Windows 11 – Microsoft Support


Leave a Reply Cancel reply