
This guide will help you easily change the date, time, and time zone on your Windows 11 computer.
Why Does This Matter?
Windows 11 can set the date and time automatically. When you do this, it will also adjust for daylight saving time changes on its own. Having the correct date and time is important. It helps your computer work properly. It keeps things like appointments, emails, and updates running smoothly.
How to Change Your Time Zone in Windows 11
Windows 11 has a central place called Settings. This is where you can change most things on your PC, including the date and time.
To open Settings, you can:
- Press
Windows key + Ion your keyboard, OR - Click the Start button, then click Settings
Another way is to click the search box on your taskbar. Type Settings. Click the Settings app when it appears.

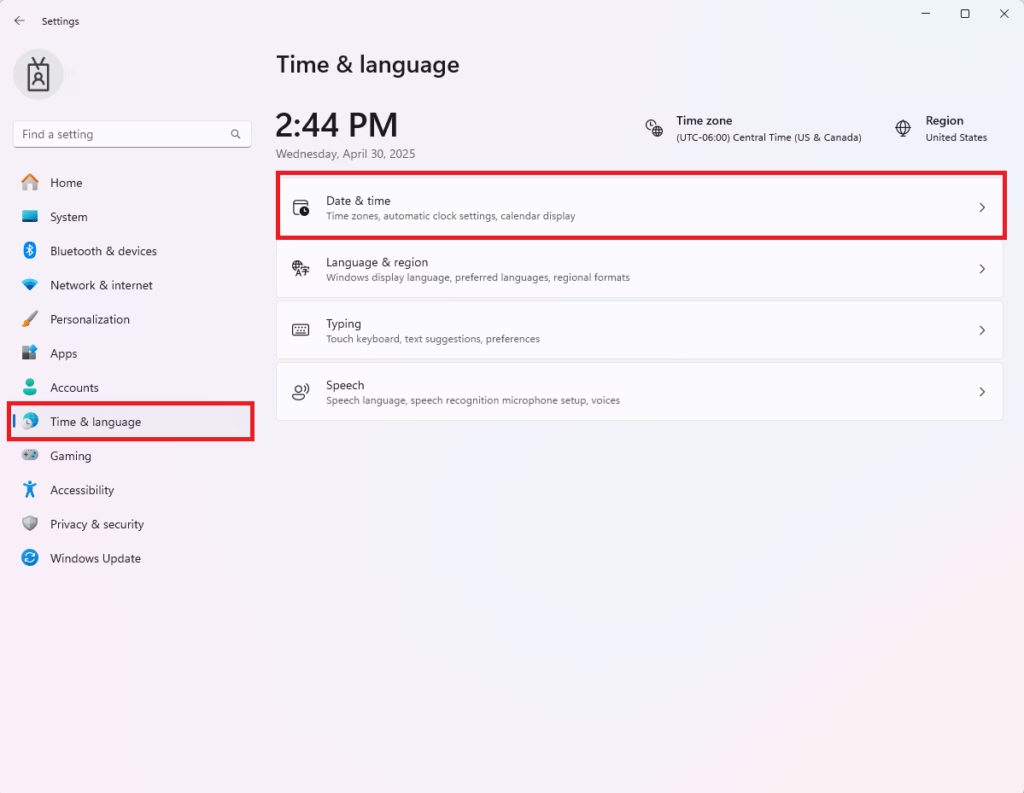
Once in Settings, look for Time & Language on the left side. Then click Date & Time on the right side.
Now, find the Time zone drop-down menu. Pick the correct zone where you live.
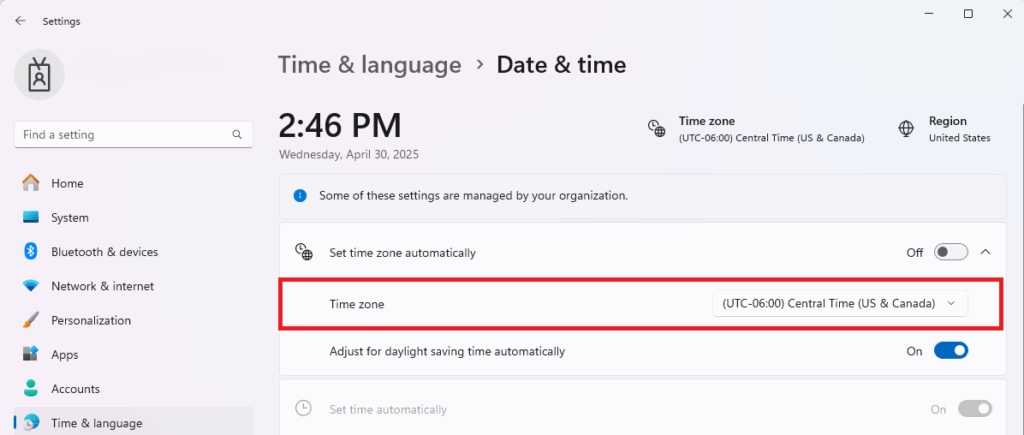
Windows will then automatically turn on the settings for adjusting your clock for daylight saving time.
Note: You can also choose to let Windows set the time zone automatically. But sometimes this doesn’t work well — especially if you use a VPN that connects to other countries.
If after changing the time zone, the clock doesn’t update right away, scroll down. Click the Sync now button to fix it.
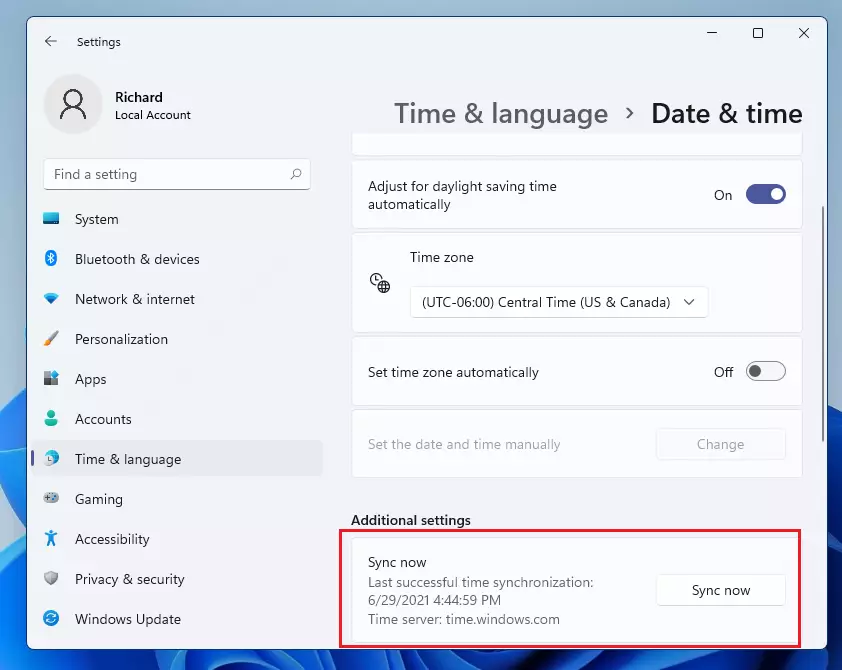
This will connect your PC to the internet time server (time.windows.com). Your clock will update automatically.
If syncing doesn’t work right away, try restarting your computer. After logging back in, Windows will apply the new settings.
How to Set Date & Time Manually
If your computer is not connected to the internet, you can set the date and time yourself.
On the same Date & Time settings page, turn off Set time automatically and Adjust for daylight saving time automatically. Click their sliders to the Off position.
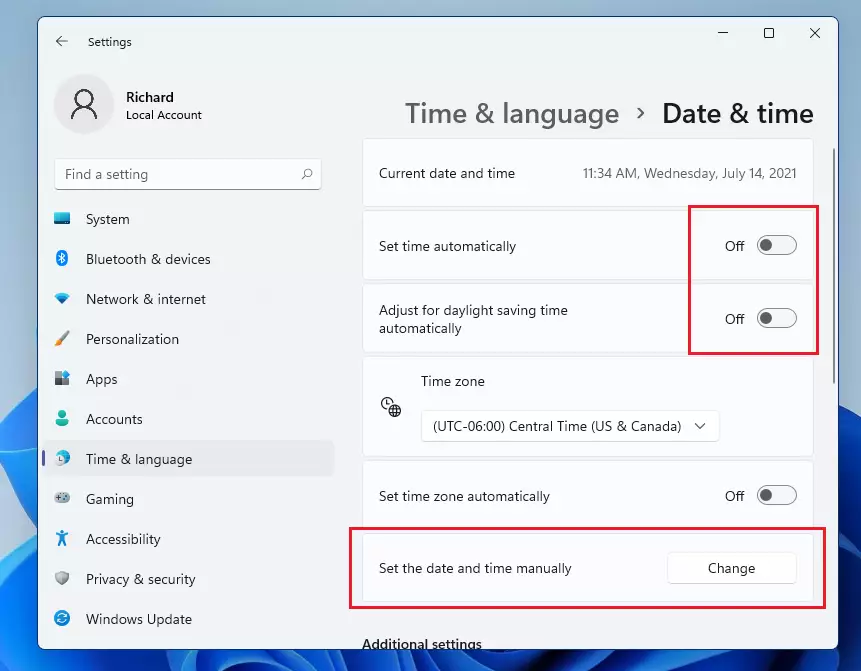
Now, click the Change button. This button is under “Set the date and time manually.”
A small window will pop up. You can pick the correct date and time. Use the calendar and the clock to do this.
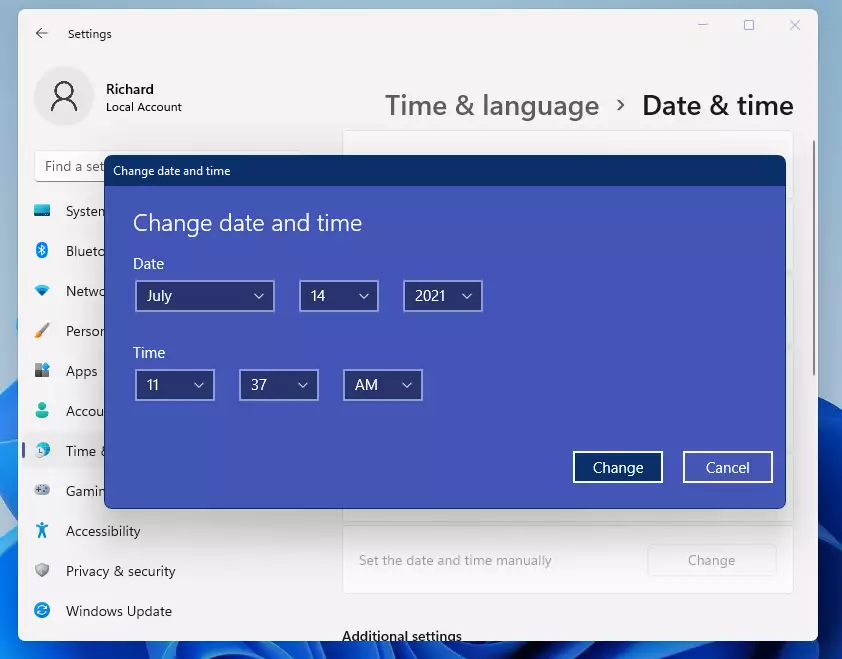
When you’re done, click Change to save your new date and time.
Your computer’s clock, shown at the bottom right corner of the screen, will now display the correct date and time.

Summary
What happens when you set the correct date and time?
- Your computer’s clock shows the right time for appointments, reminders, and updates
- It automatically adjusts for daylight saving time so you don’t have to change it yourself
- You can set time manually if you don’t have internet or if automatic updates don’t work
- Having the correct time helps your PC work better and avoid errors
Remember to check your settings and sync your clock regularly. By following these simple steps, you can make sure your Windows 11 PC always has the right time.
For more Windows 11 tips, check out the official Microsoft support website.


Leave a Reply Cancel reply