

This article explains the steps to restore a Windows 11 PC using a restore point.
If you’ve recently installed an app, a hardware driver, or updated Windows 11, and your PC is not functioning properly, it could be due to these changes. You may be able to resolve the issues by restoring your computer to an earlier state, known as a restore point.
Windows 11 automatically creates restore points to allow your computer to be reverted to a previous working state. It functions like a time machine, helping when you need it most. In most cases, this feature should be enabled, especially for home computers.
Restore your PC from a restore point
As mentioned above, Windows creates a restore point so that you can revert changes. If you have identified recent changes causing your PC not to work, simply restore it to an earlier state.
Below are the conditions under which System Restore works:
- Restoring from a restore point won’t affect your files, but it will remove apps, drivers, and updates installed after the restore point was created.
- System restore works for changes made in the last 7 to 14 days.
To restore Windows 11, continue below.
Windows 11 has a centralized location for the majority of its settings. Everything can be done, from system configurations to creating new users and updating Windows from its System Settings pane.
To get to System Settings, you can use the Windows key + I shortcut or click on Start ==> Settings, as shown in the image below:

Alternatively, you can use the search box on the taskbar to search for Settings. Then select to open it.
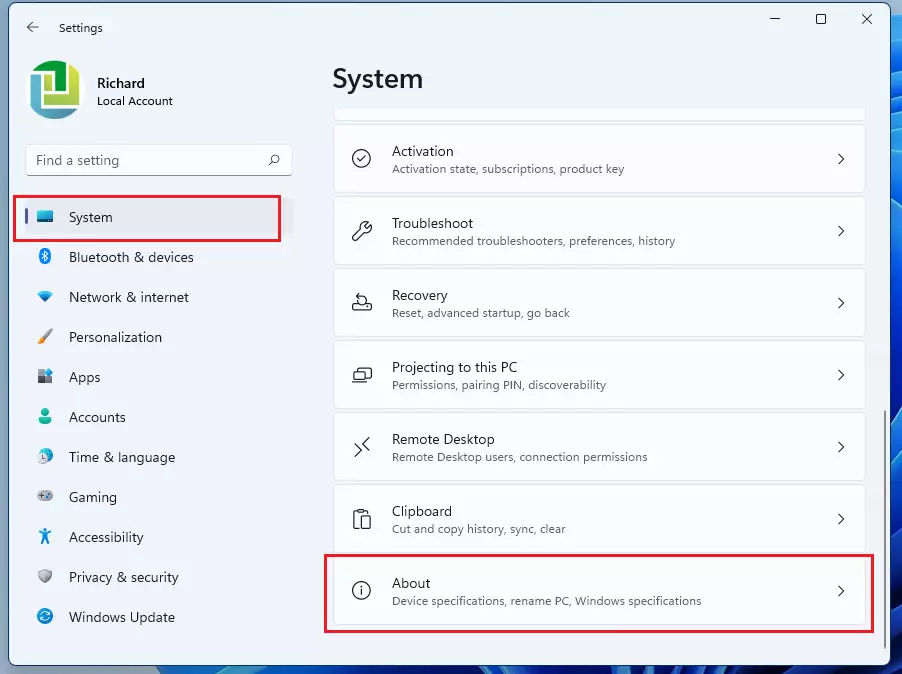
To access your Windows Settings, click on System and then select About from the right pane of your screen, as illustrated in the image below.
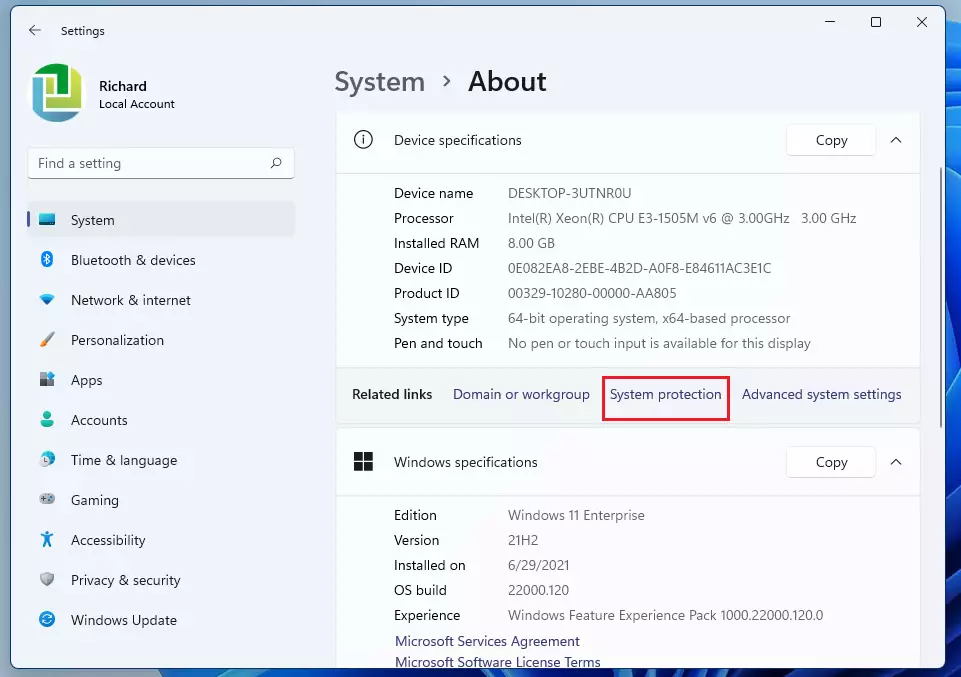
On the About settings pane, click on the System protection link as highlighted below.
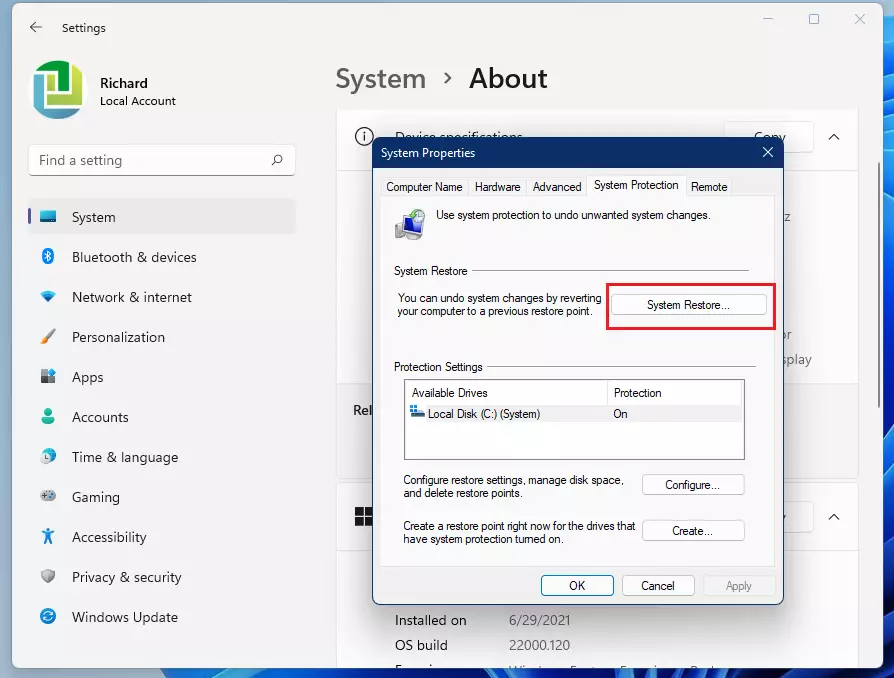
On the System Protection settings pane, click on System Restore to initiate a restore.
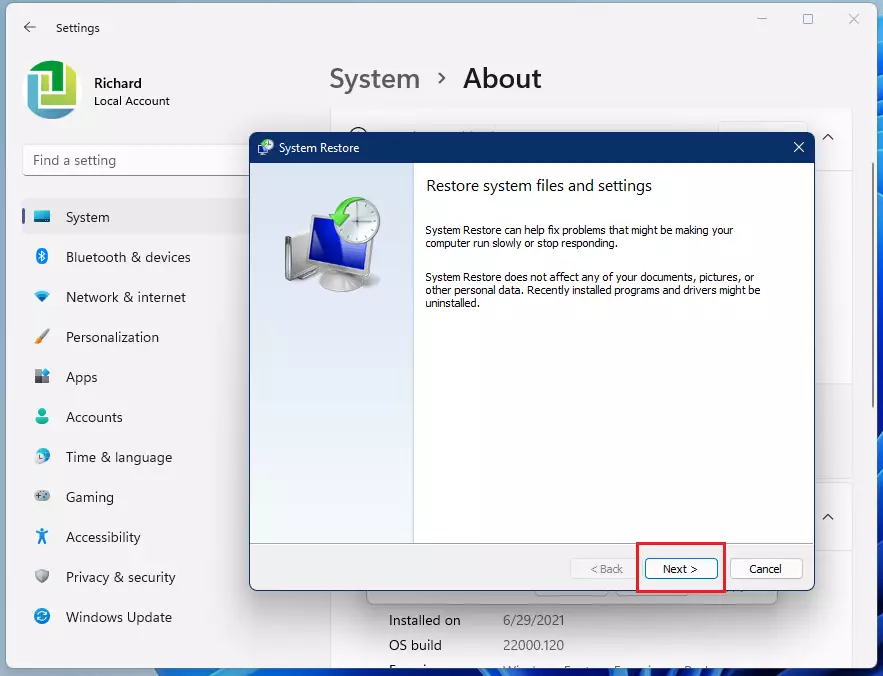
A new system restores wizard will launch. Click Next to continue to restore your PC from an earlier state.
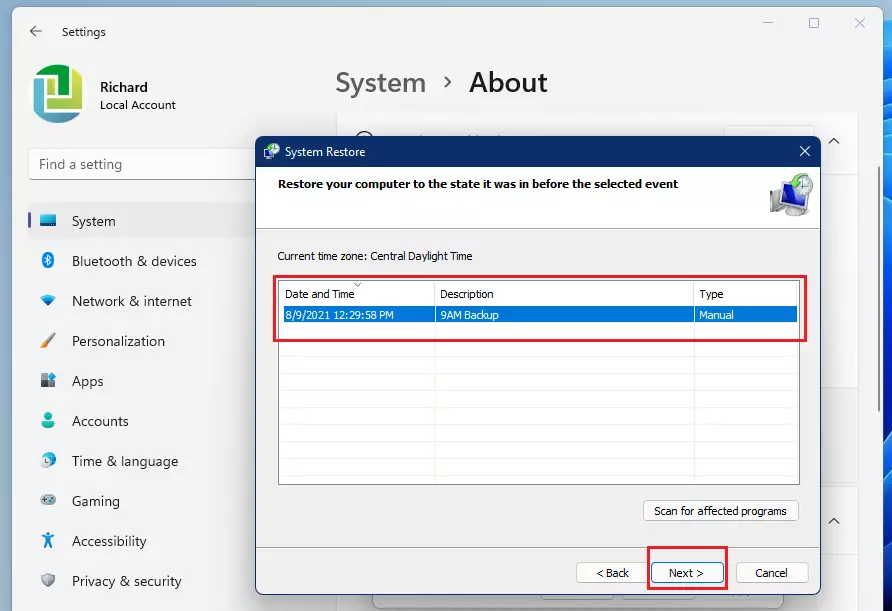
On the next screen, select a restore point from the list to restore to. Select a date before the recent changes, then click Next.
If you don’t see any restore points, it might be because system protection isn’t turned on.
Click Finish to confirm and start restoring your computer.
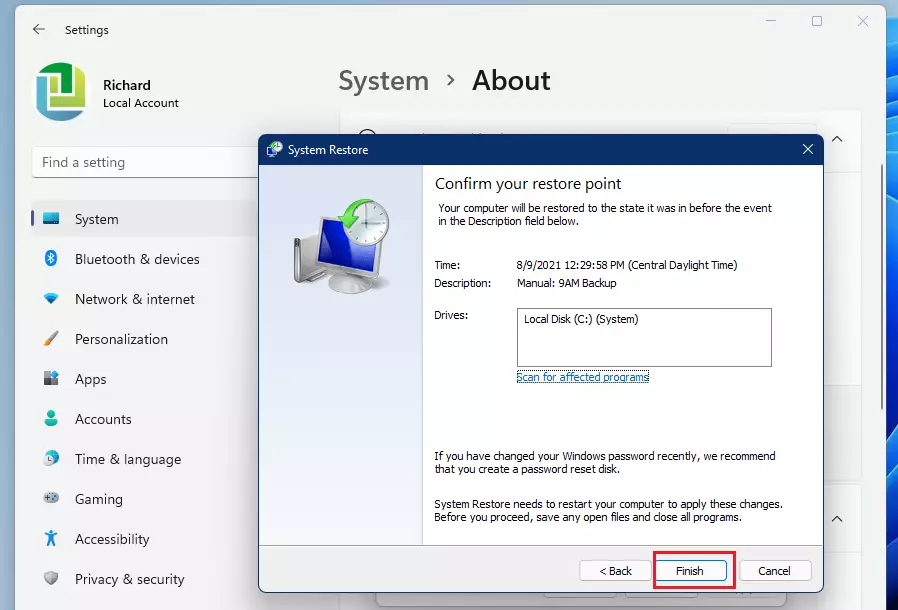
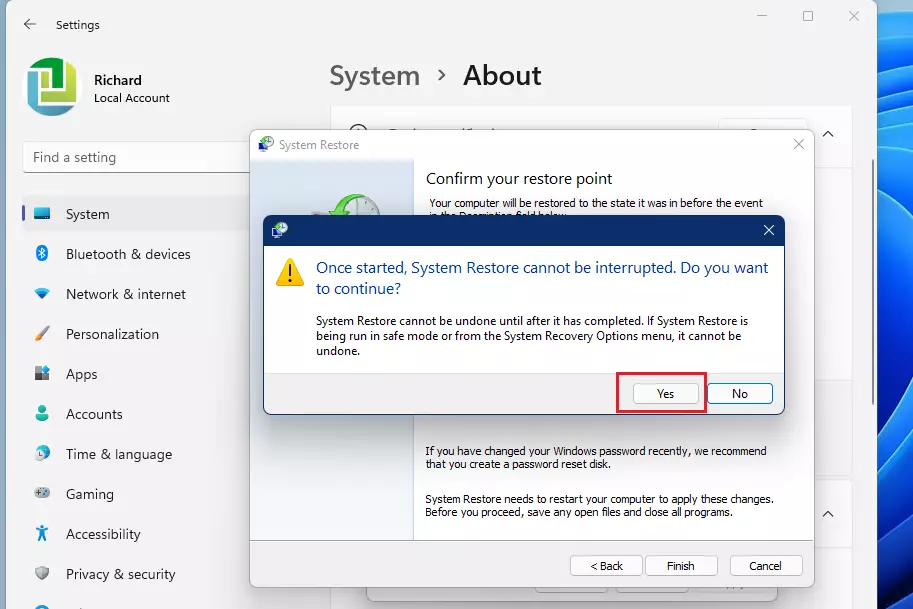
System restores can not be interrupted when started. Ensure you’re connected to a power source and have ample time to complete the process.
Once ready, click Yes.
Your System should begin restoring to an earlier state and may reboot several times.
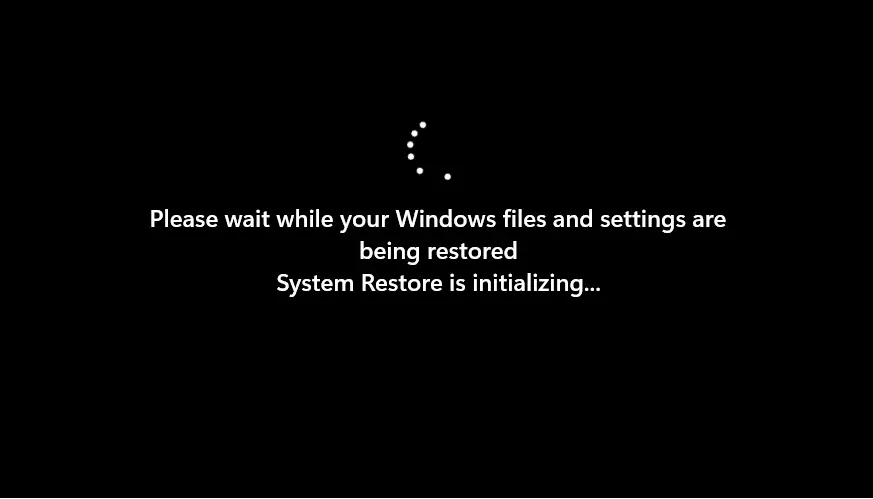
After that, your computer should be restored to the date selected above.
That should do it!
Conclusion:
- Restoring your Windows 11 PC from a restore point can effectively address issues caused by recent changes, such as app installations or Windows updates.
- System Restore does not affect your files, ensuring data safety while reverting system settings to a stable state.
- It’s essential to select a restore point dated before the occurrence of the problems for a successful restoration.
- Ensure your PC is connected to a power source during the process to avoid interruptions.
- Regularly check and enable System Protection to have restore points available when needed.
By following these steps, you can effectively manage system issues and maintain the performance of your Windows 11 computer.


Leave a Reply Cancel reply