

This tutorial shows you how to reset the screenshot counter back to 1 in and Windows 11.
Why Reset Your Screenshot Counter?
When you take a screenshot using the Windows + Print Screen keyboard shortcut, it saves to your C:\Users\(user-name)\Pictures\Screenshots folder. Each file is named Screenshot (#).png. The # number increases by one each time you take a screenshot. If you want to start fresh with Screenshot (1).png instead of Screenshot (47).png, you can reset this counter.
What Happens When Done?
After resetting, your next screenshot will be named Screenshot (1).png instead of continuing with the next number in sequence.
Option One: Use Command Line
- Open Windows Terminal. Choose either Windows PowerShell or Command Prompt.
- Copy and paste this command into Windows Terminal and press Enter:
REG ADD HKCU\SOFTWARE\Microsoft\Windows\CurrentVersion\Explorer /V ScreenshotIndex /T REG_DWORD /D 1 /F - [Admin Required] You may need to approve this action.
- If you want screenshots to start at a different number instead of 1, change the final “1” in the command to that number.
- Close Windows Terminal when done.

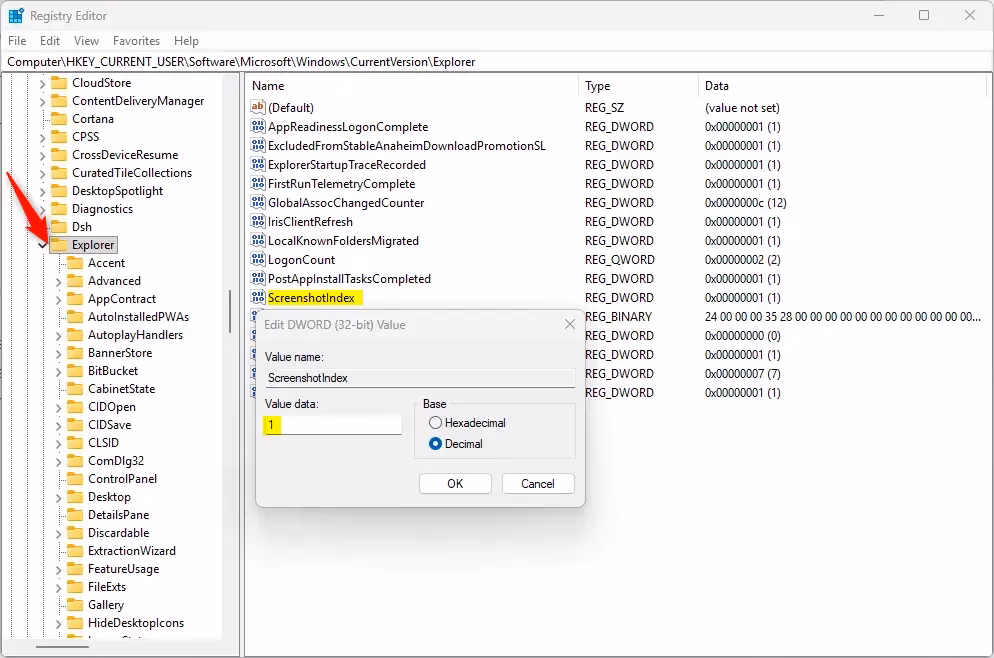
Option Two: Use Registry Editor
- Open Windows Terminal.
- Browse to the Registry key HKEY_CURRENT_USER\SOFTWARE\Microsoft\Windows\CurrentVersion\Explorer
- Edit the ScreenshotIndex REG_DWORD and change the value to 1.
Summary
Resetting your screenshot counter is quick and easy. You can use either Windows Terminal with a command or the Registry Editor. Both methods change the ScreenshotIndex setting back to 1, so your next screenshot starts fresh. This is helpful if you want to organize your screenshots into smaller numbered sequences instead of having one long-running counter.


Leave a Reply Cancel reply