
This post explains how students and new users can remove or uninstall extra language packs or keyboard languages in Windows 11.
When installing Windows, you are given the option to select your preferred language. When you do, Windows uses your preferred language for features like Settings and File Explorer.
After installing Windows on your device, you can install additional language packs to add to your list of Windows display languages. Language packs can include features to support text-to-speech, speech recognition, handwriting, keyboard, optical character recognition, and more.
Suppose you have extra language packs and keyboard languages installed with optional features. In that case, you can remove them so they are not using valuable space, especially if your device has low storage space.
The steps below show you how to remove extra language packs or keyboard languages in Windows 11.
How to remove extra language packs in Windows 11
As mentioned above, Windows uses your preferred language for features like Settings and File Explorer. However, the steps below show you how if you have installed additional language packs and want to remove them from your system.
Below is how to remove a language from Windows 11
Windows 11 has a centralized location for the majority of its settings. From system configurations to creating new users and updating Windows, all can be done from the System Settings pane.
To get to System Settings, you can use the Windows key + I shortcut or click on Start ==> Settings, as shown in the image below:

Alternatively, you can use the search box on the taskbar to search for Settings. Then select to open it.
Windows Settings pane should look similar to the image below. For example, click Time & language in Windows Settings, then on the right pane, and select the Language & region tile to expand it.

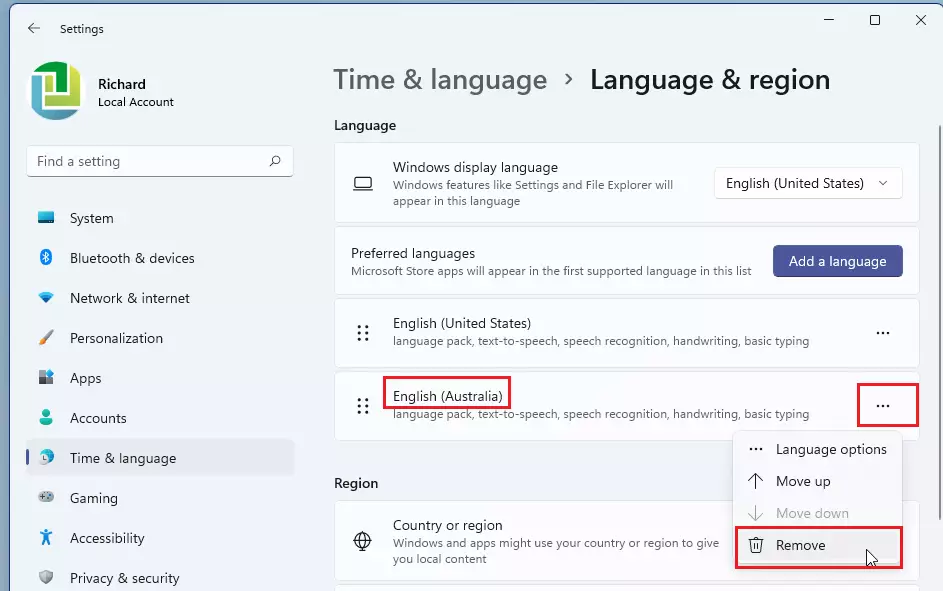
On the Language & region settings pane, under Preferred Languages, locate the language you want to remove.
Then, select the Options (ellipses) for the language you want to uninstall and click on Remove.
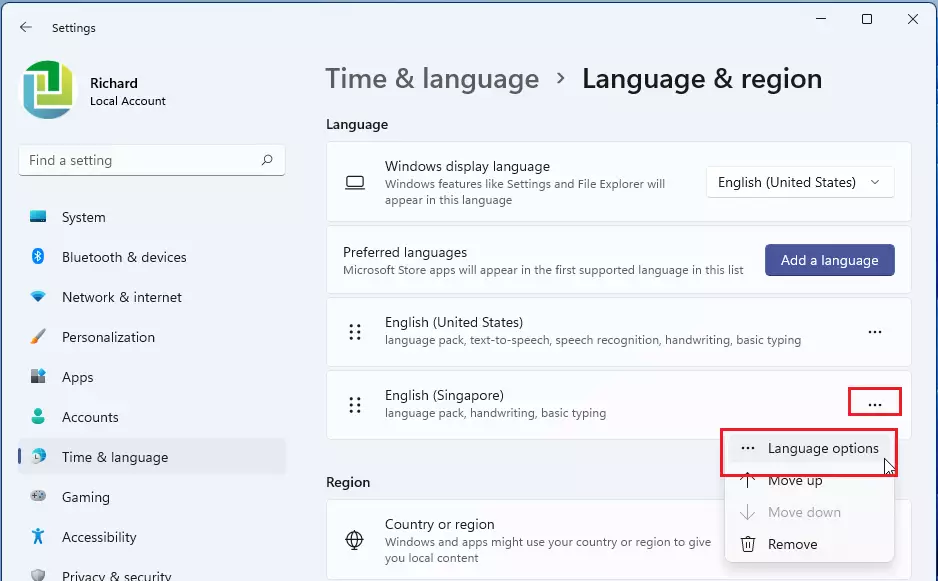
Select the language and Options (ellipses) to remove an individual keyboard. Next, language options on the context menu, scroll down to the Keyboards section, select the keyboard you want to remove and select Remove.
That should do it! You have successfully removed a preferred language in Windows 11. Under the Preferred Languages tile, you’ll see that the language pack you installed is gone.
Conclusion:
- Removing extra language packs and keyboard languages helps free up valuable storage space on your device.
- The process is straightforward and can be done through the System Settings in Windows 11.
- Regularly reviewing and managing installed languages can enhance system performance.
- Ensure you keep only the languages you actively use for a more personalized user experience.
- Follow these steps anytime you need to adjust your language settings in Windows 11.


Leave a Reply Cancel reply