
This article explains how to mute your microphone when joining a Zoom meeting in Windows 11.
Zoom is a video conferencing and online meeting platform that allows users to connect remotely. It offers Video and audio conferencing, screen sharing, and recording features.
There are many settings one can configure in the Zoom app on Windows. Users can download and install, start Zoom automatically when Windows starts, use dual monitors, turn Video and audio on or off screen lock, and more.
When you use Zoom on Windows, you can mute your microphone when joining meetings. Your microphone will be unmuted before you join a meeting by default. Instead of manually muting your mic, you can configure Zoom to mute your microphone when joining meetings.
It is a good practice to mute your microphone when joining Zoom meetings to avoid unwanted noise or interruptions. When multiple people are in a meeting, background noise can be very distracting and make it difficult for others to concentrate.
You can eliminate background noise by muting your microphone; others can hear you clearly when you speak. Additionally, muting your microphone during a meeting can help prevent any accidental interruptions caused by background noise or other sounds.
Mute microphone when joining Zoom meetings
As mentioned above, you can configure the Zoom app on Windows to mute your microphone when joining meetings to avoid unwanted noise or interruptions.
You don’t always have to remember to do this before joining a meeting.
Here’s how to do it!
First, open the Zoom app. You can do that by clicking Start and selecting the ‘All apps’ button on the Start menu.
Under All apps, scroll down alphabetically to the bottom and open the Zoom app.

When the Zoom app opens, click the Settings (gear) to open its Setting pane.

Alternatively, click on your profile image at the top right and select Settings on the context menu.

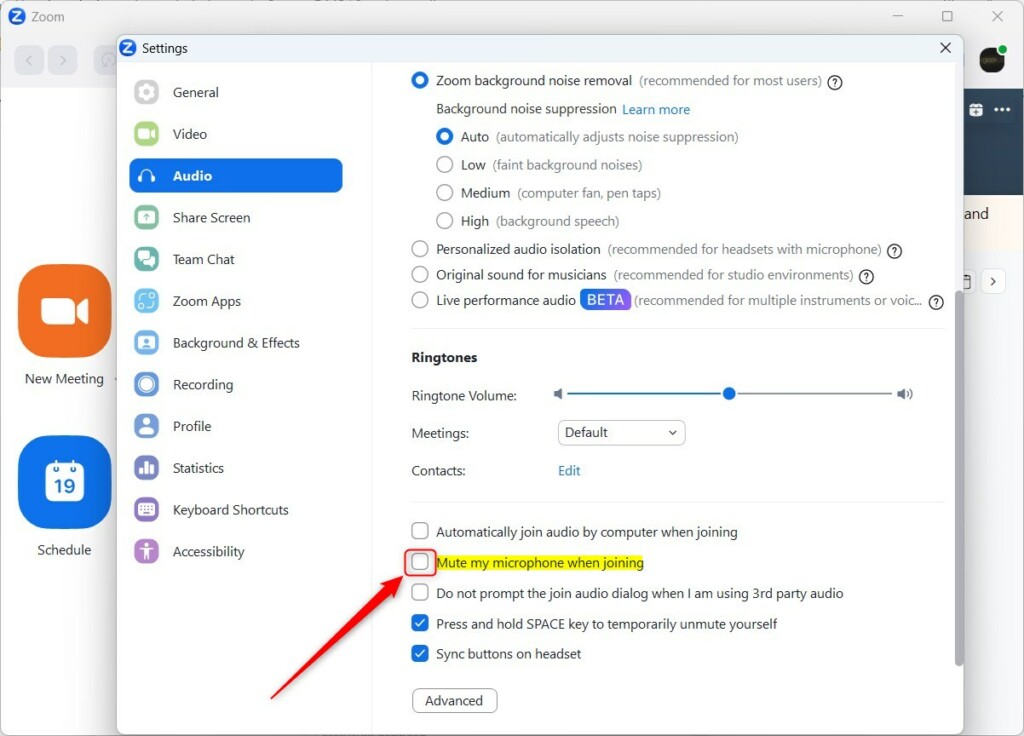
When the Settings pane opens, under Audio, check the box next to the line that reads “Mute my microphone when joining” to enable this feature.
To disable it, uncheck the box.
Exit the Zoom app to save your changes.
That should do it!
Conclusion:
- Muting your microphone when joining Zoom meetings in Windows 11 can help reduce background noise and prevent accidental interruptions caused by other sounds.
- Configuring Zoom to mute your microphone by default is a good practice to ensure a smooth and interruption-free meeting experience.
- This article provides step-by-step instructions on enabling the setting to mute your microphone when joining Zoom meetings, allowing for clear and focused communication.


Leave a Reply