
This article explains how to map shares from the host computer to VirtualBox guest machines in Windows 11.
You can easily copy small text and files from the VirtualBox host machine to its virtual machines.
However, when you want larger files and other data to the virtual machines, you can’t simply copy and paste them into the virtual machines. VirtualBox has a shared folder feature that allows users to share folders on the host with virtual machines easily; the steps below will show you how to do that.
The shared folder feature can also mount ISO files and other portable storage devices that don’t work directly with the guest machines.
Below is how to share a folder on the VirtualBox host machine with guest machines in Windows 11.
First, learn how to install VirtualBox on Windows 11:
How to install VirtualBox on Windows 11
How to map a folder in a VirtualBox VM on Windows 11
As mentioned above, VirtualBox allows users to share folders on the host with virtual machines easily using its shared folder feature.
Below is how to do that.
For this to work, you must install VirtualBox guest tools on the virtual machine. This post shows you how to install VirtualBox on Windows 11.
Open VirtualBox. Select the Windows 11 virtual machine and click Settings, or right-click on the machine and select Settings.
On the Settings window, click Shared Folders.
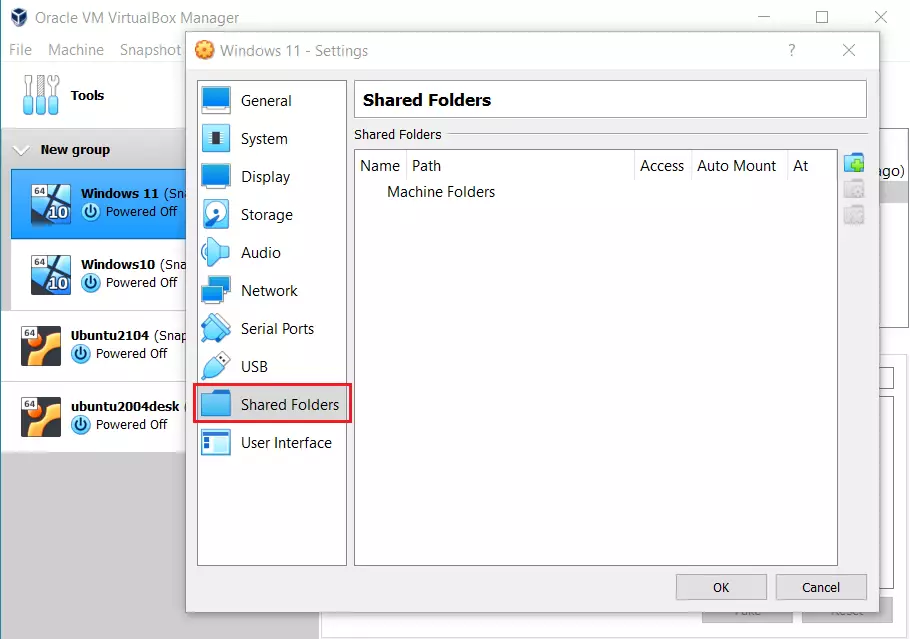
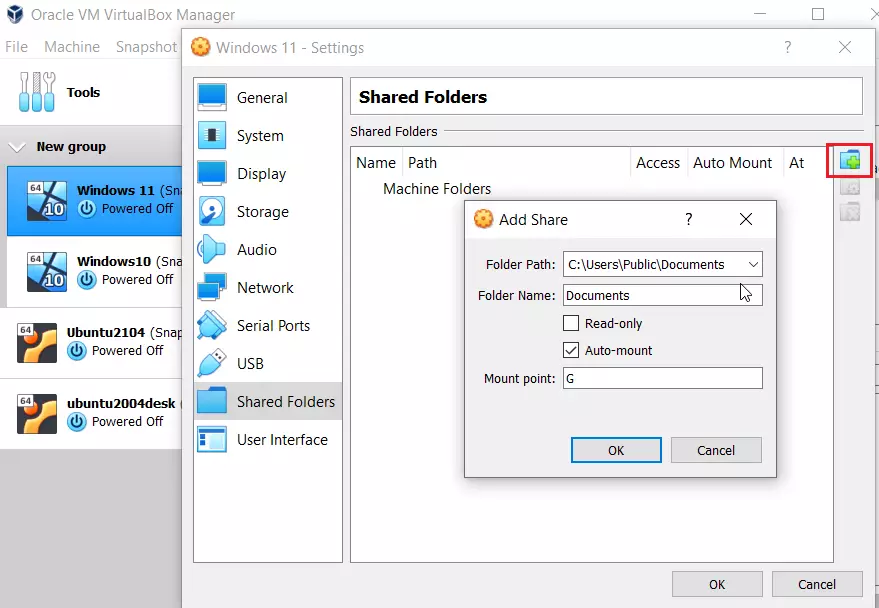
On the Shared Folders window, click the Add new folder button (green plus).
In the Folder Path, specify the path for the local folder you want to share with the virtual machine. Alternatively, you can click the down-arrow arrow and select Other to browse and select the folder you want to share.
Type in or accept the default folder name in the Folder Name field.
The Read-only box is optional. The read-only option prevents saving files into the folder from the virtual machine.
The auto-mount box is optional when you check it; whenever the virtual machine boots up, it will automatically mount the folder.
In the Mount point field, specify the drive letter to map the folder as a drive on the virtual machine. For this tutorial, we select G:
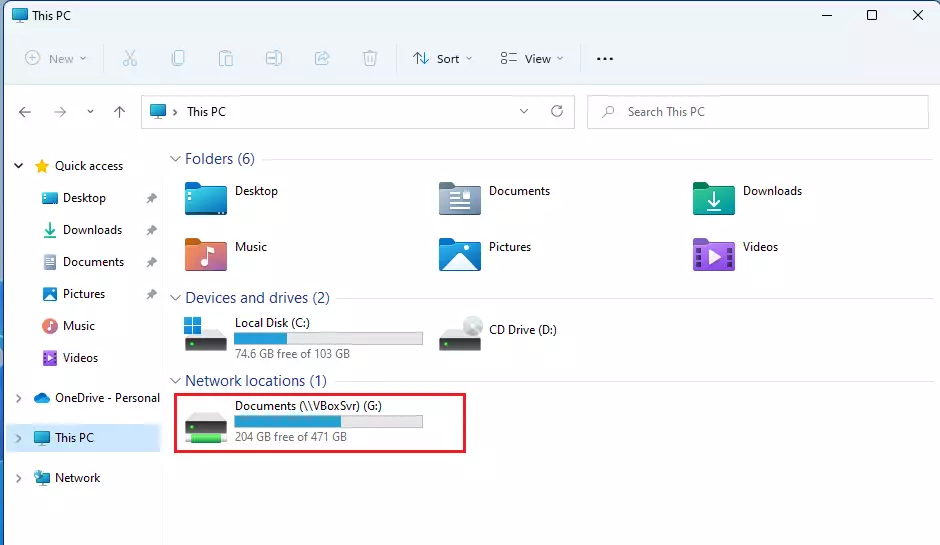
Click OK to complete the setup and boot the machine.
After you boot the virtual machine and log in, you should see a mapped folder with the G: drive letter in the Windows virtual machine.
If you have turned on Network discovery and Public folder sharing, you will also be able to see the mapped folder in the network folder under \\VBOXSRV\
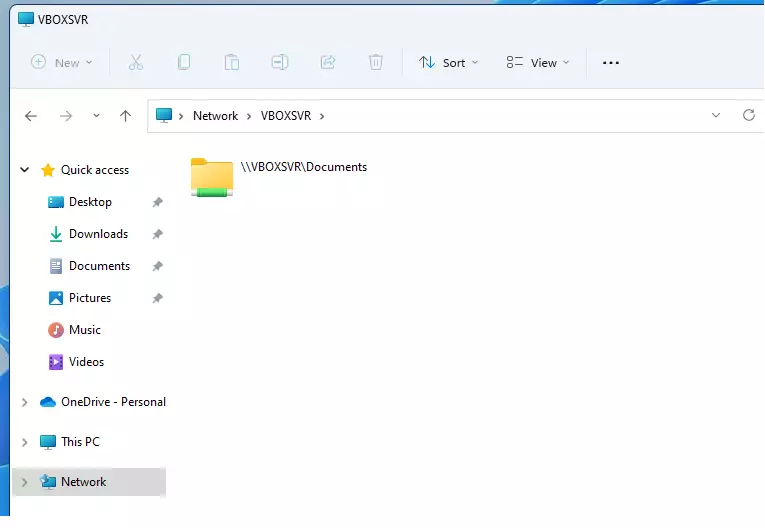
Whatever you have in the shared folder on the host machine will be accessible from the guest machines.
That should do it!
Conclusion:
- VirtualBox’s shared folder feature simplifies transferring large files between hosts and guest machines.
- The setup process involves installing VirtualBox guest tools, configuring shared folders in the settings, and rebooting the virtual machine.
- Users can customize folder permissions, such as read-only access and automatic mounting upon startup.
- Mapped folders appear as drive letters in the guest OS, ensuring easy accessibility.
- Ensuring network discovery is enabled enhances the visibility of shared folders across the network.
With these steps, you can efficiently manage your files between the host and VirtualBox guest machines in Windows 11.
Leave a Reply Cancel reply