
This article explains how to see or locate other computers on the same network in Windows 11.
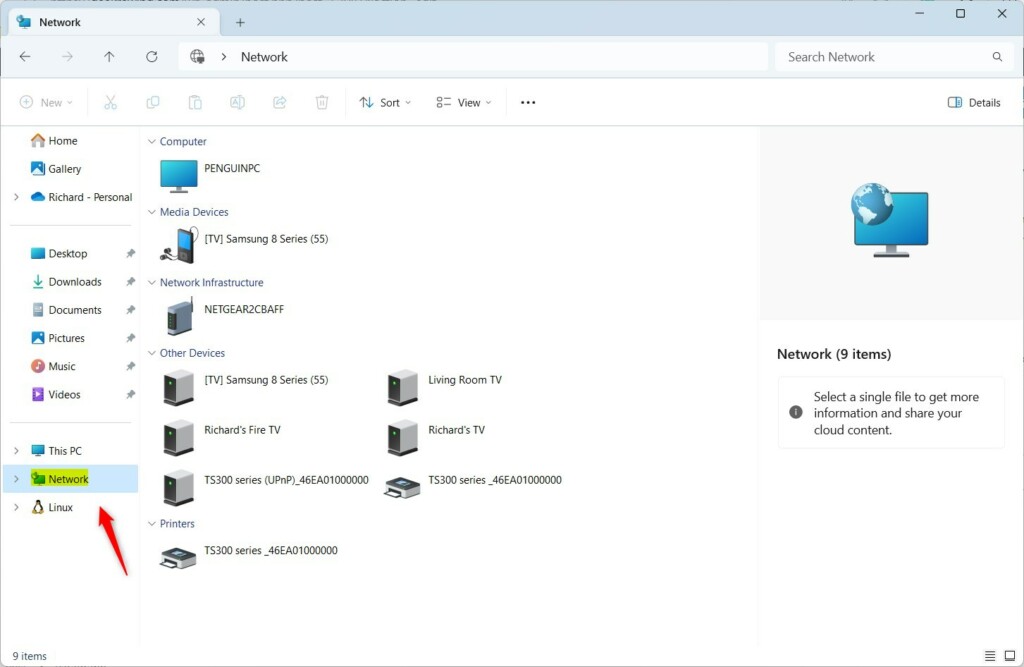
Windows automatically discovers computers and devices on the same network within a shared workgroup. These devices are grouped in Windows File Explorer -> Network folder.
A network is a group of devices connected to the same Domain or workgroup that can share things, such as your internet connection, File, folder resources, or printer.
Devices at your home using the same network (internet) and in the default workgroup are in your home network. Devices at your office are in your office network.
Below are some of the steps one can use to find or locate computers and other devices in a network on Windows 11.
See network devices in Windows 11
As mentioned above, devices that share the same network and Domain are discoverable in Windows 11.
They are grouped in File Explorer -> Network folder.
Here’s how to find devices on a network in Windows 11.
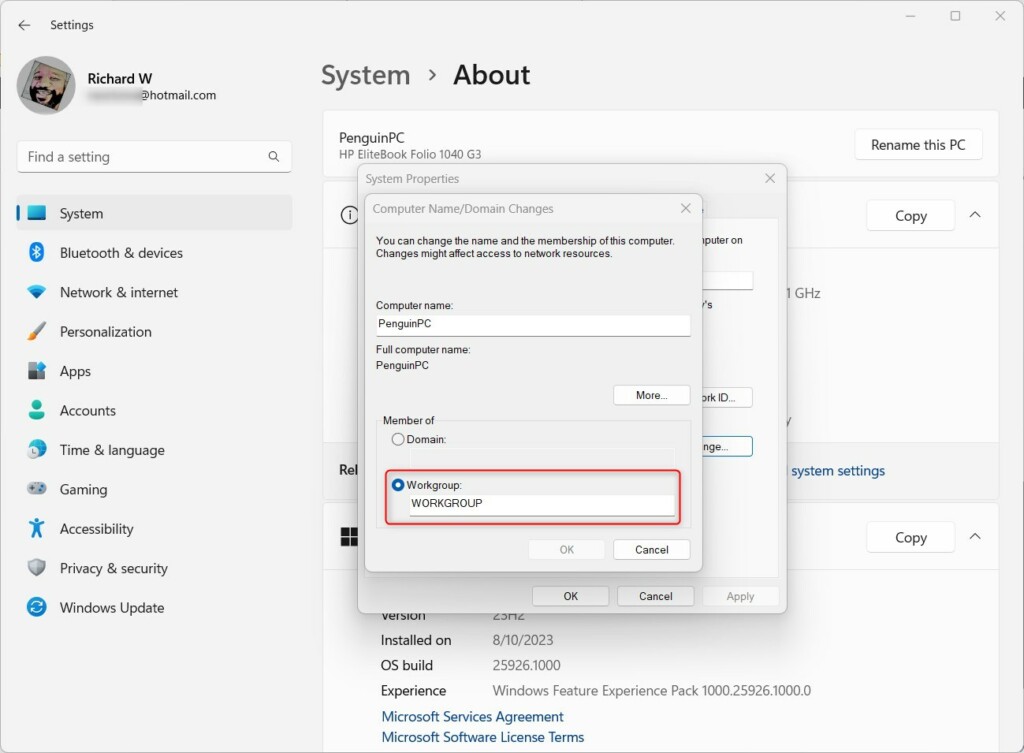
Change workgroup
First, ensure that all devices are in the same workgroup. To see or locate network devices in Windows, they must be in the same workgroup.
Read the post below to learn how to change a device’s workgroup in Windows 11.
How to change workgroup in Windows 11
Go to Start -> Settings -> About -> Advanced system settings (click Domain or workgroup) link -> on the Computer tab, click the Change button.
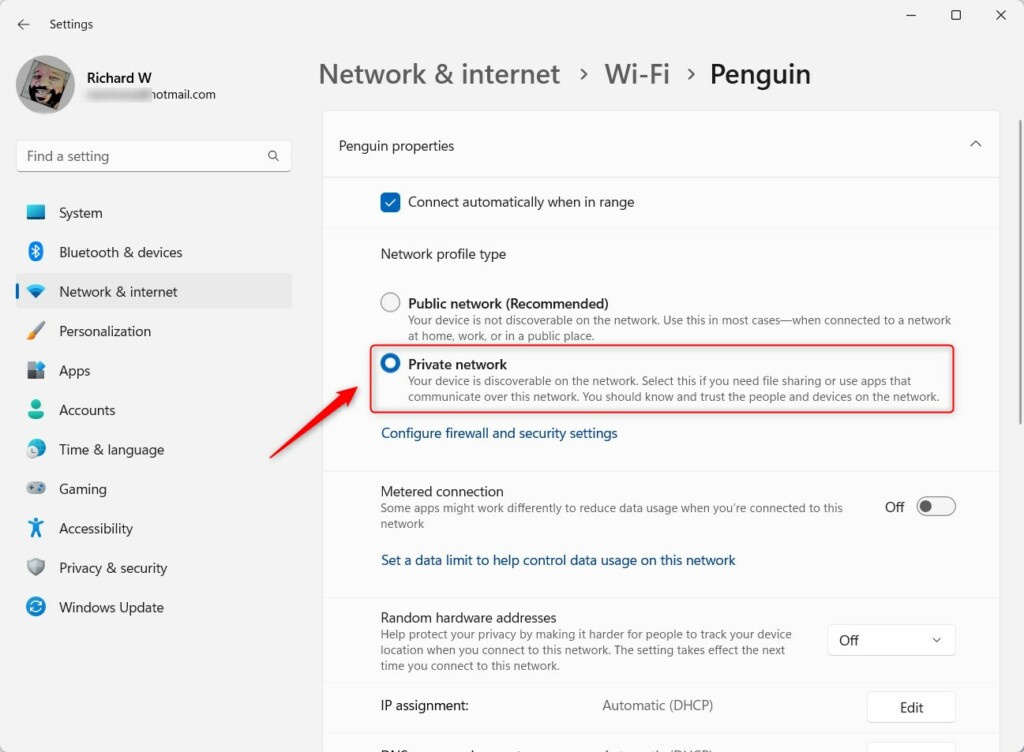
Change to a Private network
Once computers and devices share the same workgroup set up above, you must also ensure they are in the same network.
Read the post below to learn how to change a computer network profile.
Change computers network profile in Windows 11
Go to Start -> Settings -> Network & internet -> Network type (ex. Wi-Fi) -> Network name -> Properties.
Then select Private Network.
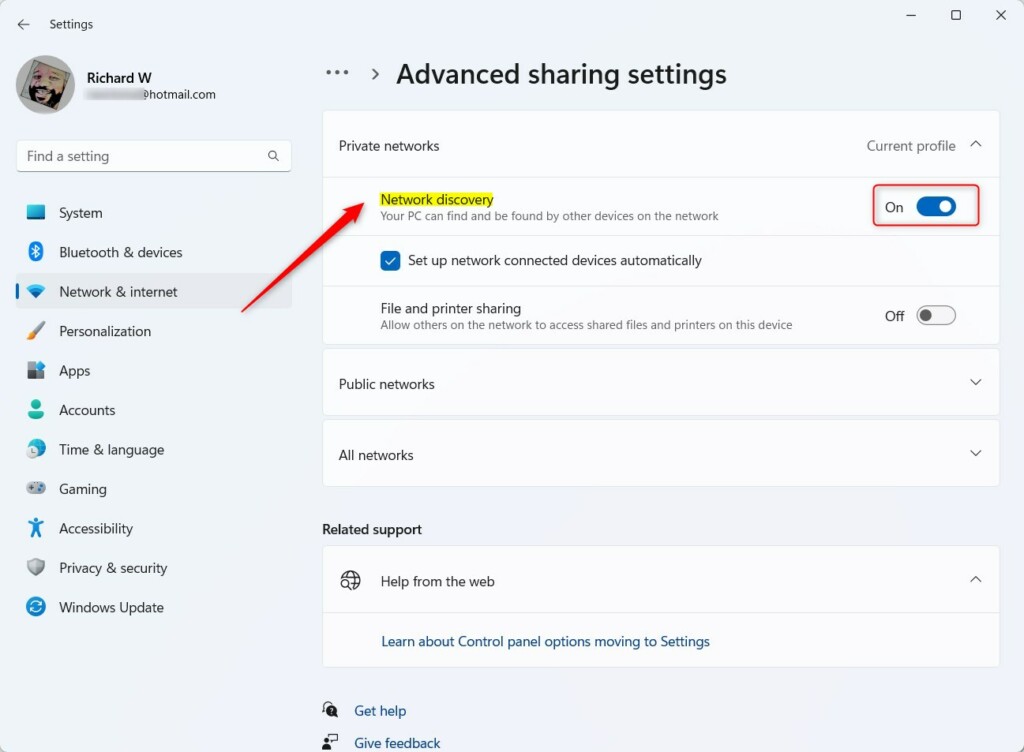
Turn on Network discovery
Yet, computers and devices must also be discoverable before they can be seen or located on a network.
Read the post below to turn network discovery on or off
Turn Network discovery On or Off in Windows 11
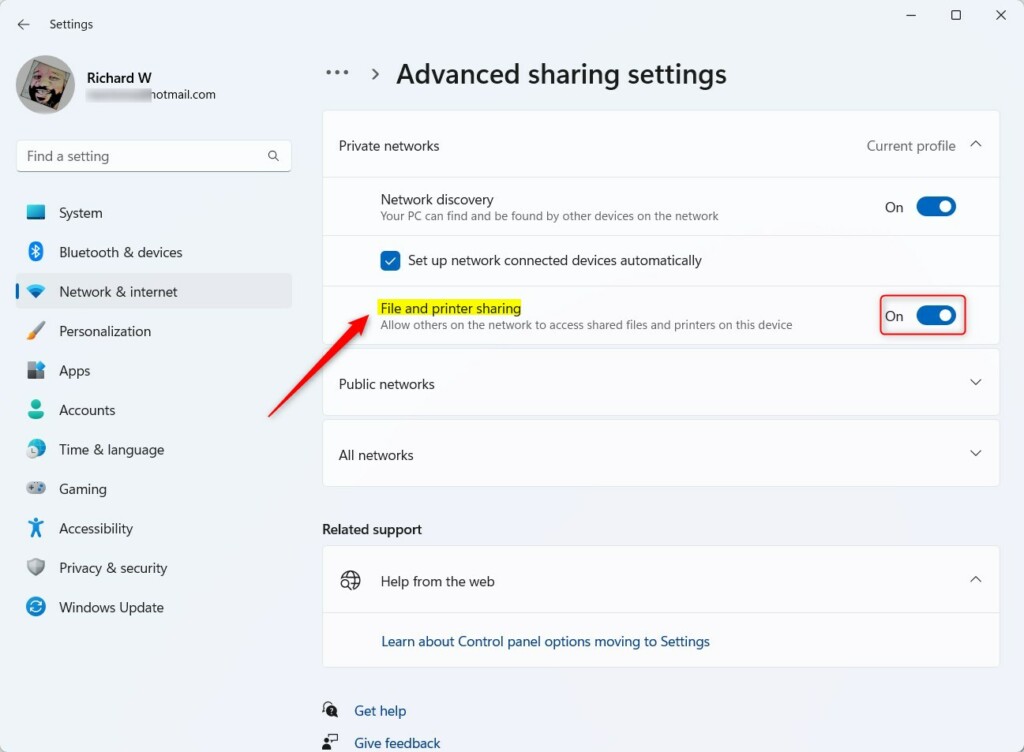
Go to Start -> Settings -> Network & internet -> Advanced network settings -> Advanced shared settings.
Then turn on or off Network discovery.
Turn on File and printer sharing
Finally, devices on a network must have File and printer sharing for them to appear in the Windows File Explorer -> Network folder.
Read the post below to turn on file and printer sharing.
How to turn File and printer sharing on or off in Windows 11
Go to Start -> Settings -> Network & internet -> Advanced network settings -> Advanced shared settings.
Then turn on File and printer sharing.
Once all the steps above are completed, the computer should appear in the Network folder of Windows File Explorer.
That should do it
Conclusion:
- Configuring an adequate workgroup and network is crucial for devices to be discoverable on the same network in Windows 11.
- Enabling network discovery and file sharing are essential steps for devices to appear in the Network folder of Windows File Explorer.
- Following the outlined steps will ensure a seamless process for locating computers and other devices on a network in Windows 11.
Leave a Reply Cancel reply