
This post shows students and new users steps to install and use the TeamViewer remote desktop tool when using Windows 11 to provide or allow remote support and desktop sharing.
TeamViewer is a cross-platform remote support software that’s free for personal use. If you want to use it to provide remote support services for your business or non-personal use, you must purchase a license to abide by its licensing terms.
There are multiple remote support tools available for Windows users. Many of these tools are cross-platform – meaning they work on other operating systems, like macOS, Linux, and others. However, TeamViewer is probably the most popular among them all.
You can provide remote support services and use TeamViewer to connect with contacts and teams through secure videoconferencing, VoIP calls, instant chat, screen sharing, and more across devices and platforms worldwide.
To start installing TeamViewer in Windows 11, follow the steps below.
How to install and use TeamViewer in Windows 11
Installing TeamViewer in Windows is pretty straightforward. All you need to do is download the installer package, run it, and you’re done.
Click the link below to go to TeamViewer’s download web page.
Click on the Download button – 64-bit only for Windows 11 systems.
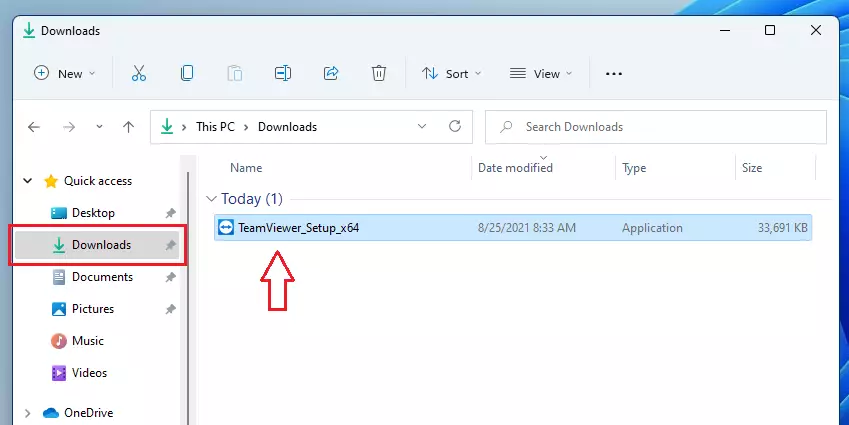
Once downloaded, the TeamViewer_Setup_x64 file should be saved in your Downloads folder. Go to the Downloads folder and double-click the file to begin installing.
During the installation, you’ll be prompted to choose the installation types. Depending on your situation, you should choose one. In most cases, the Default installation will be fine.
However, suppose you need to access the computer remotely without confirming a connection every time. In that case, you will want to choose the Unattended Access option.
On the other hand, if you simply want to run TeamViewer without installing it, then use the option Run only (the one they use).
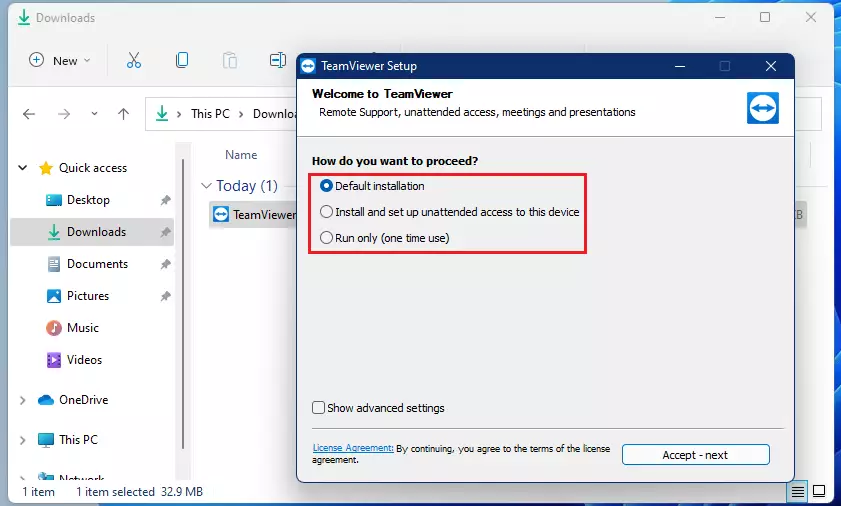
For this tutorial, we’re choosing the default installation.
Select how you’d want to use TeamViewer at the end of the installation. As mentioned above, you must purchase a license if you use it for commercial purposes.
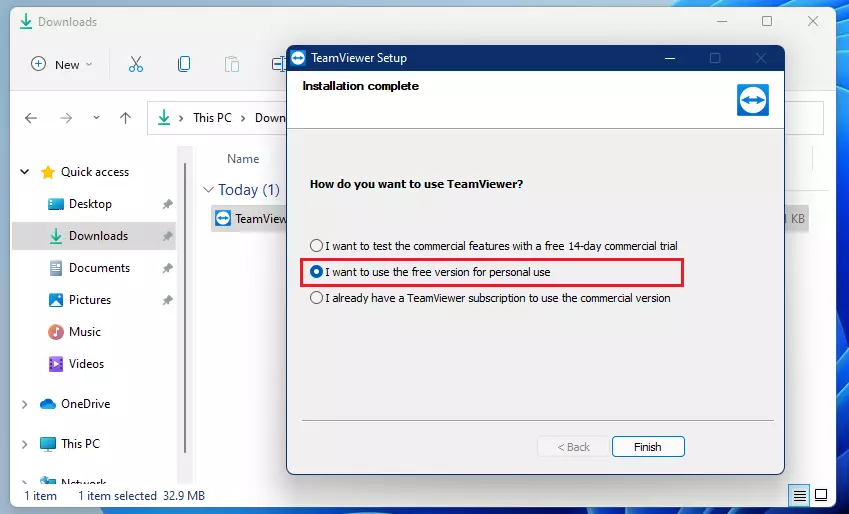
For this tutorial, we’re going to use TeamViewer for personal use. Once selected, click Finish to complete the installation.
How to use TeamViewer in Windows 11
Now that TeamViewer is installed, a TeamViewer icon should be added to your desktop or your application list. Open TeamViewer and begin using it.
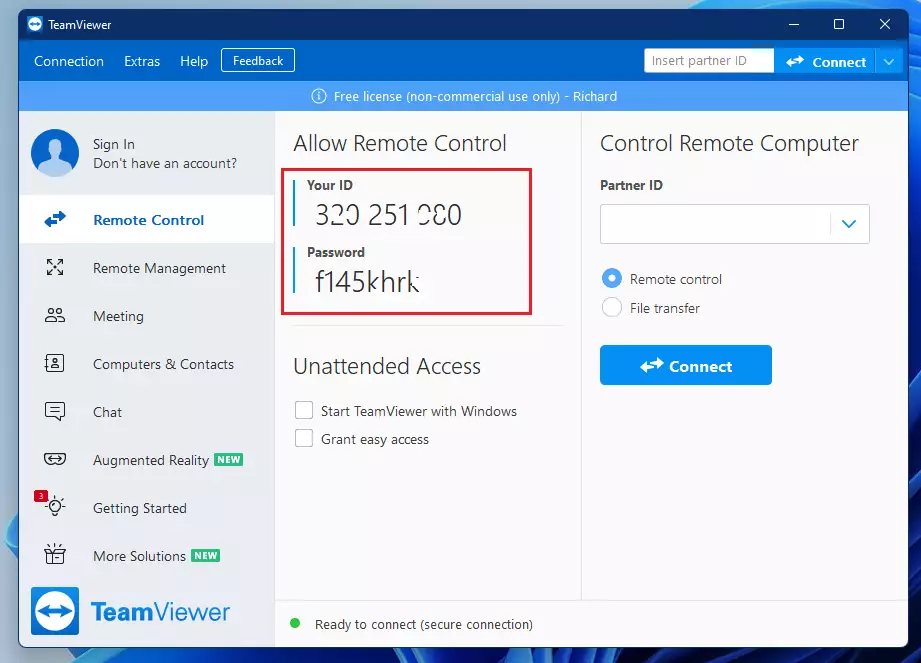
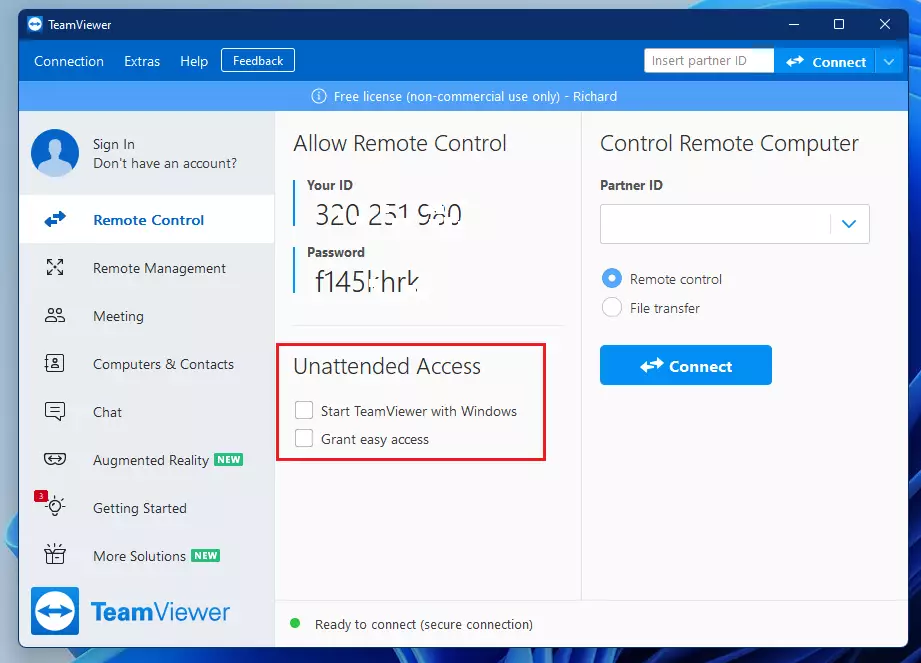
TeamViewer will provide you with an ID and password. Please give them your ID and password to allow others using TeamViewer to access your computer. You’ll also have to confirm and accept their connection to your computer when they connect.
If your partner will be connecting frequently and you probably won’t always have time to confirm and accept, check the boxes under Unattended Access Start TeamViewer with Windows, and Grant easy access.
Finally, one last change you’ll want to make is to show your partner the cursor while connected to your computer. Click on Extras ==> Options ==> Remote control. Then check the box to Show your partner’s cursor.
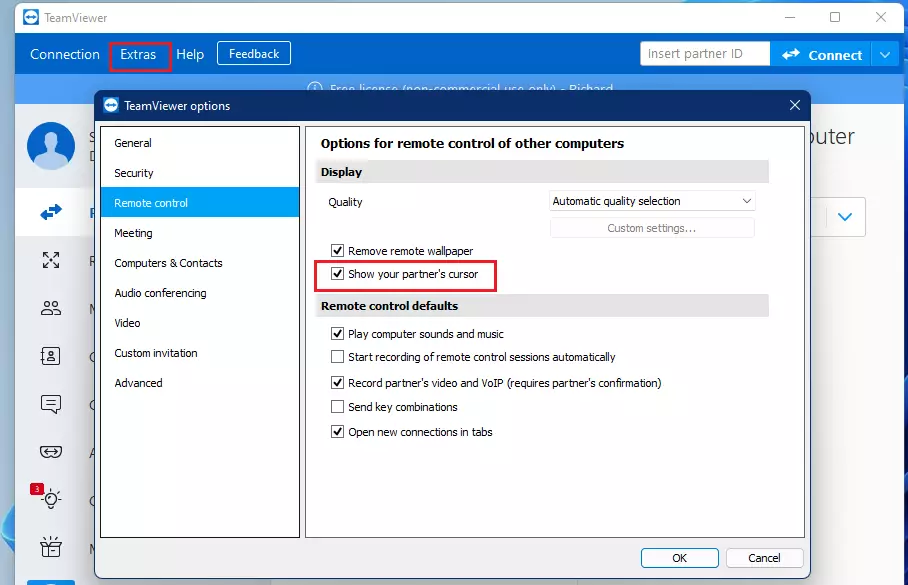
Save, and you’re done.
You can choose from many more settings depending on your environment. Go through the settings and see what makes sense in your case.
Conclusion:
- TeamViewer is a user-friendly and versatile remote desktop tool suitable for both personal and professional use.
- The installation process on Windows 11 is straightforward, requiring only a few simple steps.
- Users can choose between different installation types based on their remote support needs.
- Unattended access features enhance convenience for frequent connections.
- Customizable settings allow users to tailor the experience according to their preferences.
- Always ensure compliance with licensing terms if using TeamViewer for commercial purposes.
- Effective communication and collaboration are made easier with TeamViewer’s various capabilities.


Leave a Reply to How to Turn On or Off Remote Assistance Connections in Windows 11 - Geek Rewind Cancel reply