How to Install Fleet Osquery Manager on Ubuntu Linux
You can install Fleet OSquery Manager on Ubuntu Linux to centralize the management and monitoring of your endpoints.
Fleet OSquery Manager provides a powerful web-based interface for running live queries, collecting inventory data, and detecting security threats across your entire infrastructure. It leverages the capabilities of OSquery, an open-source tool that exposes your operating system as a high-performance relational database.
This setup allows you to gain real-time visibility and control over every machine in your network. For example, you can use Fleet to quickly identify all Ubuntu 22.04 LTS servers running a specific version of a vulnerable package.
Install Fleet Osquery Manager on Ubuntu by first setting up MariaDB and Redis. Then, install Fleet itself, ideally via Docker, or by downloading the binary. Finally, configure a systemd service and optionally set up Nginx as a reverse proxy for SSL.
Install MariaDB Database Server
Fleet needs a database to store its information. MariaDB is a great choice for this task.
Run these commands to install it:
sudo apt update
sudo apt install mariadb-server
After installation, make sure the service starts whenever your computer turns on:
sudo systemctl stop mariadb
sudo systemctl start mariadb
sudo systemctl enable mariadb
Setup Fleet Database
Now, we need to create a specific place in the database for Fleet. Use the security script first to lock things down:
sudo mariadb-secure-installation
Follow the prompts to remove guest users and secure the root account (your main administrator account). Next, log in to MariaDB using this command: `sudo mariadb -u root -p`. Then, inside the MariaDB prompt, run these commands to create the database and user:
CREATE DATABASE fleetdb;
CREATE USER ‘fleetuser’@’localhost’ IDENTIFIED BY ‘your_strong_password’;
GRANT ALL PRIVILEGES ON fleetdb.* TO ‘fleetuser’@’localhost’;
FLUSH PRIVILEGES;
EXIT;
Install Redis Server
Fleet uses Redis to handle quick data tasks. Install it with this command:
sudo apt install redis
sudo systemctl enable redis-server
sudo systemctl start redis-server
Install Fleet Osquery Manager
While you can run Fleet as a binary, using Docker is the recommended way to keep it updated and manageable.
Docker Deployment (Recommended)
Here’s how to get started with Docker Deployment:
First, install Docker on your Ubuntu system. Then, create a folder for your configuration and run Fleet as a container. This keeps your setup isolated and simple to update.
Manual Binary Installation
If you prefer not to use Docker, you can fetch the latest version automatically using this script:
LATEST_VERSION=$(curl -s https://api.github.com/repos/fleetdm/fleet/releases/latest | grep tag_name | cut -d ‘”‘ -f 4)
curl -LO https://github.com/fleetdm/fleet/releases/download/$LATEST_VERSION/fleet_$LATEST_VERSION_linux.tar.gz
tar xf fleet_$LATEST_VERSION_linux.tar.gz
sudo cp fleet /usr/local/bin/
Systemd Service
Create a service file so Fleet runs in the background:
sudo nano /etc/systemd/system/fleet.service
Add this configuration:
[Unit]
Description=Fleet Osquery Manager
After=network.target
[Service]
User=fleet
ExecStart=/usr/local/bin/fleet serve –config /etc/fleet/fleet.yml
Restart=always
[Install]
WantedBy=multi-user.target
Enable and start the service:
sudo systemctl daemon-reload
sudo systemctl enable fleet
sudo systemctl start fleet
Configure Nginx Reverse Proxy
It’s best practice to use Nginx (a web server) in front of Fleet to handle SSL (secure connections). Install Nginx and use Certbot to get a free Let’s Encrypt certificate.
sudo apt install nginx certbot python3-certbot-nginx
Create an Nginx configuration file that points to your server’s domain and forwards traffic to your Fleet port (usually 8080). Use certbot --nginx to automatically attach your SSL certificate to the site.
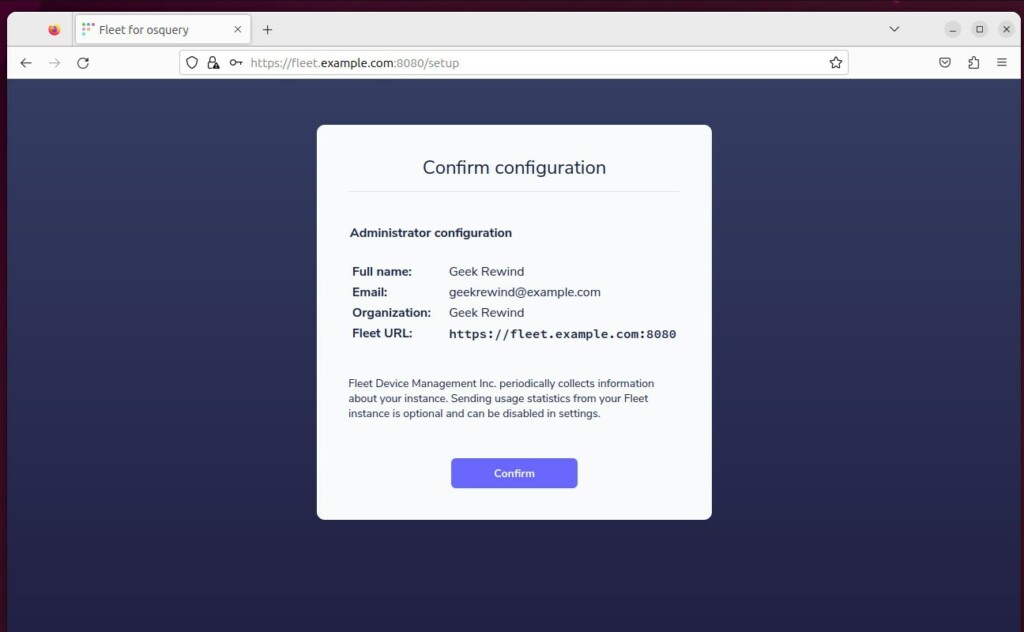
Once finished, visit your domain in a web browser to finalize the setup.
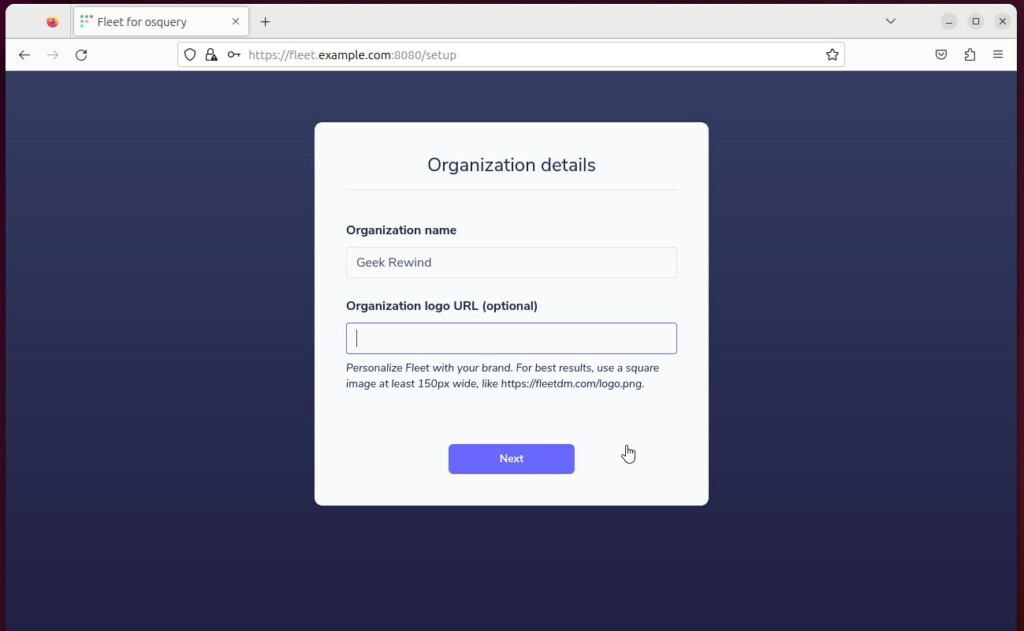
Follow the screen prompts to create your admin account.
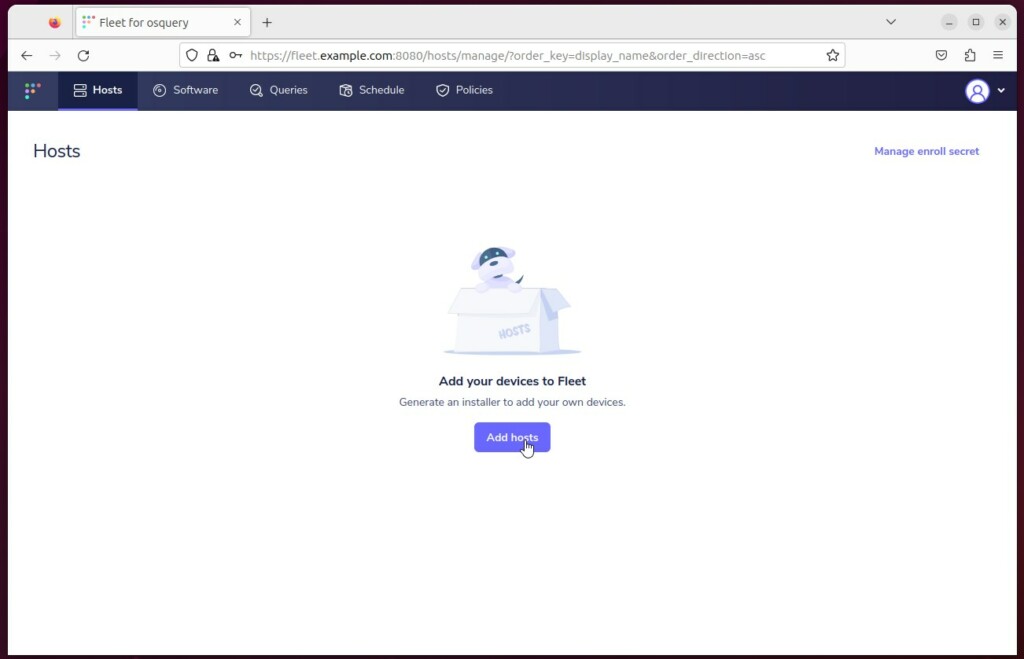
You can now add your devices to the dashboard.
Conclusion
You have successfully installed the Fleet Osquery Manager. Your system is now ready to track and manage your devices securely. By using modern tools like Docker and Nginx, you have ensured that your management platform remains stable and safe for years to come.
[Unit] [Service] [Install] [1] [5395] [5395]
Was this guide helpful?

About the Author
Richard
Tech Writer, IT Professional
Richard, a writer for Geek Rewind, is a tech enthusiast who loves breaking down complex IT topics into simple, easy-to-understand ideas. With years of hands-on experience in system administration and enterprise IT operations, he’s developed a knack for offering practical tips and solutions. Richard aims to make technology more accessible and actionable. He's deeply committed to the Geek Rewind community, always ready to answer questions and engage in discussions.

No comments yet — be the first to share your thoughts!