This article explains installing Flarum Forum with Nginx support on Ubuntu 24.04.
Installing Flarum with Nginx support on Ubuntu can offer several benefits. Nginx, a high-performance web server, is adept at handling concurrent connections and static content, making it a perfect fit for hosting web applications like Flarum.
Nginx also supports advanced features, such as reverse proxying, load balancing, and SSL/TLS termination, boost performance, and fortify your Flarum installation’s security.
By using Nginx with Flarum on Ubuntu, you can rest assured that you’re creating a stable and efficient web hosting environment for your forum.
The steps below will walk you through installing the Flarum next-generation forum platform with Nginx support on Ubuntu 24.04.
Install Nginx HTTP server on Ubuntu
Flarum requires a web server. This post will install and use the Nginx web server to run Flarum.
To do that, open the Ubuntu terminal and run the commands below to install the Nginx web server.
sudo apt update
sudo apt install nginx
Once Nginx is installed, the commands below can start, stop, and enable the Nginx web server to start automatically when your server boots up.
sudo systemctl stop nginx
sudo systemctl start nginx
sudo systemctl enable nginx
You can test the Nginx web server by opening your web browser and browsing to the server’s local host or IP address.
http://localhost
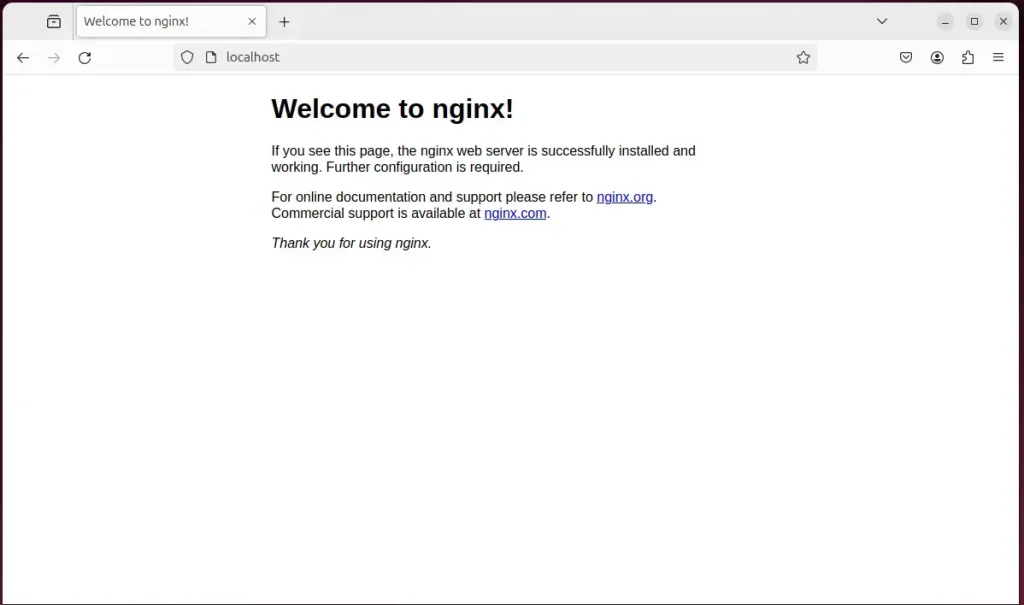
When you see “Welcome to nginx!” the Nginx HTTP server has been installed.
Additional help on installing Nginx on Ubuntu is in the link below.
How to install Nginx on Ubuntu
Install MariaDB database server on Ubuntu Linux
The next component that is required to run Flarum is a database server. This post will install and use the MariaDB database server to run Flarum.
To install and use the MariaDB database server, use the instructions below.
Open the Ubuntu terminal and run the commands below to install the MariaDB database server.
sudo apt update
sudo apt install mariadb-server
Once the MariaDB database server is installed, use the commands below to stop, start, and enable the MariaDB server to start automatically when the server boots.
sudo systemctl stop mariadb
sudo systemctl start mariadb
sudo systemctl enable mariadb
Run the following commands to validate and test if the MariaDB database server is installed successfully.
sudo mariadb
Once you run the commands above, it will log you onto the MariaDB console and display a message similar to the one below.
Welcome to the MariaDB monitor.  Commands end with ; or \g.
Your MariaDB connection id is 32
Server version: 10.11.2-MariaDB-1 Ubuntu 23.04

Copyright (c) 2000, 2018, Oracle, MariaDB Corporation Ab and others.

Type 'help;' or '\h' for help. Type '\c' to clear the current input statement.

MariaDB [(none)]>
The message tells you that the server is installed successfully.
Additional help on installing MariaDB.
Create a Flarum database
Upon successfully installing the MariaDB database server, create a blank database on the server specifically for the Flarum application.
As part of the setup, we will create a database named ‘flarumdb‘ and a corresponding user account called ‘flarumdbuser.’
Finally, we’ll grant the flarumdbuser full access to the flarumdb database.
All the database steps above can be done using the commands below:
But first, log on to the MariaDB database server:
sudo mariadb
Then run the commands below to complete the steps:
CREATE DATABASE flarumdb CHARACTER SET utf8mb4 COLLATE utf8mb4_general_ci;
CREATE USER flarumdbuser@localhost IDENTIFIED BY 'type_your_password_here';
GRANT ALL ON flarumdb.* TO flarumdbuser@localhost WITH GRANT OPTION;
FLUSH PRIVILEGES;
exit
Ensure to replace ‘type_your_password_here ‘with your password.
Install PHP-FPM on Ubuntu Linux
The last component you will need to run Flarum is PHP-FPM. The Flarum application is PHP-based and supports the latest versions of PHP-FPM.
Run the commands below to install PHP-FPM.
sudo apt install php-fpm php-intl php-mysql php-curl php-cli php-zip php-xml php-gd php-common php-mbstring php-xmlrpc php-json php-sqlite3 php-soap php-zip
Additional help on installing PHP
How to install PHP on Ubuntu Linux
Download Flarum files
Let’s begin downloading and configuring the Flarum files on Ubuntu Linux.
You may want to use the GitHub repository to get Flarum’s latest release. Install Composer, Curl, and other dependencies to get started.
sudo apt install curl git
curl -sS https://getcomposer.org/installer | sudo php -- --install-dir=/usr/local/bin --filename=composer
After installing curl and Composer above, change the directory to the Nginx root directory and download the Flarum packages from Github. Always replace the release number with the latest release.
sudo mkdir -p /var/www/{.cache,.config,flarum}
sudo chown -R www-data:www-data /var/www/{.cache,.config,flarum}
cd /var/www/flarum/
sudo -u www-data composer create-project flarum/flarum .
sudo chown -R www-data:www-data /var/www/flarum/
Once all the steps are done, configure the Nginx webserver to serve the Flarum content.
Run the commands below to create a Nginx virtual host file for Flarum.
sudo nano /etc/nginx/sites-available/flarum.conf
Then, copy and paste the content block below into the Nginx server block.
server {
        listen 80;
        listen [::]:80;
        server_name flarum.example.com;

        root /var/www/flarum/public;
        index index.php;

        error_log /var/log/nginx/flarum.error;
        access_log /var/log/nginx/flarum.access;

        include /var/www/flarum/.nginx.conf;

        location ~ \.php$ {
            fastcgi_pass unix:/run/php/php8.3-fpm.sock;
            fastcgi_param SCRIPT_FILENAME $document_root$fastcgi_script_name;
            include fastcgi_params;
            include snippets/fastcgi-php.conf;
        }
}
Save the file.
Then, run the commands below to enable the virtual host and restart the Nginx server.
sudo ln -s /etc/nginx/sites-available/flarum.conf /etc/nginx/sites-enabled/
sudo systemctl restart nginx.service
Setup Let’s Encrypt SSL/TLS for Flarum
You may want to install an SSL/TLS certificate to secure your Flarum site. Secure your Flarum installation with HTTPS from Let’s Encrypt.
Please read the post below for additional resources on installing and creating Let’s Encrypt SSL certificates for Nginx.
How to set up Let’s Encrypt SSL certificate for Nginx on Ubuntu Linux
Once you have restarted the Nginx web server, open your browser and browse to the server hostname or IP address defined in the Nginx server block.
http://flarum.example.com
A Flarum installation wizard page should appear. Enter the forum name database connection info and create an administrator account. Then, click “Install Flarum.“
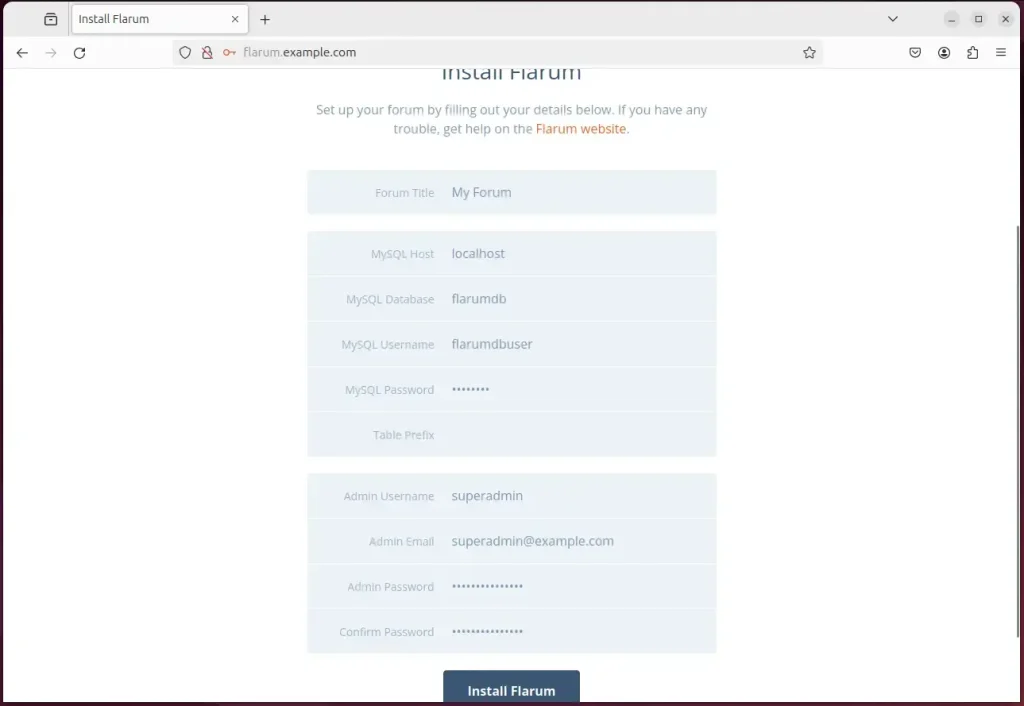
Your Flarum site should be ready to use.
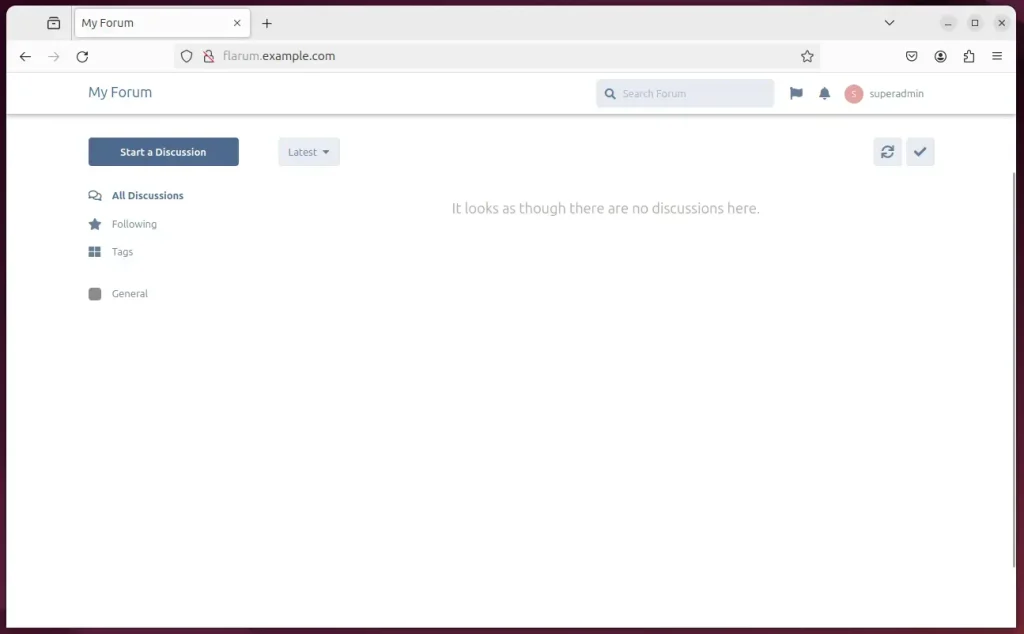
That should do it!
Conclusion:
- Setting up a Flarum site on Ubuntu with Nginx support offers numerous benefits, including enhanced performance and security.
- The comprehensive guide provided detailed steps for installing Nginx, MariaDB, PHP-FPM, and Let’s Encrypt SSL/TLS for a seamless Flarum installation.
- Users were walked through essential tasks such as creating a Flarum database, downloading Flarum files, and setting up the Nginx virtual host.
- Additional resources and external links were included for further reference and troubleshooting.
- The post invites readers to provide feedback and report any errors for continuous improvement.




Leave a Reply Cancel reply