
This article describes how to free up disk space in Windows 11 when you’re running low.
If your computer has low free disk space, you won’t be able to install important security updates or upgrade the Windows operating system, which can negatively impact your computer’s performance.
It’s essential to maintain adequate free space on your hard drive to ensure your computer runs smoothly.
When your computer has low free disk space, it can slow down significantly, making it difficult to run programs or complete tasks quickly.
Use the Disk Cleanup Tool
You can utilize the built-in Disk Cleanup tool in Windows to remove temporary and system files from your device, freeing up disk space.
To use Disk Cleanup, follow the steps below:
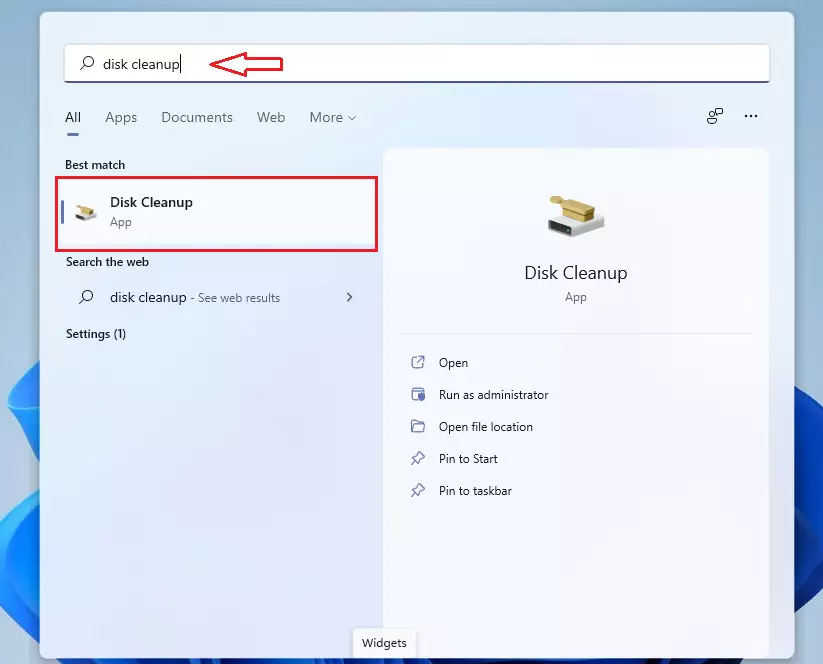
Select the Start button, type disk cleanup, then select Disk Cleanup from the results list.
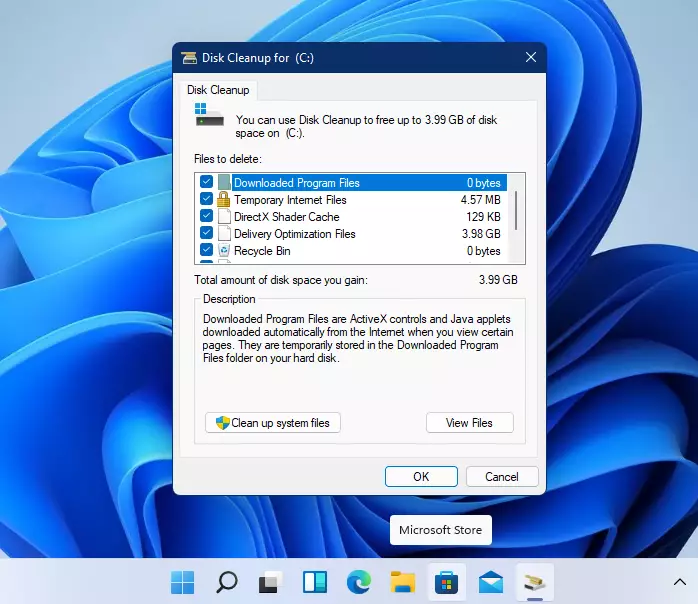
To delete unused files, select the check box next to the type of files you want to delete. (To view a description of each file type, select the name.)
Downloaded Program Files, Temporary Internet Files, and Thumbnails are selected by default. To free up even more space, select Clean up system files, and then select the type of system files you want to delete.
When you’re done selecting the types of files to delete, select OK, then select Delete files in the confirmation window to start the cleanup process.
That should free up some disk space.
Use Storage Sense
Windows 11 includes a built-in feature called Storage Sense. When you enable Storage Sense, Windows automatically frees up space by deleting unnecessary files, emptying the recycle bin, and performing other maintenance tasks based on your selected schedule for how often you want Storage Sense to run.
To set up Storage Sense on Windows, follow the steps below:
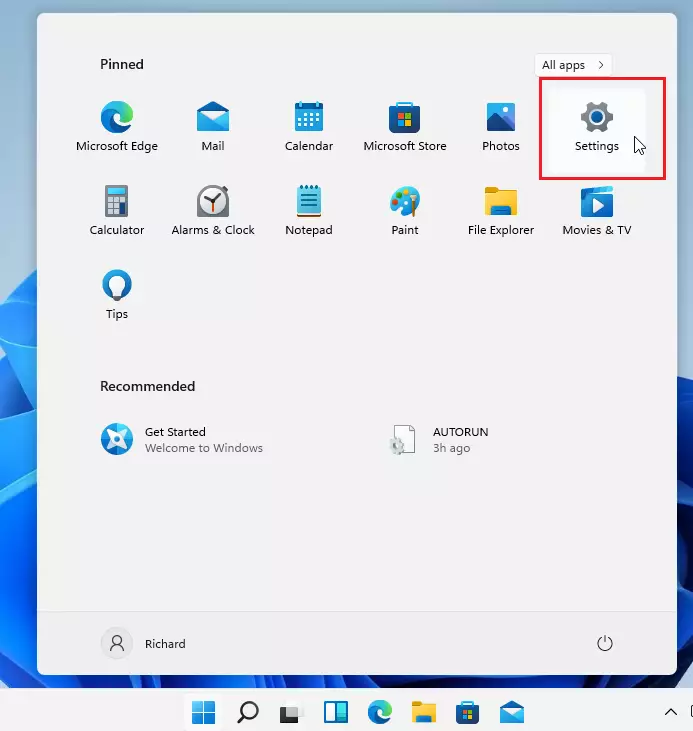
Select the Start button, and then select Settings.
Then, navigate to System > Storage and turn on Storage Sense.
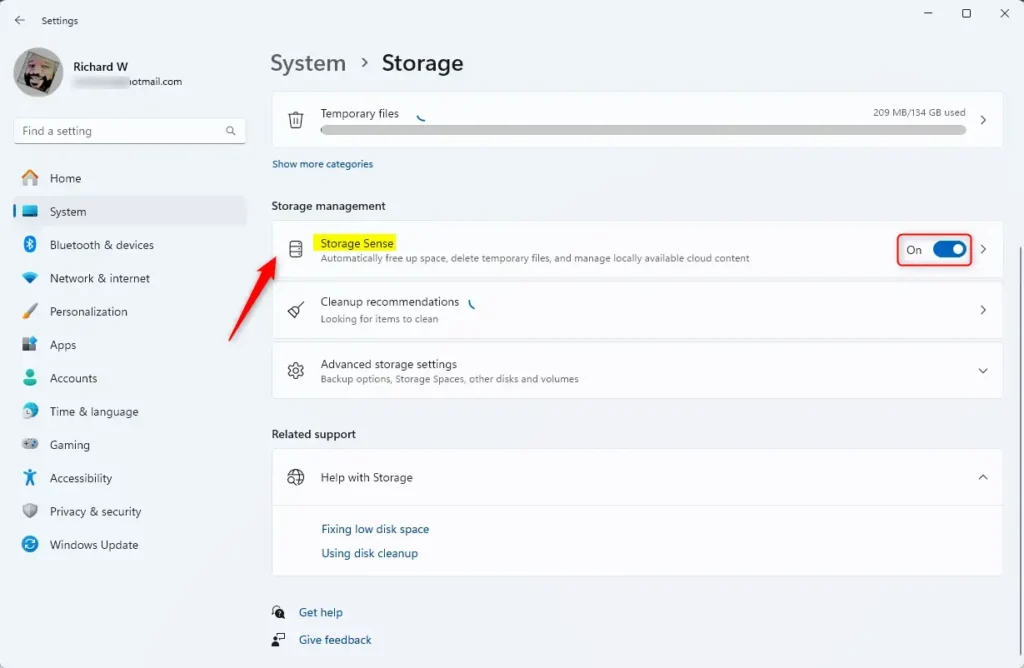
Next, click the Storage Sense tile to expand it.
Configure more options to allow “Storage Sense” to automatically clean up user content and help keep Windows running smoothly.
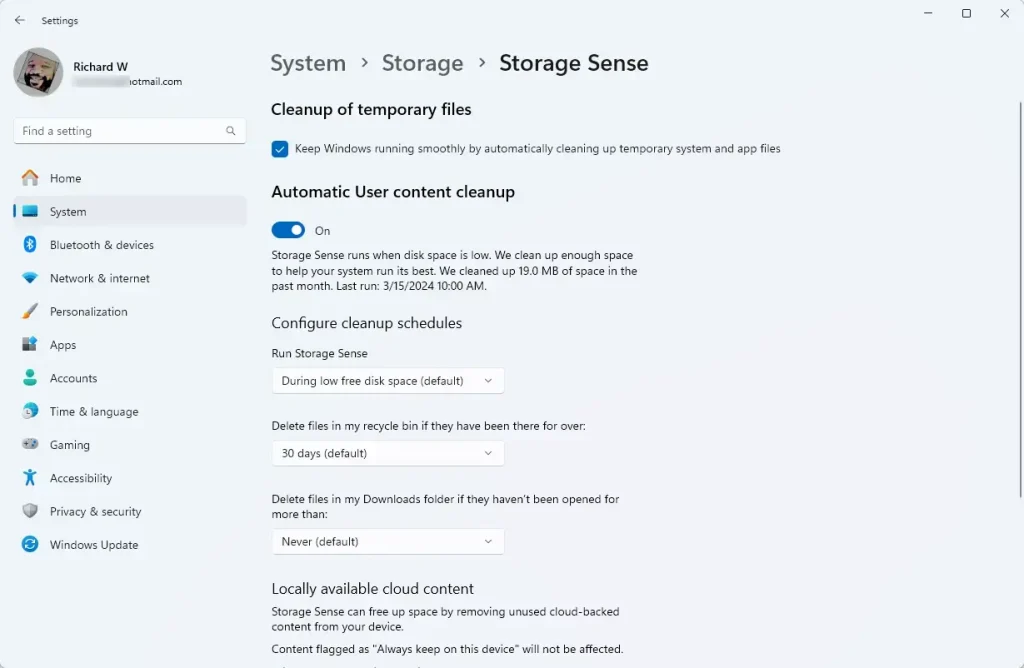
With your current settings, Windows should automatically remove temporary files. You can adjust more advanced options, but the default settings should suffice in most cases.
That’s it!
Conclusion:
- Regular maintenance of your disk space in Windows 11 is crucial for optimal performance.
- Utilizing tools like Disk Cleanup and Storage Sense can help you efficiently manage and free up space.
- Enabling Storage Sense offers automated upkeep, reducing the need for manual intervention.
- Staying proactive about disk space not only enhances system speed but also ensures important updates can be applied without issues.
- Make it a habit to check your disk space regularly to prevent performance slowdown and maintain a smooth computing experience.

Leave a Reply