How to Format External USB Drives in Windows 11
Formatting a USB drive in Windows 11 is a common task. We’ll guide you through each step, making sure your drive is ready for backups or file storage.
Open Settings, navigate to System, then Storage, and Advanced storage settings. Select Disk & volume, choose your USB drive, click Properties, and then click Format. Confirm the action to erase and prepare the drive.
Why Format a USB Drive?
Formatting a USB drive in Windows 11 makes it ready to store files and work properly, especially if it’s a new drive or one you’ve used on other devices. This process prepares the drive for Windows, but it also wipes all data, so be sure to save anything important first.
What happens when you format a drive? Formatting prepares your drive to work with Windows. It also erases everything on the drive, so make sure you back up any files you want to keep.
How to Format an External USB Drive in 🪟 Windows 11
Follow these steps to format a drive in Windows 11:
Step 1Open Windows Settings
First, open the Settings app. You can open Settings in two ways:
- Press
Windows key + I - Click Start → Settings
You can also type ‘Settings’ into the search bar on your taskbar to find it.
Step 2Go to Storage Settings
In the Settings window, click System on the left side. Then select Storage from the right pane.

Step 3Open Advanced Storage Settings
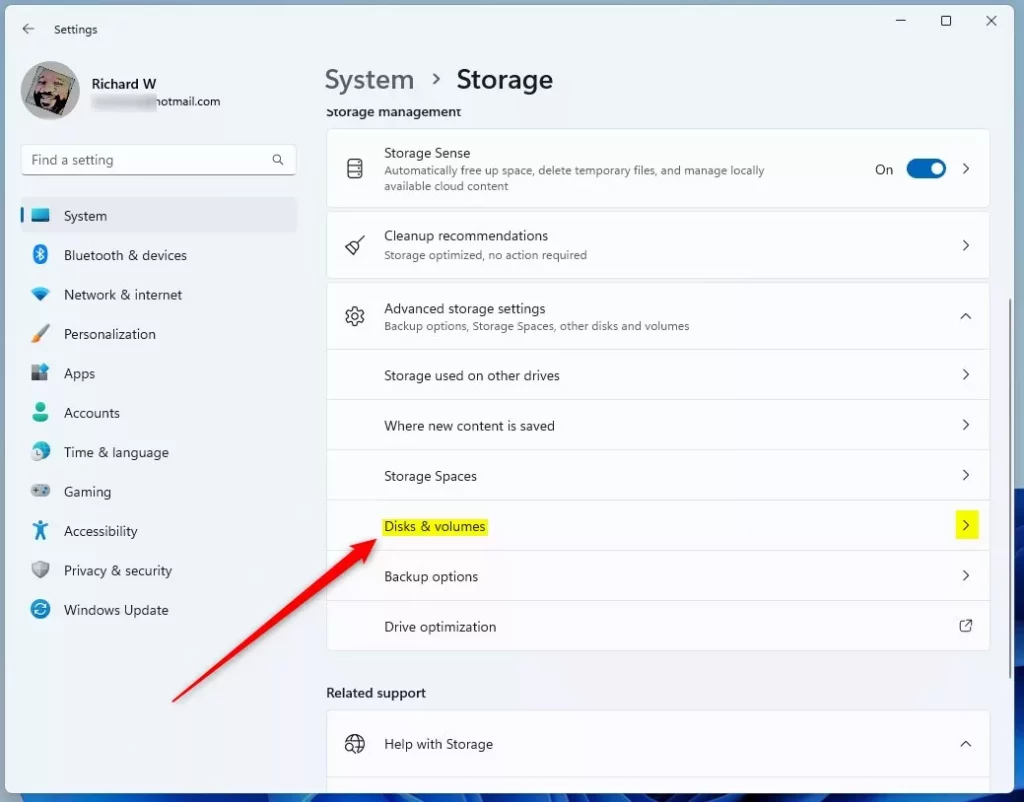
On the Storage page, click Advanced storage settings to see more options.
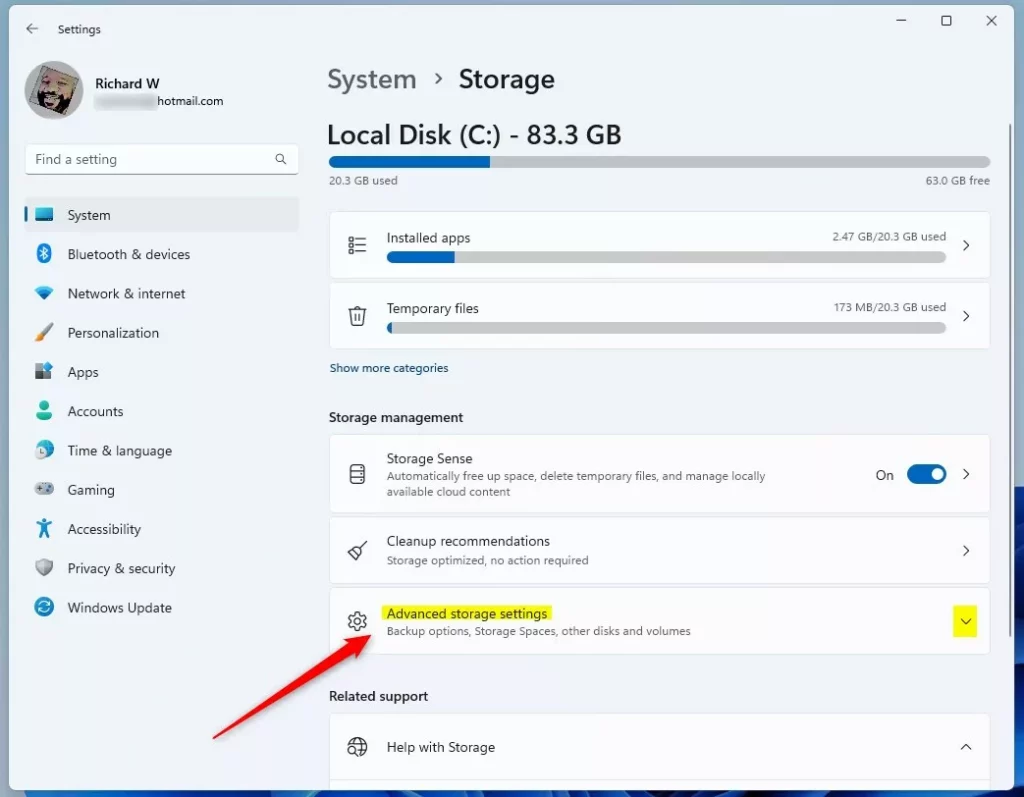
Step 4Select Disk & Volume
In the expanded settings, click Disk & volume.
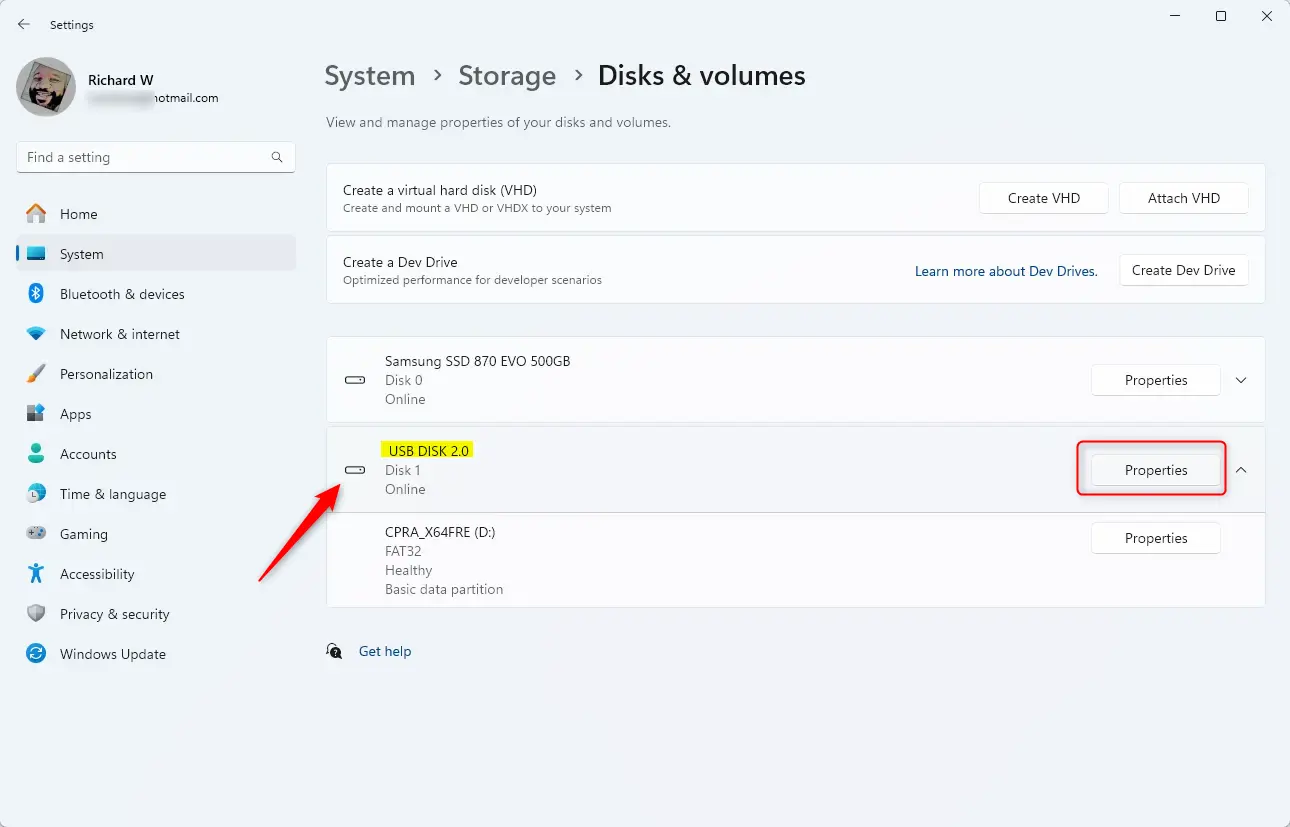
Step 5Find Your USB Drive
You’ll see a list of all the drives connected to your computer. Find your external USB drive in this list. Click on it, then click ‘Properties’.
Step 6Click Format Button ⚙️ (Requires Admin Privileges)
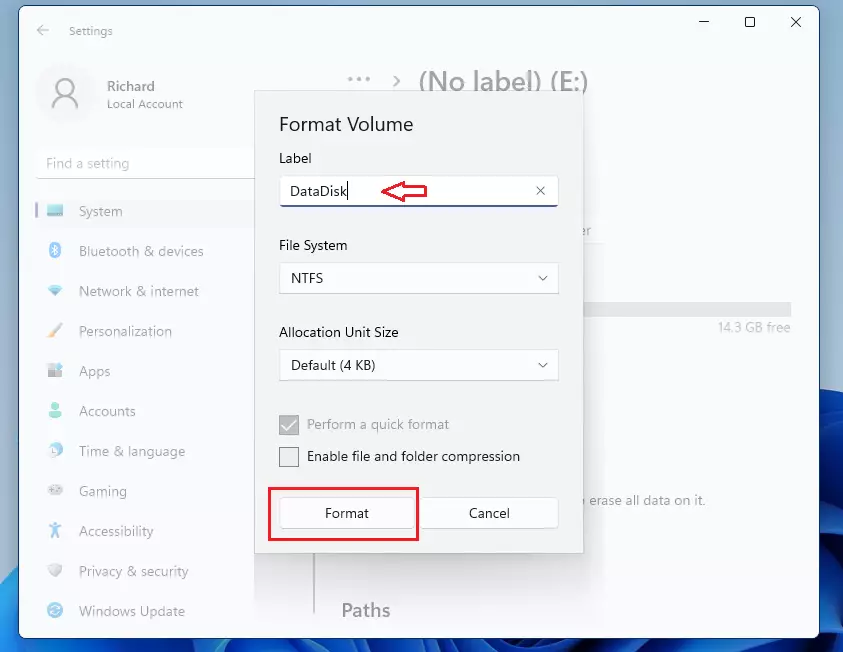
In the drive properties window, find and click the ‘Format’ button located in the ‘Format’ section. You’ll need administrator privileges for this step.
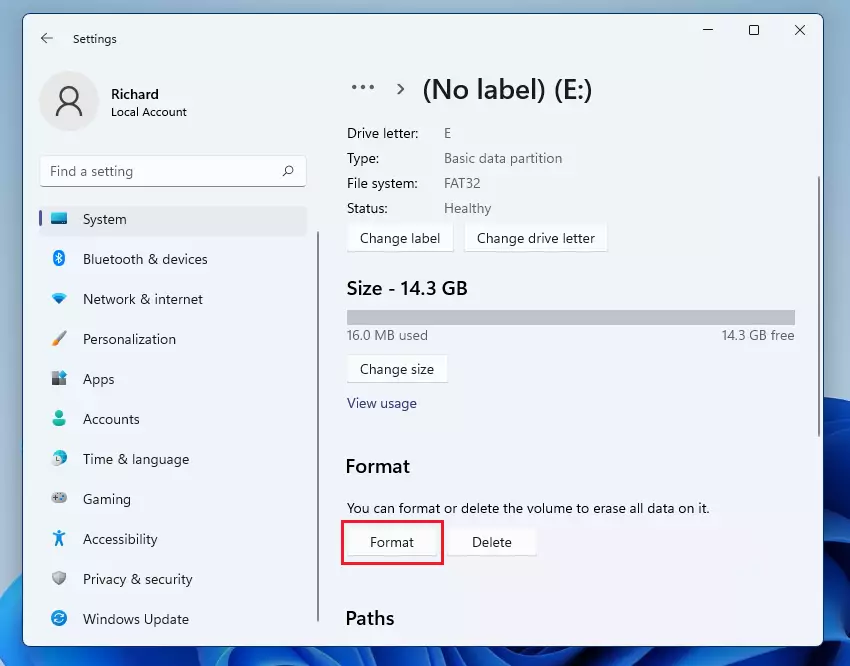
Step 7Name Your Drive and Format It ⚙️ (Requires Admin Privileges)
A dialog box will pop up. You can give your drive a new name here if you like. Once you’re ready, click the ‘Format’ button again to begin the process. This also requires administrator privileges.
Step 8Wait for Formatting to Complete
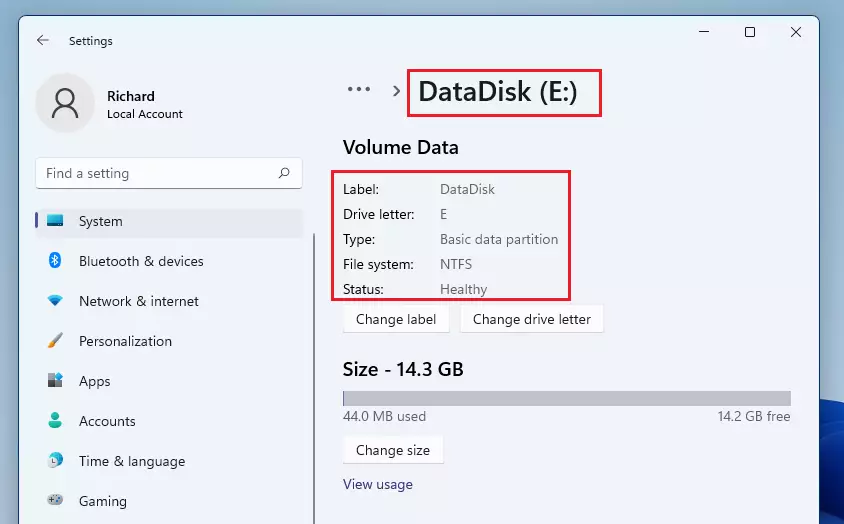
The formatting process will take a few moments. The time depends on how big your drive is and how fast your computer is. When it’s done, you’ll see a confirmation message.
Step 9Eject Your Drive Safely
Once formatting is complete, eject the drive from your computer. Your USB drive is now ready to use.
Important Warning
Formatting erases everything on the drive. Make sure you select the correct drive before you format. Double-check the drive name and size to avoid losing important files.
Summary
To format a USB drive in Windows 11, you’ll prepare it for storing files by erasing everything on it. Always back up important data before you start. You’ll need to open Settings, go to System, then Storage, and find Advanced storage settings to access Disk & volume, where you can select your USB drive and begin the process.- Formatting a USB drive prepares it for use in Windows 11
- The process erases all files on the drive, so back up anything you need first
- Open Settings → System → Storage → Advanced storage settings → Disk & volume
- Select your USB drive and click Properties
- Click the Format button and confirm
- Wait for the process to finish, then safely eject your drive
- Always verify you’re formatting the correct drive to avoid data loss
- Regular formatting helps keep your drives organized and working smoothly
Was this guide helpful?

About the Author
Richard
Tech Writer, IT Professional
Richard, a writer for Geek Rewind, is a tech enthusiast who loves breaking down complex IT topics into simple, easy-to-understand ideas. With years of hands-on experience in system administration and enterprise IT operations, he’s developed a knack for offering practical tips and solutions. Richard aims to make technology more accessible and actionable. He's deeply committed to the Geek Rewind community, always ready to answer questions and engage in discussions.

I tried this on my new PC with Windows 11 Home, but when I got the external drive selected and clicked on Properties, it opened but there wasn’t a Format option to select.
[…] On the next screen, enter the Label or name. Select a Drive Letter to assign to the Dev Drive, type in the drive size (at least 50GB), and click Format. […]