This brief tutorial shows students and new users how to flush the DNS Resolver cache in Windows 10.
Once in a while, Windows behaves strangely and stops resolving or opening websites you want to visit. This doesn’t happen very often, but when it does, flushing the Windows DNS resolver cache might help in this situation.
A DNS resolver is a temporary database containing websites and other network resources you have visited or opened on your computer. When you first visit a new website or a site you haven’t visited, Windows requests the site’s details, including unique IP addresses.
These records are kept temporarily in the DNS resolver so that the next time you visit the same site you visited previously, your computer will already have a record in its database. This helps speed up your computer’s connection to the websites you want to revisit.
Sometimes, this temporary database gets corrupted and stops processing correctly. If that happens, you may want to clear out its temporary cache of all the records so that it can start rebuilding with new records.
To get started with flushing the Windows DNS resolver cache, follow the steps below:
Flush Windows DNS Cache via the command line
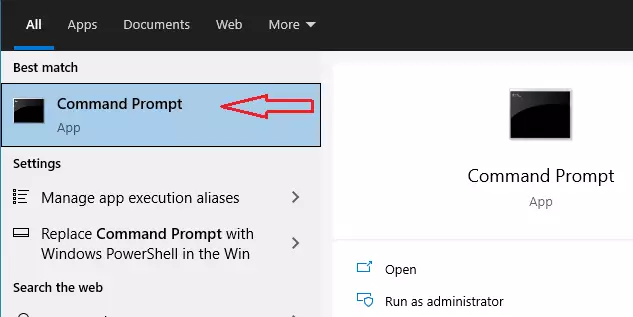
The quickest way to flush or clear the Windows DNS cache is via the Windows command prompt. Open the Command prompt and run the command below to do so.
You can search for Command Prompt in the Windows search box at the bottom left.
When the command prompt opens, type the commands below to flush the Windows DNS cache.
ipconfig /flushdns
Flush Windows DNS Cache via PowerShell
You can also use the Windows PowerShell console to flush its DNS cache. Use the search box to locate PowerShell, then type the commands below to flush its cache.
Clear-DnsClientCache
Clear Host Resolver Cache in Microsoft Edge
After clearing Windows DNS cache, you should also clear the host resolve cache in your browser, especially when you’re having trouble visiting websites online.
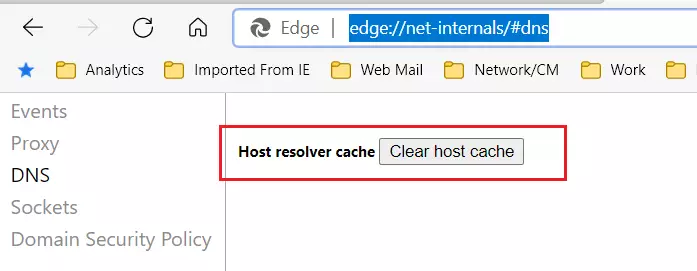
To clear the Microsoft Edge browser cache, open it, type the line below inside the address box, and press Enter.
edge://net-internals/#dns
Click the button to clear the host resolver cache.
Clear Host Resolver Cache in Chrome
If using the Google Chrome browser, type the line below instead.
chrome://net-internals/#dns
Clear the resolver cache, and you’re done.
Clear Host Resolver Cache in Firefox
In Firefox, type this:
about:networking#dns
That should help resolve many DNS caching issues in Windows.
Conclusion:
- Flushing the DNS resolver cache can resolve various connectivity issues in Windows 10.
- Using the Command Prompt or PowerShell offers quick methods to clear the cache.
- It’s important to clear the browser’s host resolver cache as it can also impact website accessibility.
- Regular maintenance of your DNS settings can help improve your browsing experience and prevent future issues.
- If problems persist after flushing the cache, consider additional troubleshooting steps or contacting your network administrator.

Leave a Reply