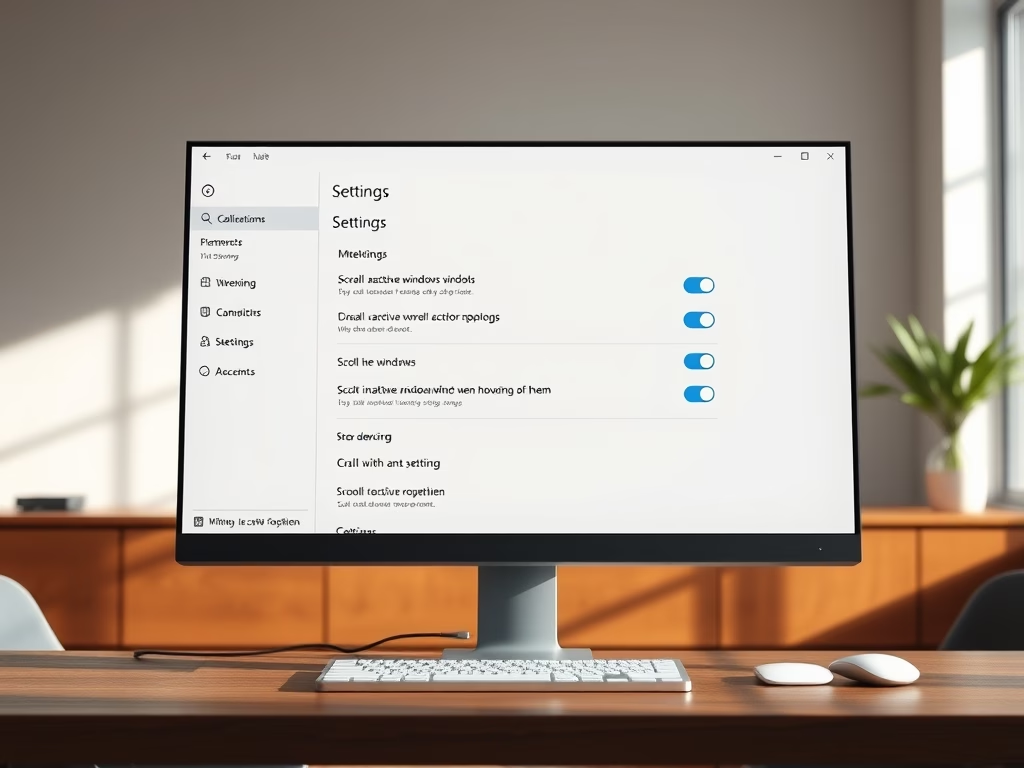
Did you know you can scroll through windows on your computer even if they are not the one you’re working on? This feature is called “Scroll inactive windows when hovering over them”, and it can be very helpful when you want to look at information in the background without switching windows.
In this guide, we’ll show you simple steps to turn this feature on or off in Windows 11.
What Does This Feature Do?
Normally, when you scroll with your mouse wheel, it only works on the window you clicked on (the active window). But with this feature turned on, you can just move your mouse over any window—even if it’s not active—and scroll through it. This means you don’t have to click away from your current work to see more in other windows.
How to Enable or Disable Scroll Inactive Windows
Step 1: Open Windows Settings
Click the Start menu (the Windows icon in the bottom left corner of your screen), then click Settings. You can also press Windows key + I on your keyboard to open Settings quickly.

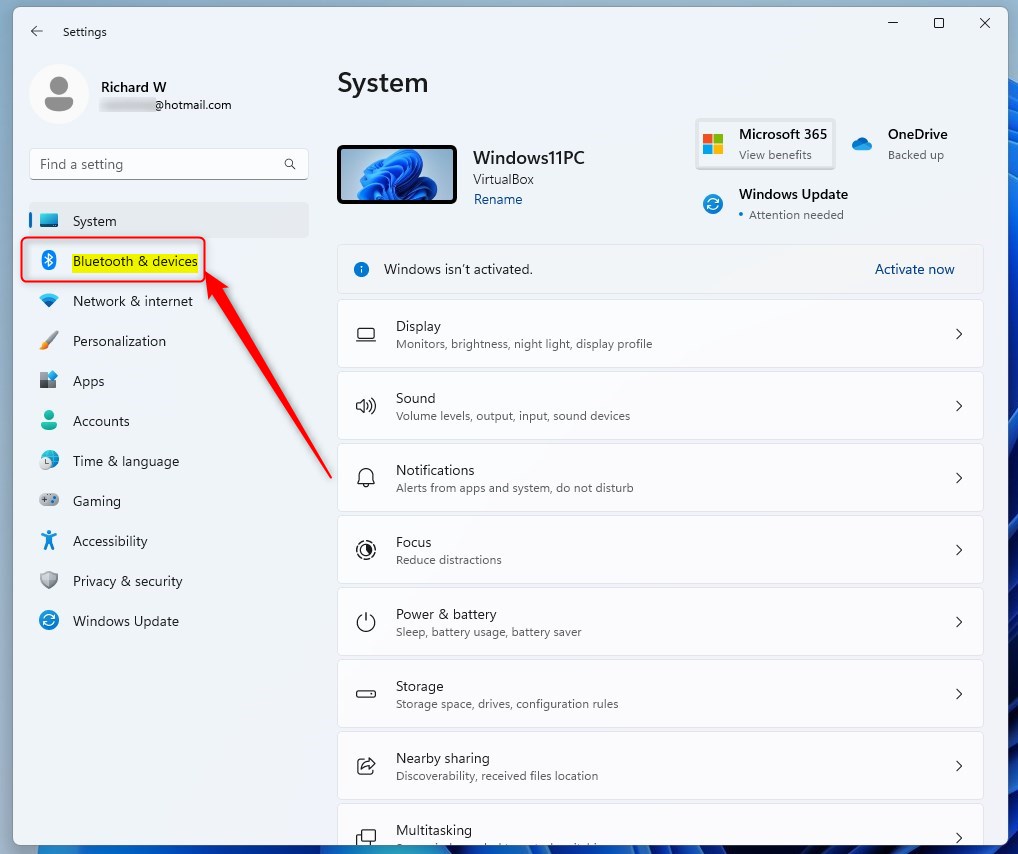
Step 2: Go to Bluetooth & Devices
Once Settings opens, look at the left side menu and click on Bluetooth & devices.
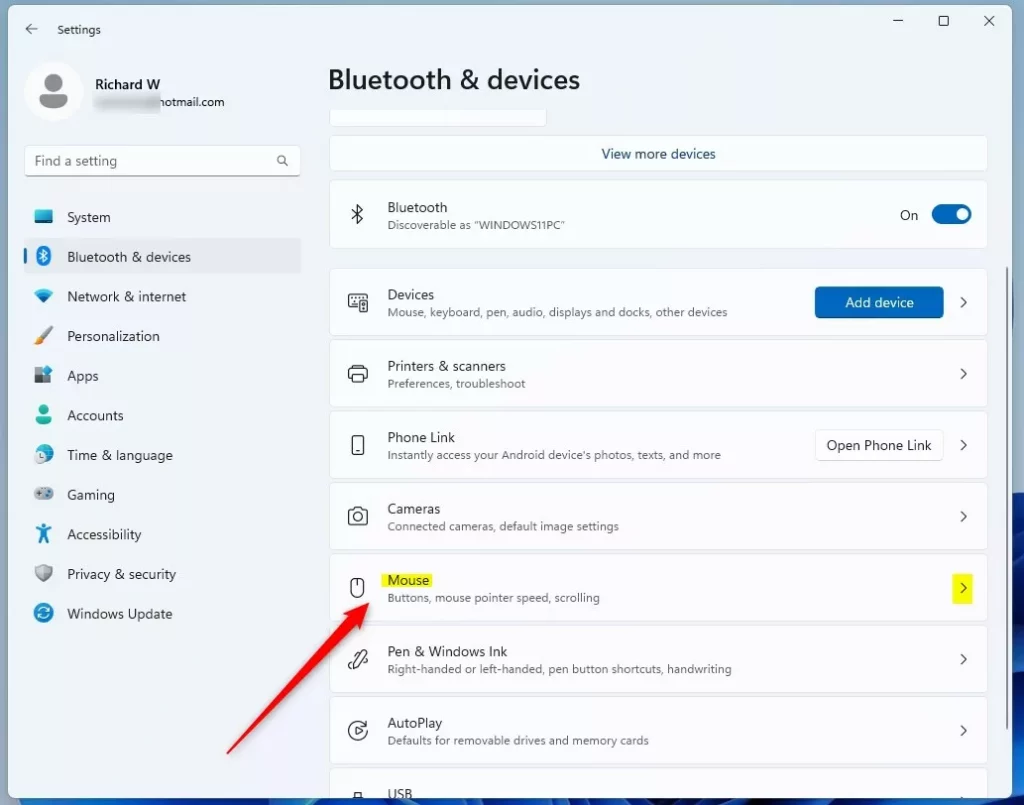
Step 3: Open Mouse Settings
On the right side, find and click on the Mouse section.
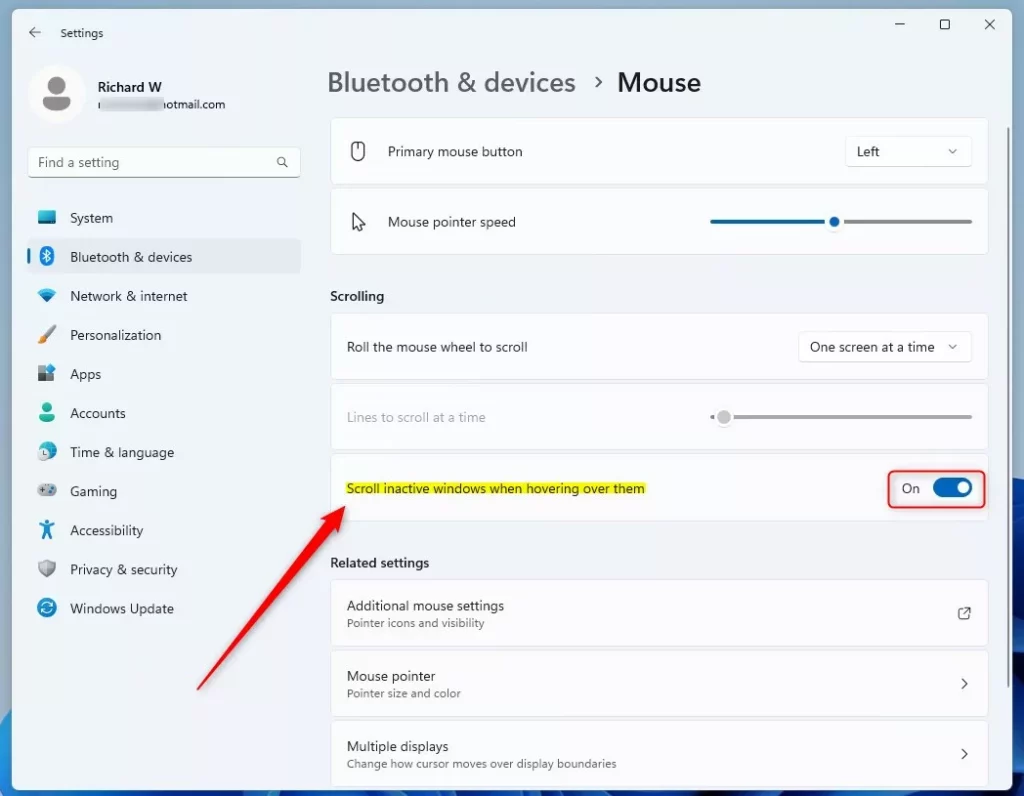
Step 4: Turn On Scroll Inactive Windows
Look for the option called “Scroll inactive windows when hovering over them”. You’ll see a toggle (a switch) next to it.
Click the toggle to turn it On if you want to use this feature. To turn it off, click the toggle again to switch it Off.
Step 5: Close Settings
Once you’re done, just close the Settings window. Your change will work right away.
Alternative: Change This Setting Using Registry Editor (For Advanced Users)
If you like, you can also turn this feature on or off by changing a setting in the Windows Registry. This method is for users who are comfortable making changes in deeper system settings.
Warning:
Be careful when using the Registry Editor. Changing the wrong settings can cause problems with your computer. It’s a good idea to back up your registry first.
Step 1: Open Registry Editor
Press Windows key + R to open the Run box, type regedit, and press Enter.
If you want to learn more about opening the Registry Editor, visit this guide: How to Open the Registry in Windows 11.
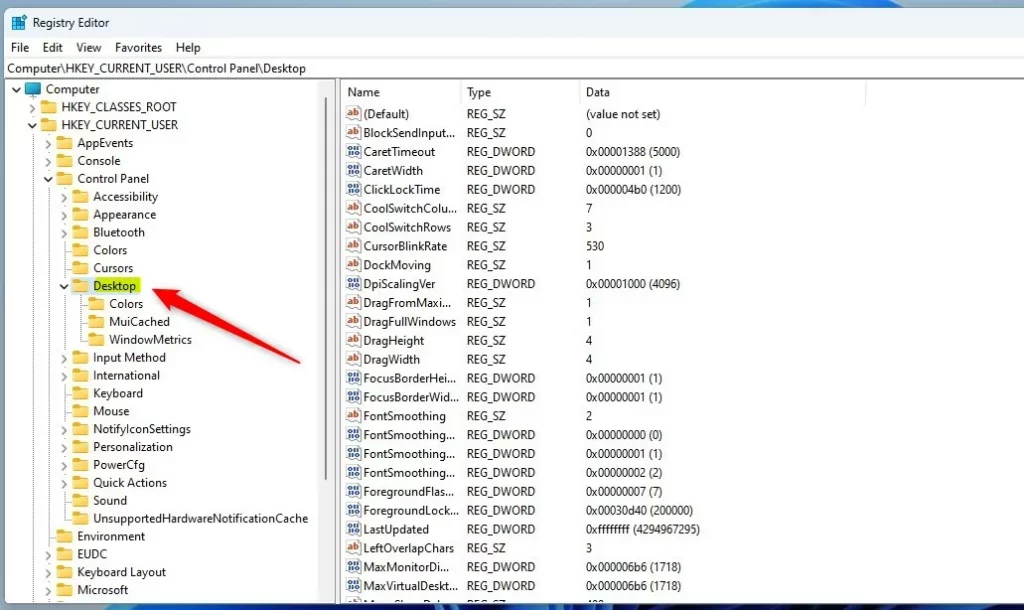
Step 2: Go to the Right Folder
In Registry Editor, go to this folder path:
HKEY_CURRENT_USER\Control Panel\Desktop
If you don’t see the Desktop folder, right-click on Control Panel, choose New > Key, and name it Desktop.
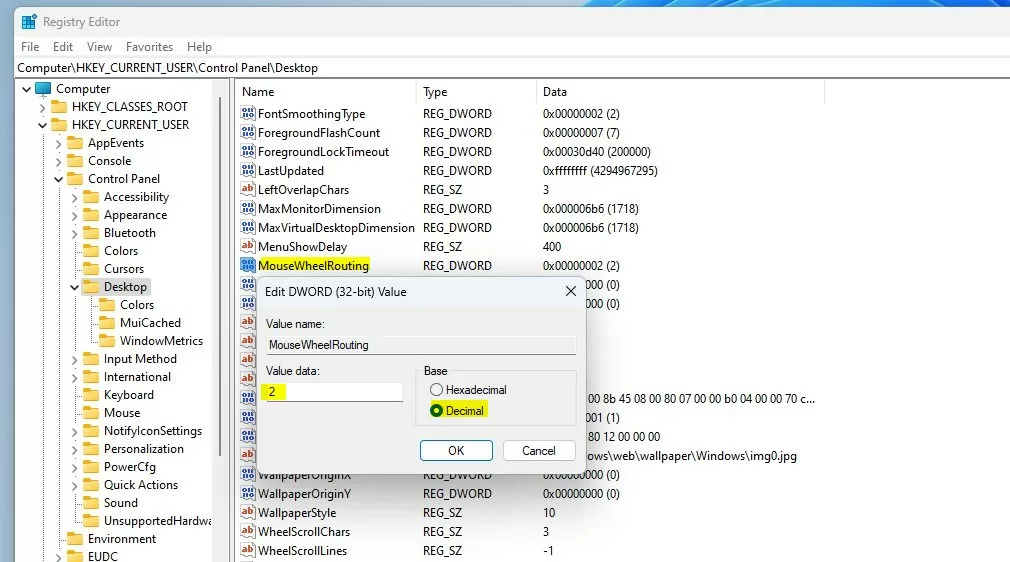
Step 3: Create or Edit MouseWheelRouting Value
In the right pane of the Desktop folder, right-click and select New > DWORD (32-bit) Value. Name this new value MouseWheelRouting.
Double-click MouseWheelRouting and set the Value data to:
- 2 to turn on scrolling inactive windows when hovering
- 0 to turn it off
Step 4: Restart Your Computer
After you’ve made this change, restart your PC for it to take effect.
Summary
- Windows 11 lets you scroll windows in the background just by moving your mouse over them.
- You can turn this feature on or off easily in the Settings app under Mouse options.
- If you prefer, advanced users can also enable or disable this feature through the Registry Editor.
- This handy feature helps you multitask without switching your active windows all the time.
If you want to learn more Windows 11 tips, check out Geek Rewind’s Windows 11 tutorials.


Leave a Reply Cancel reply