
This post describes how to turn remote desktop sharing in Ubuntu Linux on or off.
There are many remote assistance tools available today. A popular remote support tool is TeamViewer. However, Ubuntu Linux now has a built-in Remote Assistance tool that lets someone you trust take over your PC and fix a problem from wherever they are.
You must have the GNOME Remote Desktop package installed for Remote Desktop to be visible. The default Ubuntu Desktop has the package installed, so no actions are needed.
If you don’t want to use third-party tools to allow others to connect to your PC, use the built-in Remote Desktop feature with Ubuntu Linux.
Before you can use it, you’ll need to enable access. It is disabled by default. However, you can enable it if you want someone to connect and access your Ubuntu Linux machine.
Below is how you turn it on if you want to use it or turn it off if you don’t want it.
How to turn on or off remote assistance in Ubuntu Linux
As described above, Ubuntu Linux has a built-in Remote Assistance tool that lets someone you trust take over your PC and fix a problem from wherever they are.
Below is how you enable or disable it in Windows.
Open the Activities overview and start typing Sharing.
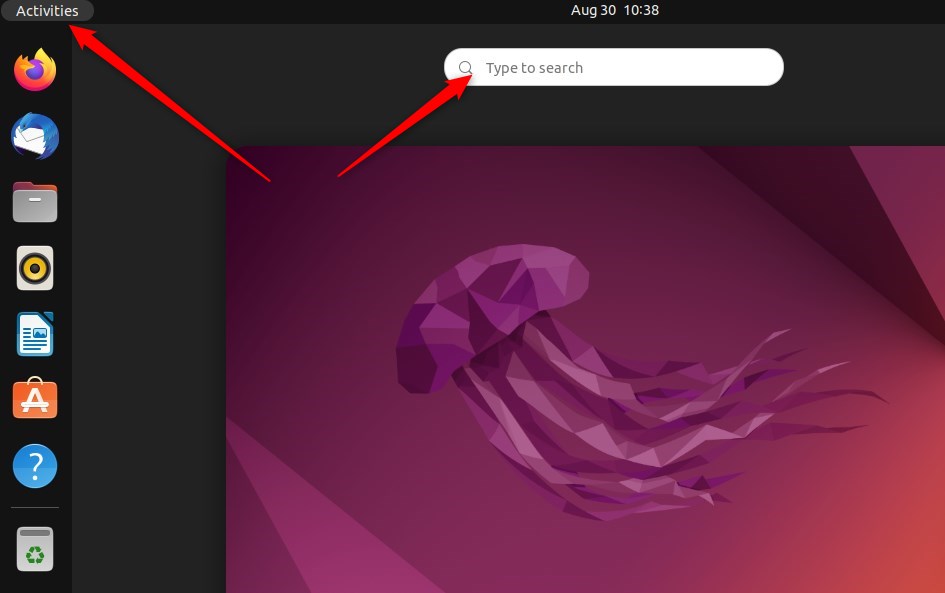
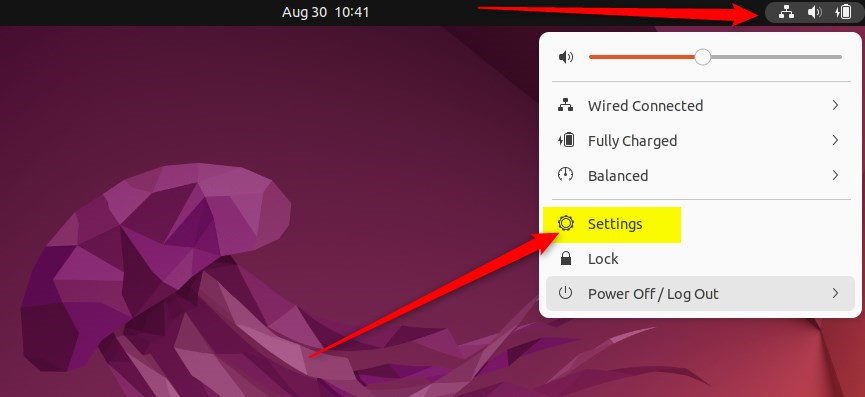
Alternatively, click on the System menu at the top-right corner of the top bar on your Desktop.
On the System menu, select Settings as highlighted below
Next, click on Sharing to open the panel.
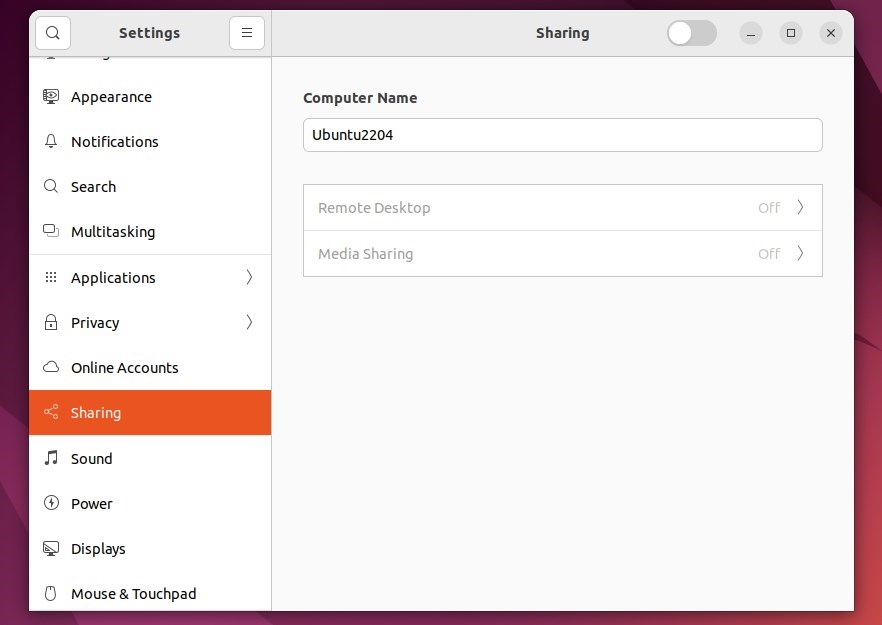
If the Sharing switch in the top-right of the window is off, click to switch it on. If the text below Computer Name allows you to edit it, you can change the name your computer displays on the network.

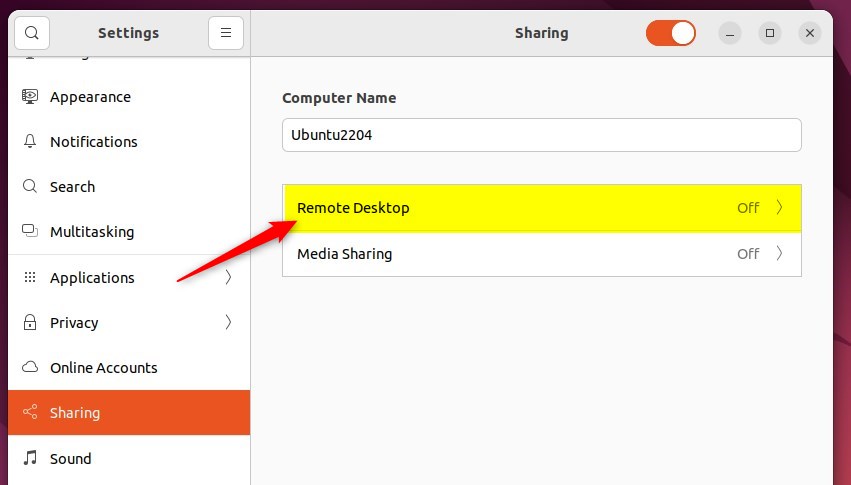
Next, click the Remote Desktop tile, as highlighted below.
To let others view your Desktop, set the Remote Desktop switch to on. This means that other people can attempt to connect to your computer and view what’s on your screen.
To let others interact with your Desktop, set the Remote Control switch to on. This may allow the other person to move your mouse, run applications, and browse files on your computer.
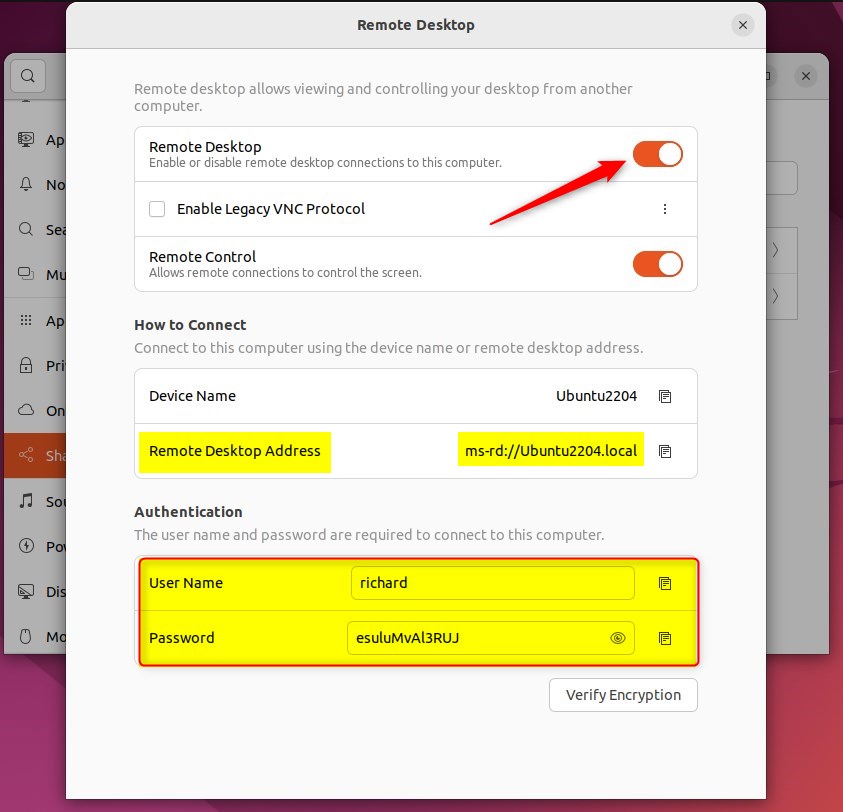
The Authentication section displays the login credentials used in the client software on the connecting device.
You can use the suggested password or enter your own in the Password field.
How to connect to Ubuntu Desktop via Remote Desktop Connections
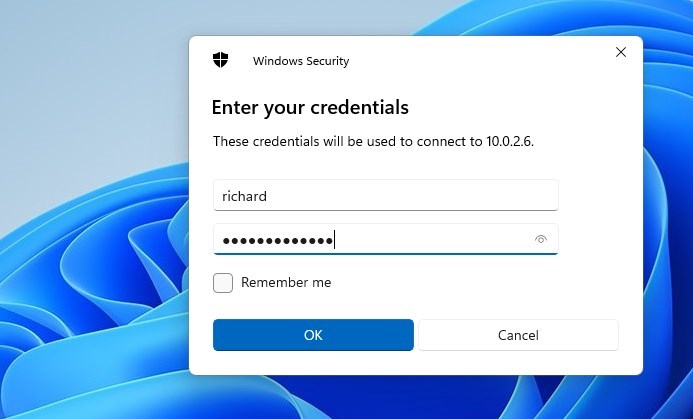
On a Windows machine, open the Remote Desktop Connections app. Then, type in your Ubuntu Linux machine hostname or IP address.
Use the username and password defined with the Sharing settings in Ubuntu Linux and connect.
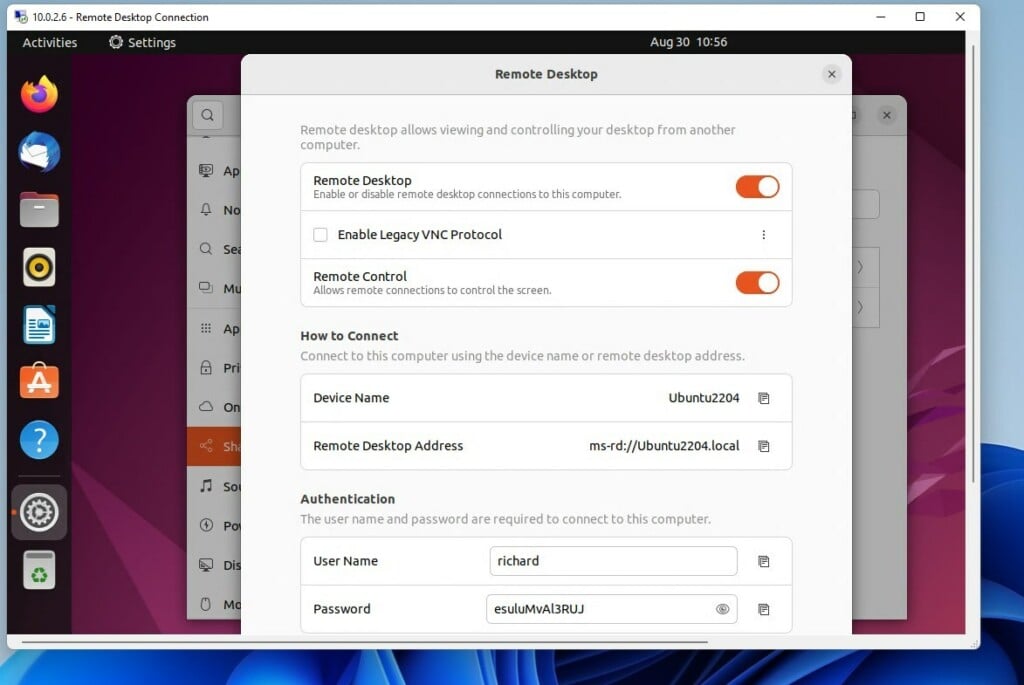
In no time, you should be connected to the Ubuntu Linux machine.
That should do it!
Conclusion:
- Ubuntu Linux offers a built-in Remote Assistance tool for remote desktop sharing, eliminating the need for third-party applications.
- Enabling access to the Remote Desktop feature allows trusted individuals to connect and fix issues remotely.
- The process to turn on or off remote assistance in Ubuntu Linux involves accessing the “Sharing” settings and adjusting the “Remote Desktop” and “Remote Control” switches.
- Windows users can connect to Ubuntu Desktop via the the Remote Desktop Connections app by entering the hostname or IP address and the defined username and password from the Sharing settings.
Leave a Reply