
This article describes steps to enable or disable the print screen key (PrtScr, Prt Sc, Print Screen) with Snipping Tool support in Windows 11.
Windows 11 comes with a new Snipping Tool app which replaces the classic Snip & Sketch app in previous versions for taking screenshots. The classic Snip & Sketch and the new Snipping Tool apps can be launched using the keyboard shortcut Windows key + Shift + S.
Although this might not be a problem for most people, for some, it’s just too many keys one has to press to take screenshots.
Windows 11 can be configured to allow your keyboard’s print screen key (PrtScr, Prt Sc, Print Screen) to open screen Snipping.
Below is how to use the print screen key for screen snipping in Windows 11.
How to turn on or off the print screen key button for screen snipping in Windows 11
As mentioned above, the classic Snip & Sketch and the new Snipping Tool apps can be launched using the keyboard shortcut Windows key + Shift + S.
You can configure Windows so your keyboard’s dedicated print screen key can be used for screen snipping.
Below is how to turn on or off the print screen key to take screenshots using the Snipping Tool in Windows 11.
Windows 11 has a centralized location for the majority of its settings. As a result, everything can be done, from system configurations to creating new users and updating Windows from its System Settings pane.
To get to System Settings, you can use the Windows key + I shortcut or click on Start ==> Settings, as shown in the image below:

Alternatively, you can use the search box on the taskbar to search for Settings. Then select to open it.
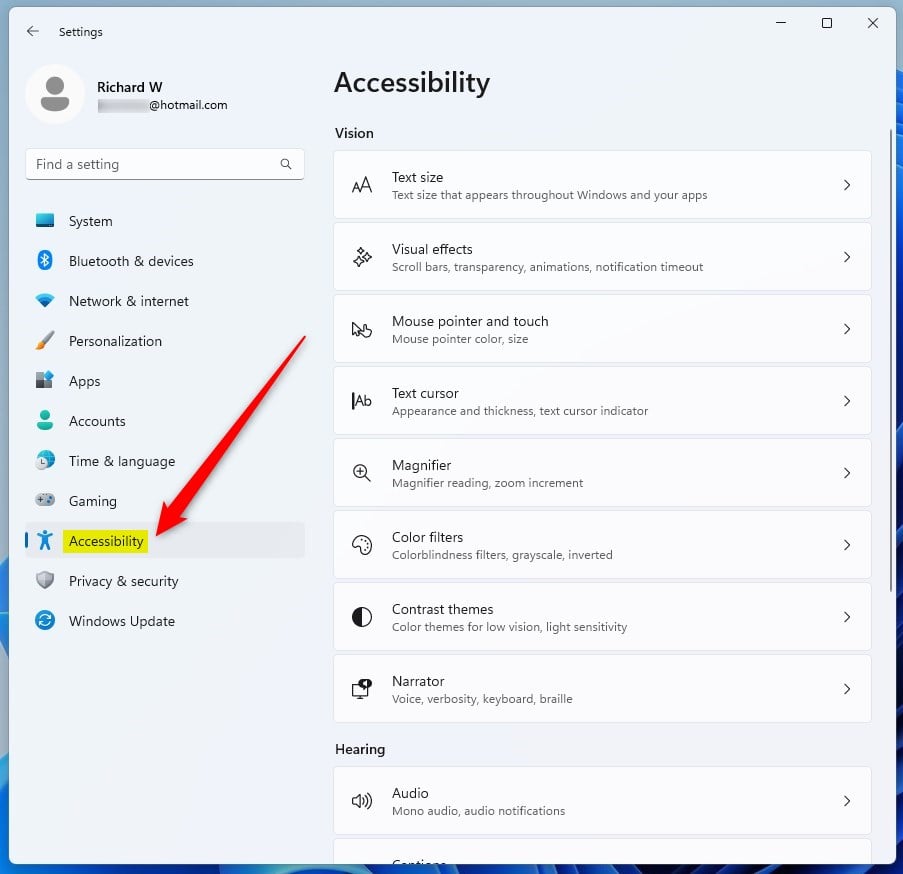
Windows Settings pane should look similar to the image below. In the Windows Settings app, click Accessibility on the left.
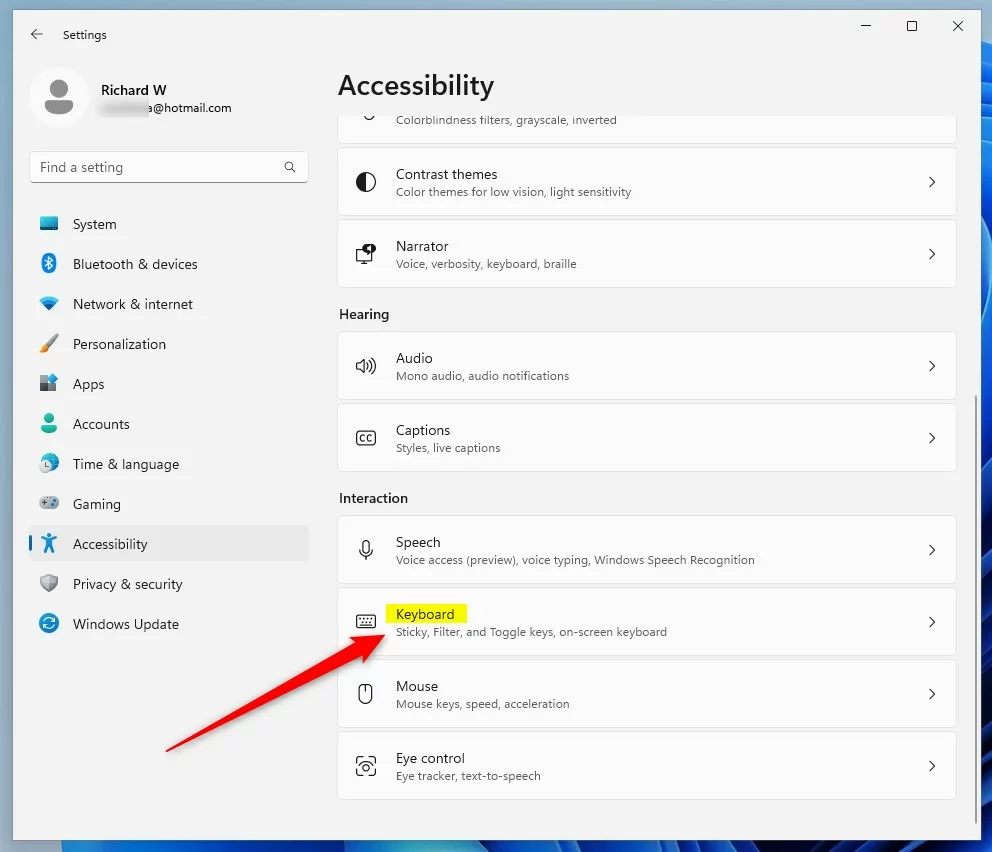
On the right, click on the Keyboard tile to expand.
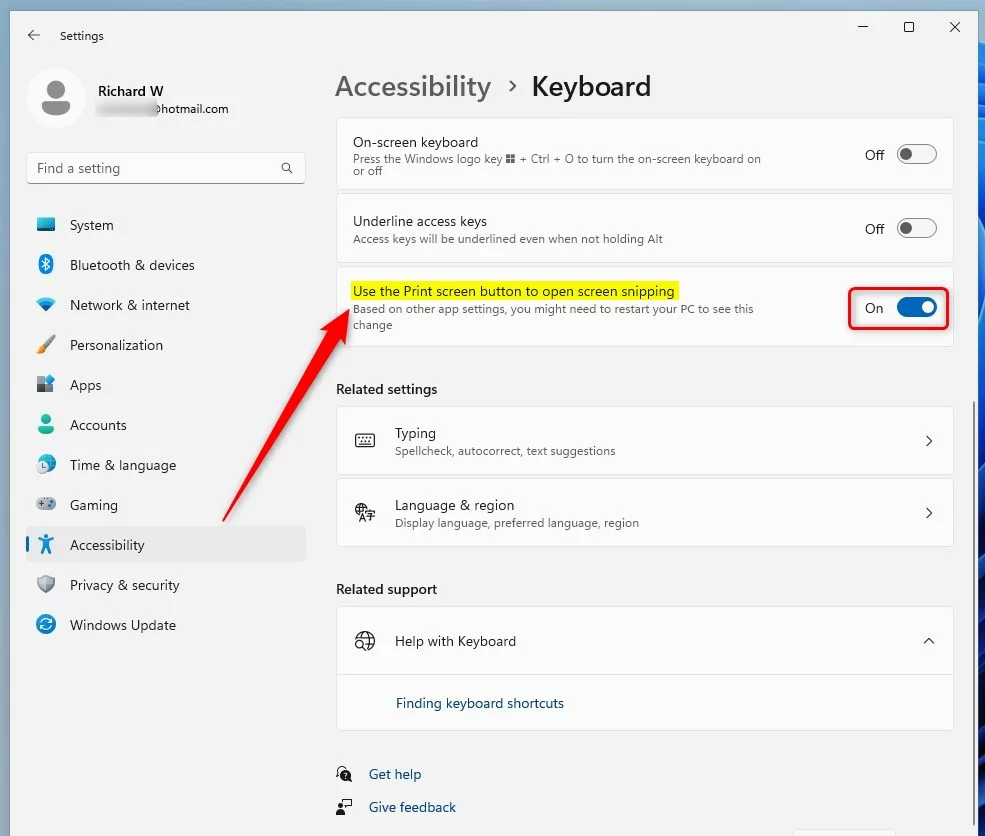
On the System -> Accessibility -> Keyboard settings pane, locate the tile that says “Use the Print Screen button to open screen snipping.”
Toggle the button to the On position to enable. To disable it, toggle the button back to the Off position.
That should do it!
After the changes above, press the Print Screen button instead of the Windows key + Shift + S keyboard shortcut to take a screenshot.
Conclusion:
- In conclusion, enabling or disabling the print screen button to take screenshots with the Snipping Tool in Windows 11 can streamline capturing your screen.
- This customization provides an alternative to the keyboard shortcut Windows key + Shift + S for screen snipping.
- Modifying this setting according to your preference can enhance the efficiency of taking screenshots on Windows 11.
- Feel free to utilize the provided instructions to tailor your screen-snipping experience based on your needs.

Leave a Reply Cancel reply