How to Enable or Disable Camera in Windows 11
This guide shows you how to turn your camera on or off in Windows 11. Whether you want to use it or keep it private, you’re in control.
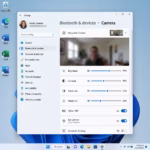
Go to Settings > Bluetooth & devices > Cameras. Select your camera and click Enable to turn it on, or click Disable to turn it off. You can also disable it via Device Manager.
Why Control Your Camera?
Your camera lets you do many things. You can make video calls on Teams, take photos, and record videos. But privacy is a concern for many. You might want to know when your camera’s active or prevent apps and malware from accessing it without your say-so.
How Do You Know When Your Camera Is On?
You can easily tell if your camera is on in Windows 11 by looking for a small light next to the lens, which usually turns on when the camera is active, or by watching for a notification that pops up on your screen.
- If your device has a camera light, it turns on when the camera is in use.
- If your device doesn’t have a light, you’ll see a notification telling you the camera is on or off.
When you’re not using your camera, you can turn it off for extra privacy and security.
Reference: Manage cameras with Camera settings in Windows 11 – Microsoft Support | Camera doesn’t work in Windows – Microsoft Support
Option 1Use a Physical Kill Switch
Some laptops have a physical switch that turns the camera on or off. For example, some HP Spectre x360 models have this feature.
- Find the privacy camera kill switch on your laptop.
- Toggle it on or off based on what you want to do.
Option 2Use Windows Settings
You’ll need administrator permissions to do this.
This is often the quickest method. Here’s how:
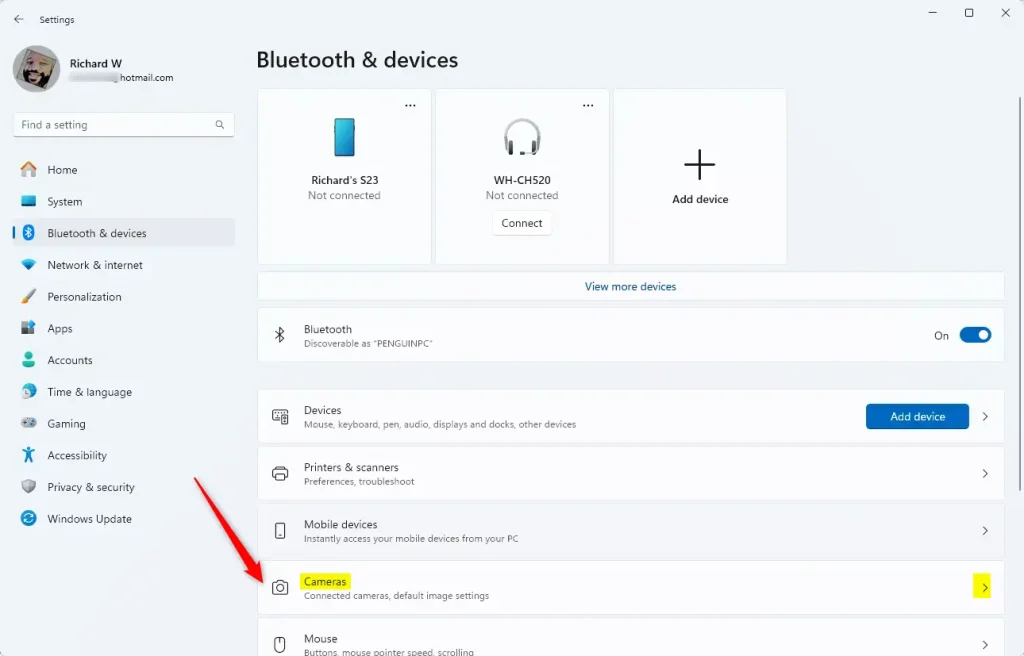
- Press
Win+Ito open Settings. - Click on Bluetooth & devices on the left side.
- Click on Cameras on the right side.
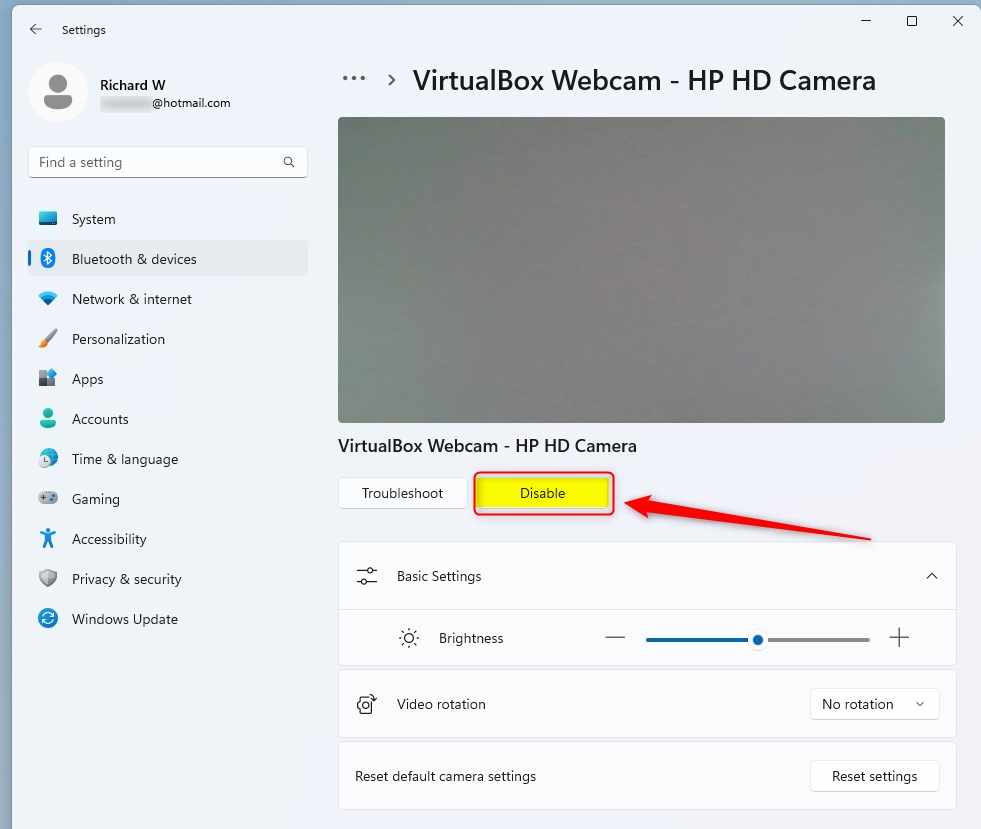
To Turn Your Camera On
- Find the camera you want to turn on .
- Click Enable.
- Close Settings when you’re done.
To Turn Your Camera Off
- Find the camera you want to turn off .
- Click on it to select it.
- Click Disable.
- Click Yes to confirm.
- Close Settings when you’re done.
Option 3Use Device Manager
You’ll need administrator permissions for this option.
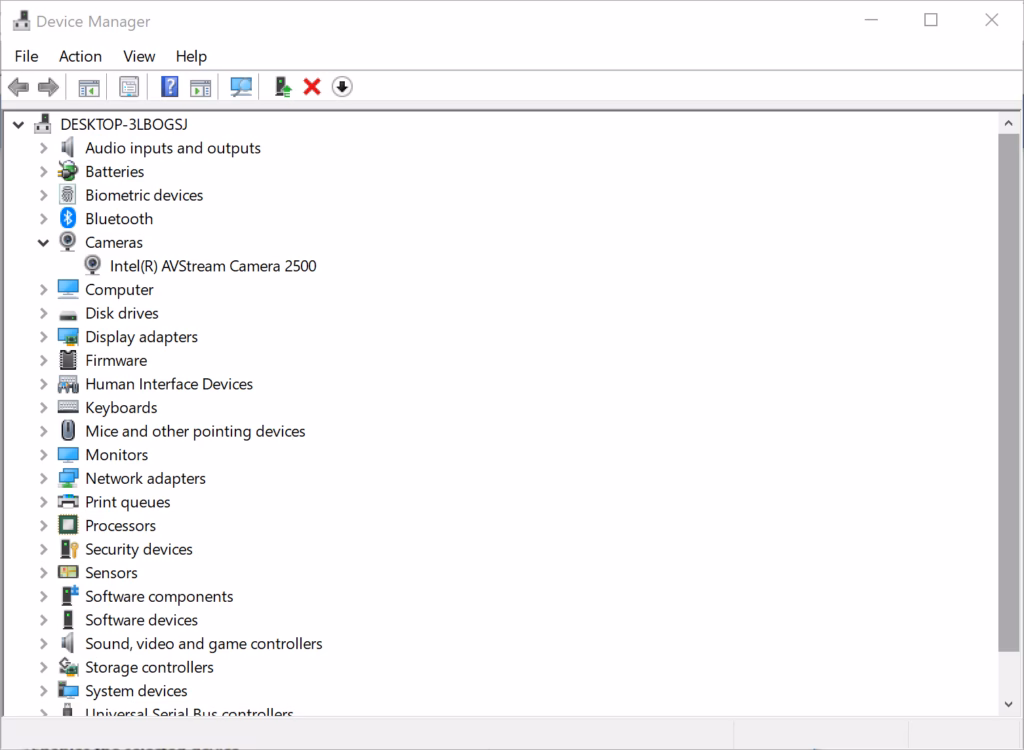
This method gives you more control over your camera through Device Manager (a tool that lets you see and manage hardware connected to your PC).
- Open Device Manager by typing
devmgmt.mscin the search box and pressing Enter.
To Turn Your Camera On
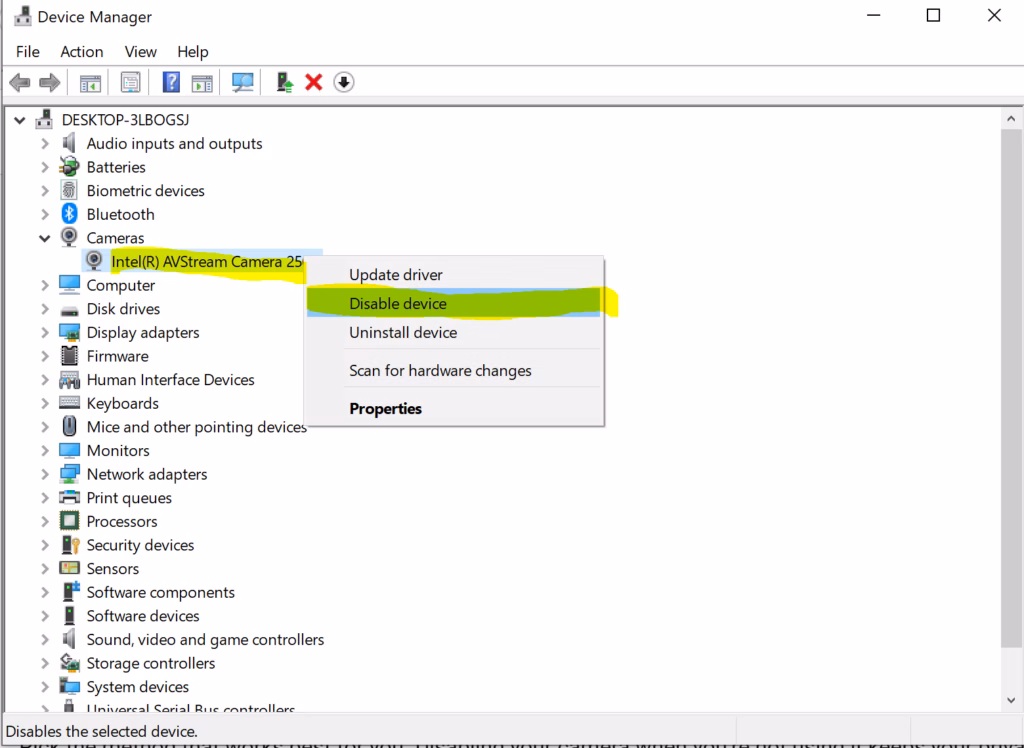
- Expand Cameras or Imaging devices (whichever one you have).
- Right-click the camera you want to turn on .
- Click Enable device.
- Close Device Manager when you’re done.
To Turn Your Camera Off
- Expand Cameras or Imaging devices (whichever one you have).
- Right-click the camera you want to turn off .
- Click Disable device.
- Click Yes to confirm.
- Close Device Manager when you’re done.
Summary
You’ve learned three simple ways to manage your camera in Windows 11, whether you use a physical switch, Windows Settings, or Device Manager, helping you keep your privacy protected by disabling the camera when not in use.
How do I reactivate my camera on 🪟 Windows 11?
To enable a camera, select Start, then select Settings > Bluetooth & devices > Cameras. In the Bluetooth & devices > Cameras window, under Disabled cameras, select the desired camera to enable it , and then select the Enable button.
Was this guide helpful?

About the Author
Richard
Tech Writer, IT Professional
Richard, a writer for Geek Rewind, is a tech enthusiast who loves breaking down complex IT topics into simple, easy-to-understand ideas. With years of hands-on experience in system administration and enterprise IT operations, he’s developed a knack for offering practical tips and solutions. Richard aims to make technology more accessible and actionable. He's deeply committed to the Geek Rewind community, always ready to answer questions and engage in discussions.
No comments yet — be the first to share your thoughts!