

What is HDR? HDR stands for High Dynamic Range. It’s a feature that makes colors brighter and shows more detail in what you see on your screen. Games, videos, and apps can all look better with HDR turned on.
Why use HDR? If your computer and monitor support HDR, turning it on makes pictures look more colorful and lifelike. Everything appears sharper and more vivid.
How to Turn on Auto HDR in Windows 11
Windows 11 has a feature called Auto HDR that turns on automatically if your screen supports it. Follow these easy steps:
- Press
Windows key + Ion your keyboard to open Settings. Or click the Start button, then select Settings.

- In Settings, click on System, then choose Display from the right side.
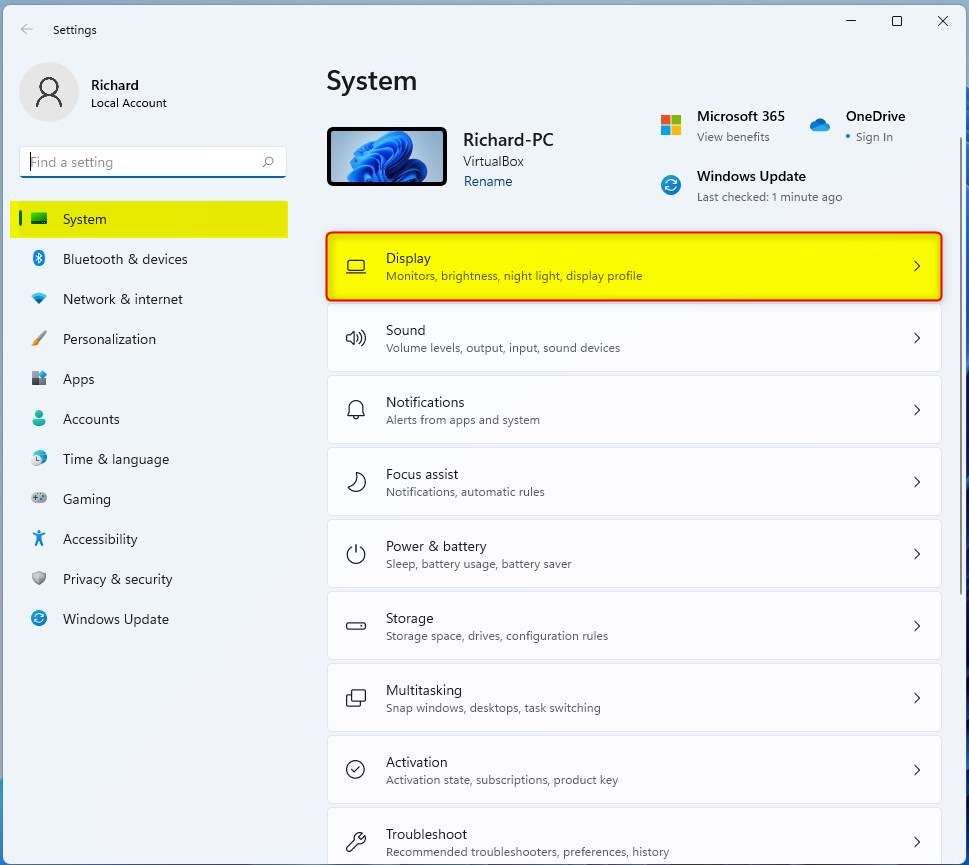
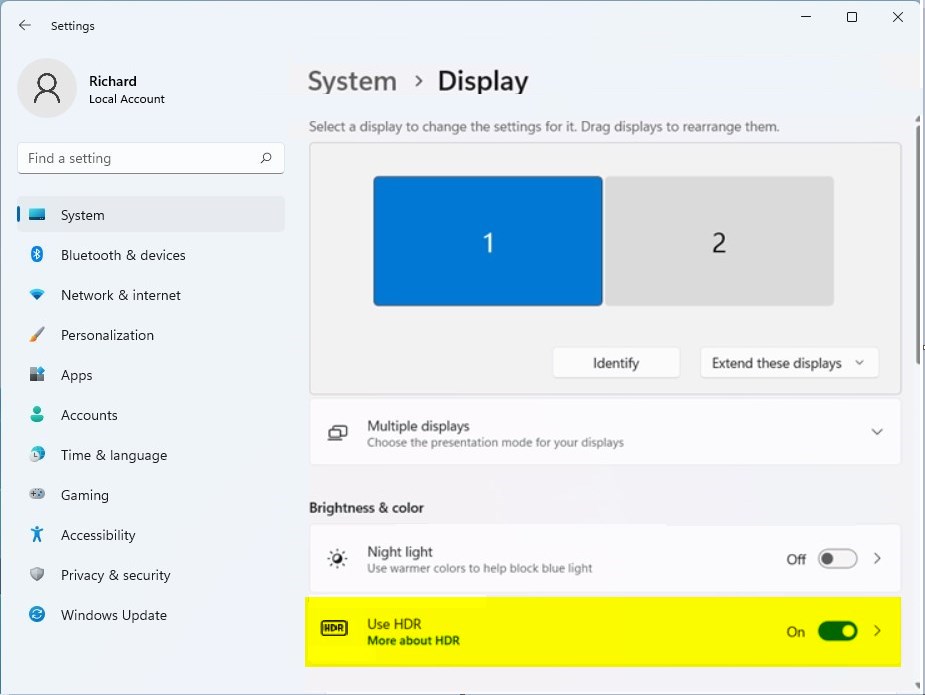
- Look for the option called Use HDR or just HDR and click on it.
- Find the Auto HDR switch and turn it On.
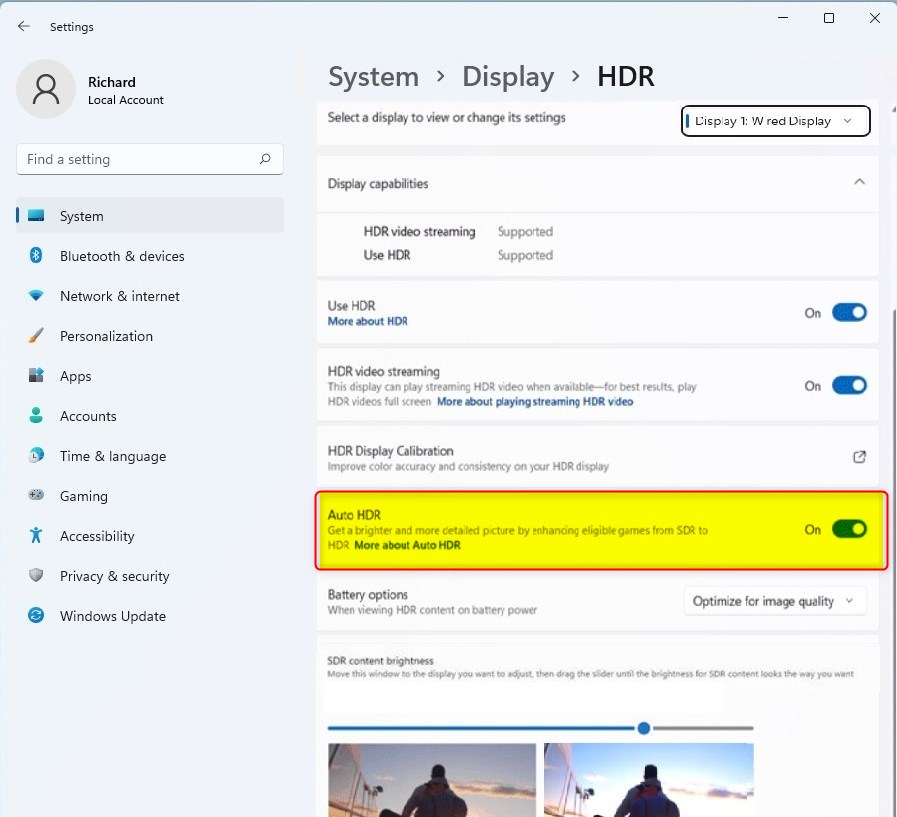
That’s it! Windows will now automatically use HDR when it makes sense, like when playing games or watching videos that support it.
How to Turn off HDR in Windows 11
If HDR doesn’t look right or you want to turn it off, follow these steps:
- Go to Start > Settings > System > Display.
- Click on the HDR or Use HDR setting.
- Turn off both Playing streaming HDR video and Use HDR.
Now HDR will be disabled and your screen will go back to normal colors.
Summary
- HDR makes colors and images on your screen look brighter and more detailed.
- Auto HDR lets Windows turn HDR on automatically when it helps your experience.
- You can easily turn HDR on or off in the Display settings.
- Turning HDR off is just as simple if you want to switch back.
- Knowing how to use HDR helps you get the best picture quality from your PC.
For more tips about Windows 11 settings, visit the official Microsoft support page: Microsoft Windows Support.


Leave a Reply Cancel reply