

This brief tutorial shows students and new users how to enable or disable Hardware Acceleration in Microsoft Edge Chromium.
The new Microsoft Edge browser has adopted the Chromium open-source project code base, offering better web compatibility and performance over the legacy Edge.
Edge browser is cross-platform and supports all Windows, macOS, and Linux systems. If you’re using Microsoft Edge and want to learn how to enable or disable the new Edge Hardware Acceleration feature, the steps below should show you how.
Microsoft Edge Hardware acceleration improves the browser’s performance by moving all graphics and text rendering from the CPU to the Graphics Processing Unit (GPU) when available. This frees up resources on your computer so it can run other applications faster.
In some instances, Hardware acceleration may render your computer to perform slowly if your computer isn’t equipped with high-performance graphics cards. If this is the case, you should disable hardware acceleration.
To get started with turning Hardware Acceleration on or off, follow the steps below:
Enable Hardware Acceleration
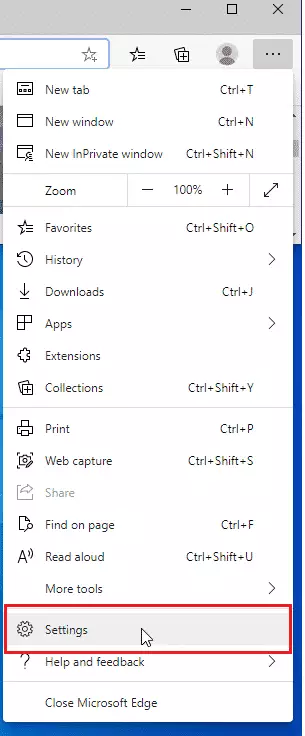
To enable Hardware Acceleration in Edge, open the Edge settings page by clicking the three horizontal dots ( . ) at the top corner of your screen, then go to Settings.
When the Settings page opens, click on System on the left side menu. To the right, turn on Hardware Acceleration under System, as shown in the image below.

Click Restart to apply the changes when done.
That’s it! If it’s already turned on and you want to disable it, click the button to turn it off.
Enable via registry
You can also enable Edge v via the Windows registry if logged in as an administrator. To do that, use the steps below:
Using the Windows registry is one way to force all users on the System to use Hardware Acceleration. There are multiple ways to do this in Windows; however, using the Windows registry is the easiest and most effective way.
To enable, press the Windows Key + R on your keyboard to open the run command box. Or use the search function to search for the Run app.
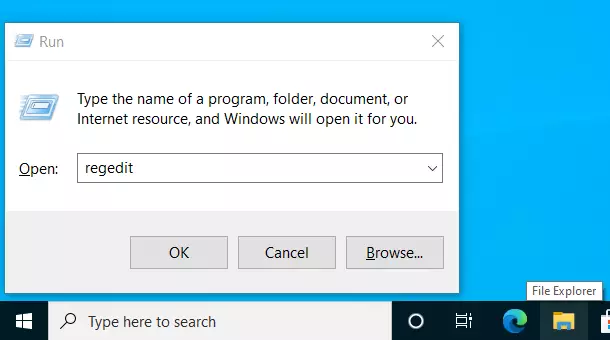
In the command box, type the commands below and press Enter.
regedit
Then the registry opens; navigate to the path below.
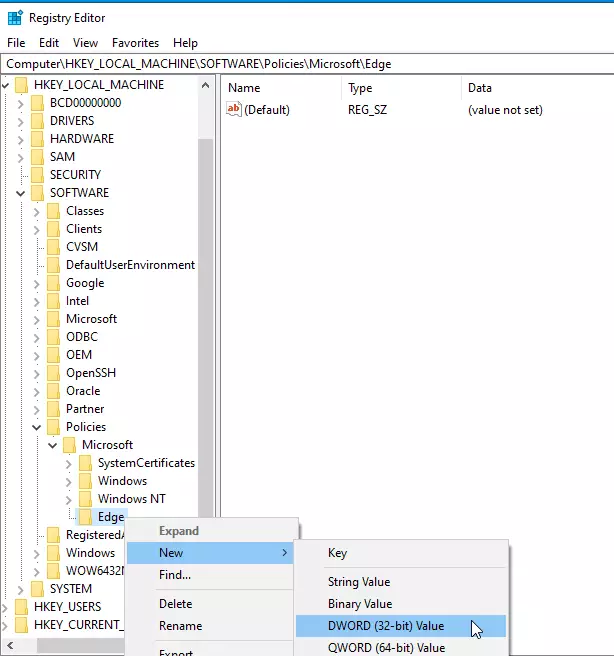
HKEY_LOCAL_MACHINE\SOFTWARE\Policies\Microsoft\Edge
From there, right-click on the Edge key and select the New > DWORD (32-bit) Value option to create a REG_DWORD value if you don’t see the existing HardwareAccelerationModeEnabled value already created.
Name the new DWORD value as:
HardwareAccelerationModeEnabled
After saving the DWORD above, double-click it to open. Then enter the value of 1 to enable.
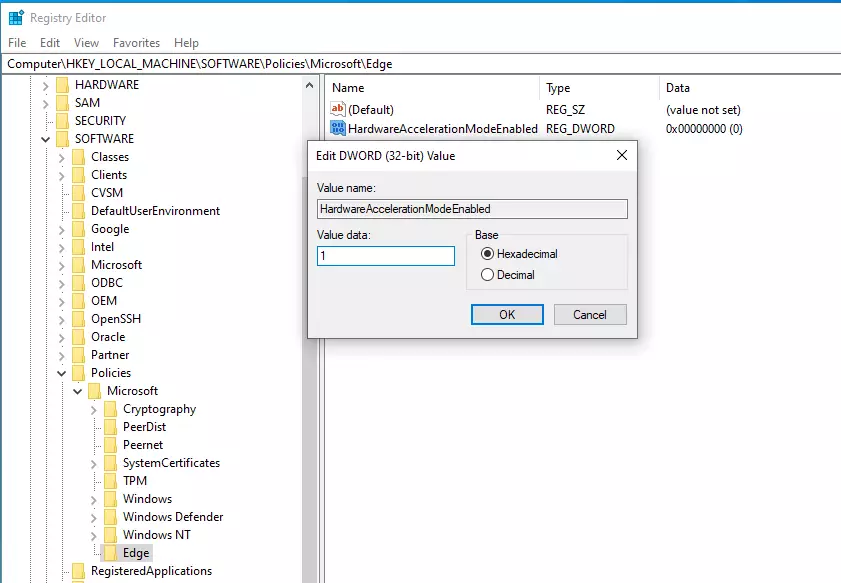
(delete) = Default
0 = Always disabled
1 = Always enabled
That should do it!
Conclusion:
- Enabling Hardware Acceleration in Microsoft Edge can significantly improve browser performance by utilizing the GPU for rendering.
- If your computer has a low-performance graphics card, you may experience slower performance with Hardware Acceleration enabled; consider disabling it in such cases.
- You can easily enable or disable Hardware Acceleration through the Edge settings or via the Windows registry for a system-wide effect.
- Following these steps ensures you can configure Edge to best meet your computing needs and maximize efficiency.
- Regularly check your Edge settings to optimize your browsing experience based on system capabilities.


Leave a Reply Cancel reply