This guide will help you adjust your Wi-Fi adapter’s roaming aggressiveness in Windows 11. This setting controls how your computer switches between Wi-Fi access points with stronger signals.
What is Wi-Fi Roaming Aggressiveness?
When you connect to Wi-Fi, Windows saves the network info (like the name and password) so it can connect automatically next time.
Roaming aggressiveness tells your Wi-Fi adapter how quickly it should look for and switch to a better Wi-Fi signal nearby. For example, if your current Wi-Fi signal gets weak, it can switch to a stronger one automatically.
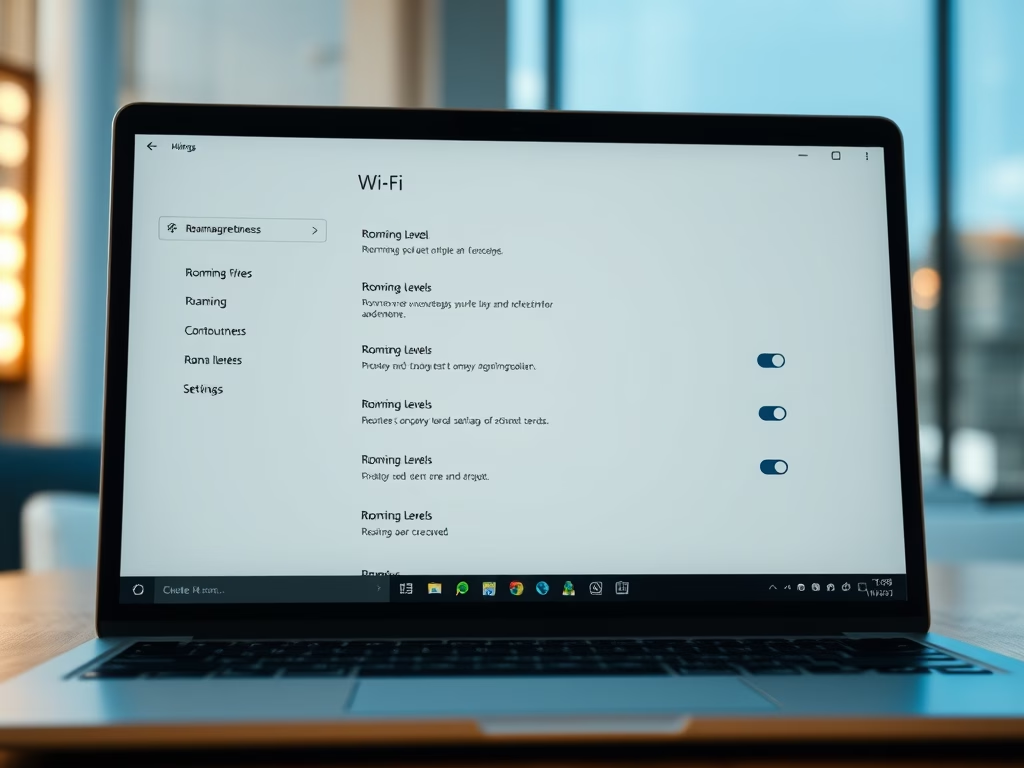
There are 5 levels of roaming aggressiveness:
| Level | What It Means |
|---|---|
| 1. Lowest | Switches only when the current signal is very weak. |
| 2. Medium-low | A bit more sensitive than lowest. |
| 3. Medium (Default) | Balanced between switching often and staying connected. |
| 4. Medium-high | Looks for better signals more actively. |
| 5. Highest | Switches even when the current signal is still good. |
Usually, the default Medium setting works best. If you move around a lot and want to connect to stronger signals faster, try higher levels. If you notice your Wi-Fi keeps disconnecting or your battery drains faster, try a lower level.
How to Change Your Wi-Fi Roaming Aggressiveness
Option 1: Change It in Windows 11 Settings
This is the easiest way for Windows 11 users.
- Press Win + I to open Settings.
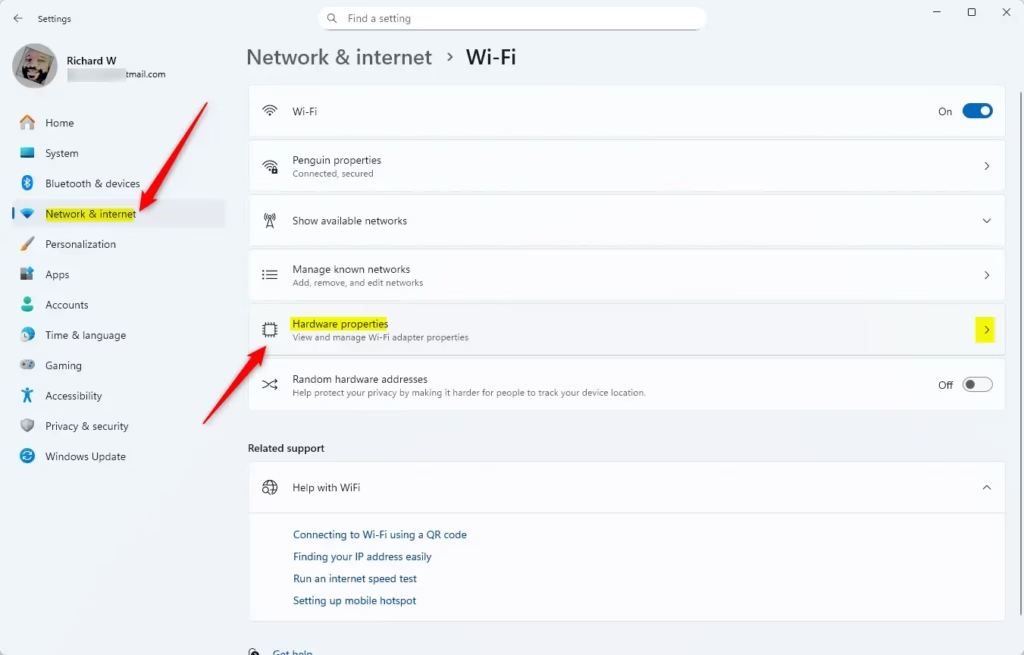
- Click Network & internet on the left, then select Wi-Fi on the right.
- Click on Hardware properties.
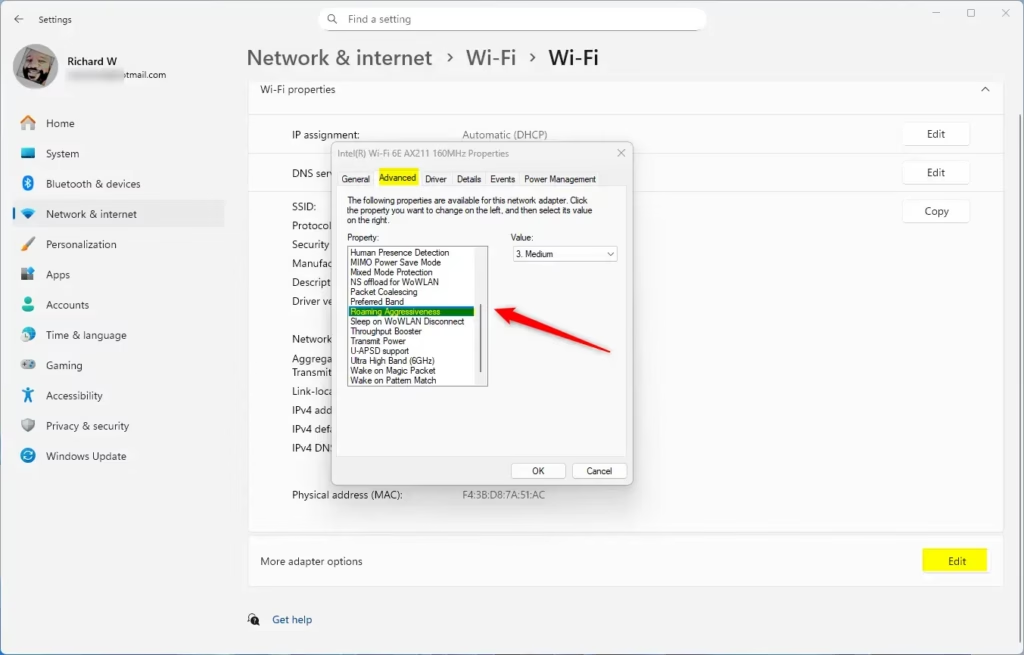
- Click Edit next to More adapter options.
- Click the Configure button.
- In the new window, go to the Advanced tab.
- Select Roaming aggressiveness in the list on the left.
- Choose your preferred level from the dropdown menu on the right.
- Click OK to save your changes.
Option 2: Change It Using Device Manager
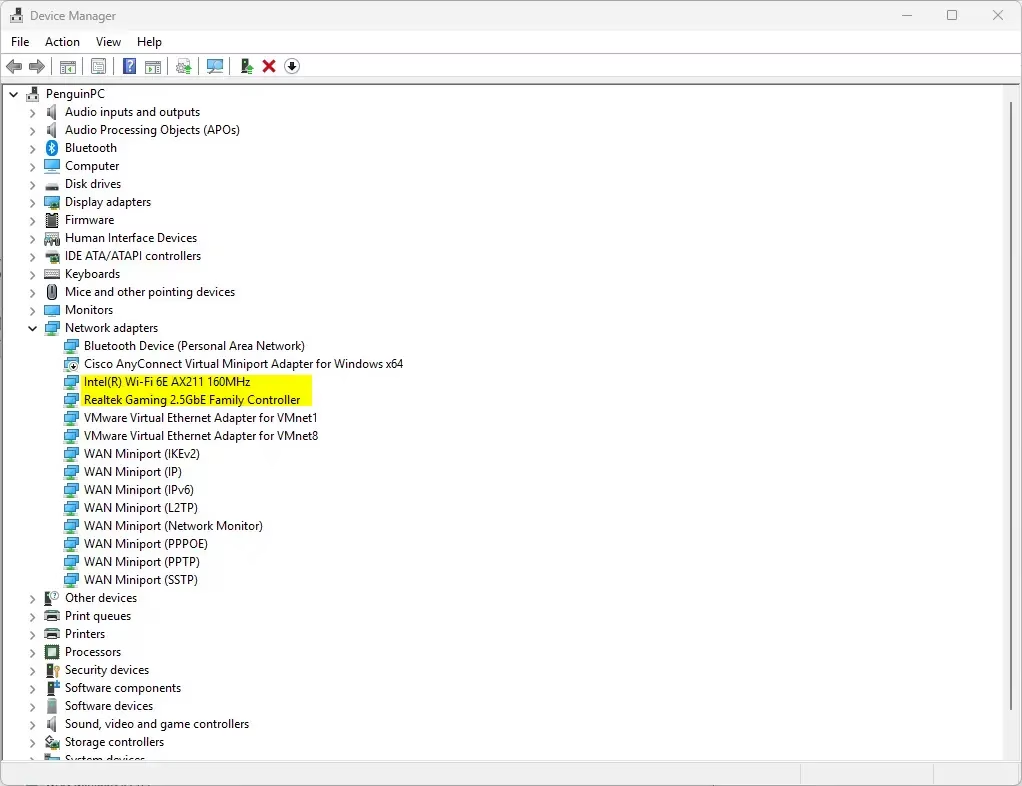
- Press Win + X and select Device Manager, or press Win + R, type
devmgmt.mscand press Enter. - Expand Network adapters.
- Double-click your Wi-Fi adapter (name might include “Wireless” or “Wi-Fi”).
- Go to the Advanced tab.
- Select Roaming aggressiveness from the list.
- Pick the level you want from the dropdown menu.
- Click OK.
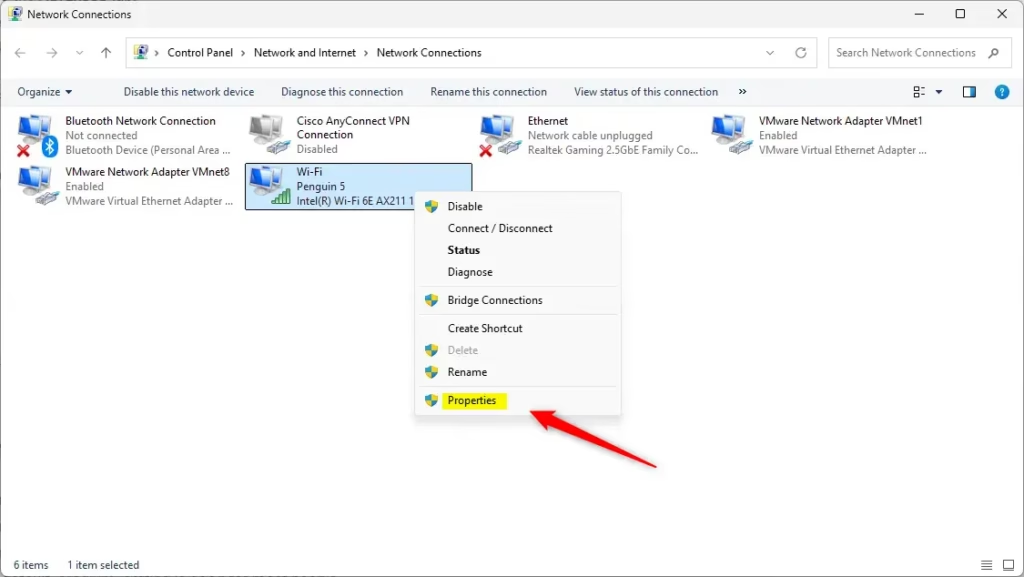
Option 3: Change It in Network and Sharing Center
- Open the Control Panel and select Network and Sharing Center.
- Click Change adapter settings on the left.
- Right-click your Wi-Fi adapter and choose Properties.
- Click the Configure button.
- Go to the Advanced tab.
- Select Roaming aggressiveness and choose your level.
- Click OK to save.
Summary
- Your computer saves Wi-Fi network info for easier connections.
- Roaming aggressiveness controls how often your Wi-Fi looks for a stronger signal to switch to.
- There are 5 levels, from very relaxed to very aggressive.
- The default “Medium” setting is good for most people.
- If you move around a lot and want better performance, try higher levels.
- If you experience connection drops or faster battery drain, try lowering the level.
- You can change this setting via Settings, Device Manager, or Network and Sharing Center.
By adjusting roaming aggressiveness, you can improve your Wi-Fi experience based on how you use your device.
More Info
Learn more about Wi-Fi roaming aggressiveness from Intel: Intel Wi-Fi Roaming Aggressiveness Setting
For advanced users, you can also manage this setting with PowerShell: Set-NetAdapterAdvancedProperty (NetAdapter)


Leave a Reply Cancel reply