
This article provides a clear guide on how to change or set the system locale in Windows 11.
Unicode is a global character-encoding standard used for character and string manipulation. However, some applications do not support Unicode, which means they cannot utilize Windows standards.
Changing the system locale does not affect menu and dialog box text or Unicode programs, unlike the system language display text.
If you need to manually configure the System Locale in Windows 11 for these programs, this guide explains how to do so.
Set System Locale in Windows 11
The System Locale defines the default ANSI, OEM, MAC, and EBCDIC code pages for non-Unicode programs, and it uses this setting to manage programs incorrectly configured with Unicode specifications.
Windows 11 has a centralized location for most settings. Users can configure the system, create new accounts, and update Windows from the System Settings pane.
To get to System Settings, you can use the Windows key + I shortcut or click on Start ==> Settings, as shown in the image below:

Alternatively, you can use the search box on the taskbar to search for Settings. Then select to open it.
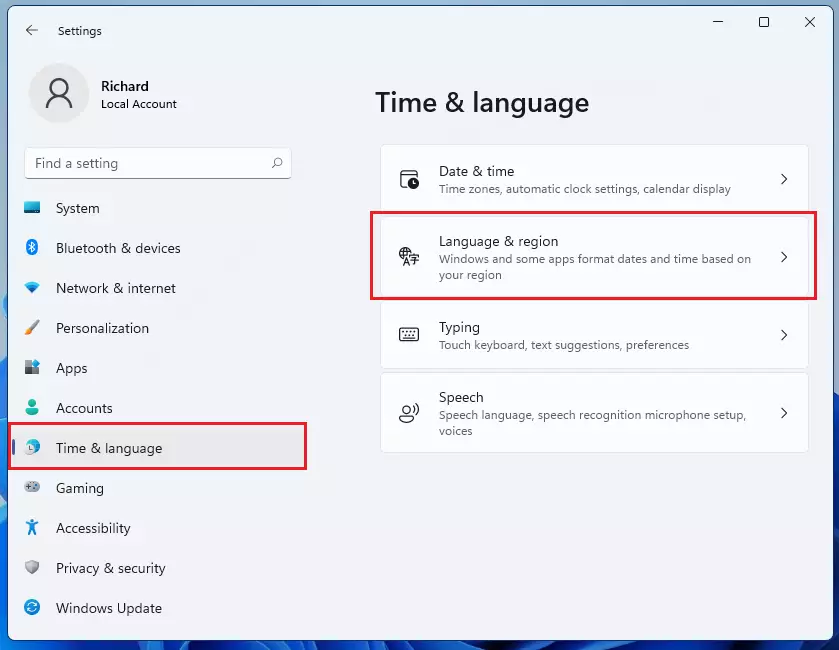
In Windows Settings, click Time & Language, and select Language & Region on the right pane of your screen, as shown in the image below.
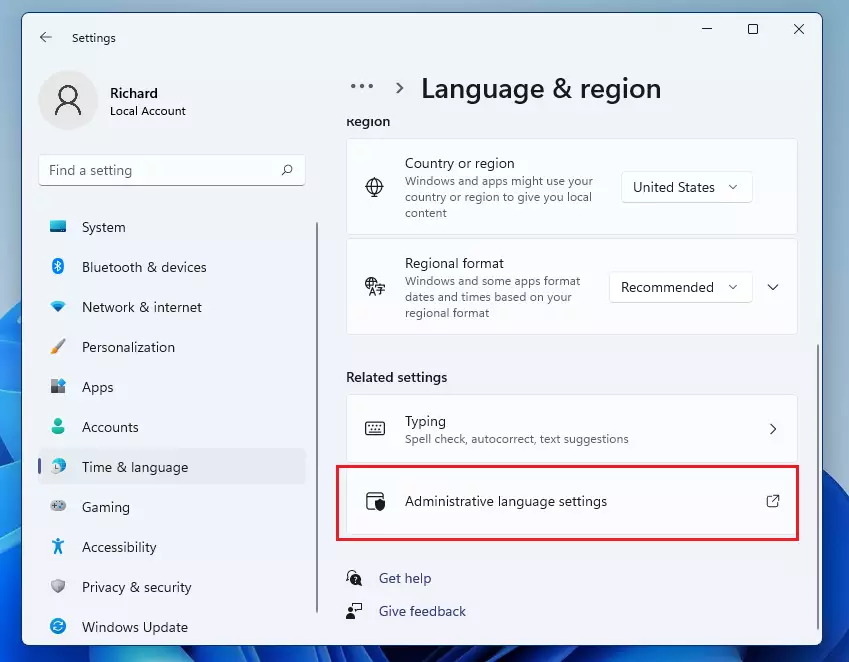
On the Language & Region settings pane, scroll down on the page. Under Related settings, click the link for Administrative language settings highlighted below.
This will take you to the Region settings pane under Administrative. Next, click the Change system locale. The button is highlighted below.
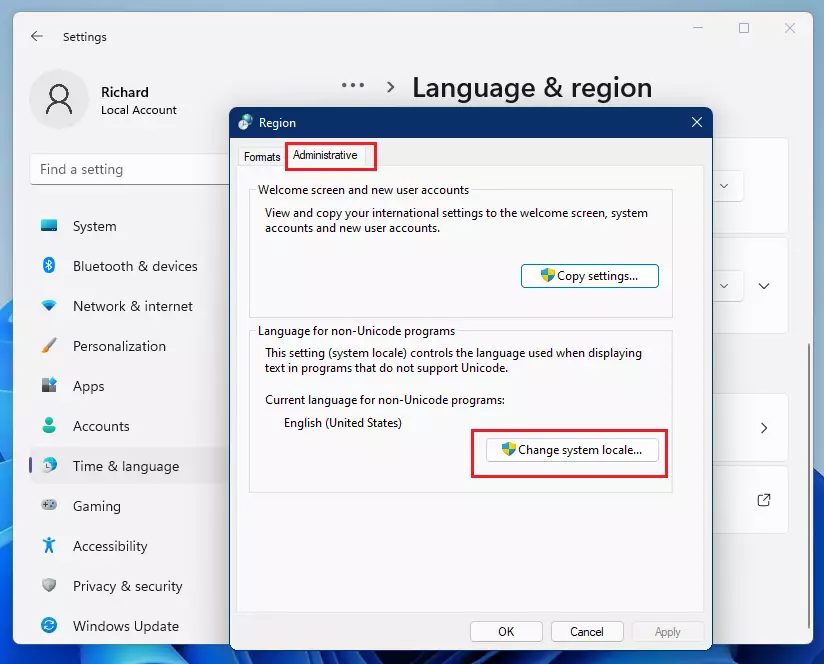
Next, select the Language you want for the system locale from the list, then click OK to apply your changes. This change will affect all user accounts on the computer.
Check the BETA: Use Unicode UTF-8 for the worldwide language support box.

You’ll be prompted to restart your computer.

The language you selected for the system locale will also be automatically chosen in Windows 11 for the system language.
That should do it!
Conclusion:
- Changing the System Locale in Windows 11 allows non-Unicode programs to function correctly using appropriate language settings.
- This setting affects all user accounts on the computer, ensuring a consistent experience across the system.
- Configuring the System Locale is a straightforward process that can easily be accomplished through the Windows Settings.
- Always restart your computer after making changes to the system locale for them to take effect.
- By utilizing the available settings, users can better manage software that does not comply with Unicode standards and enhance overall system usability.

Leave a Reply Cancel reply