
This article explains how to adjust the screen timeout settings in Windows 11 to turn off the display after a specified duration.
By default, Windows 11 turns off the screen after 5 minutes on battery and 15 minutes when plugged in.
You don’t have to accept the default timeout period. If Windows 11 is turning off too quickly, you can adjust the settings to extend the time before it turns off or to prevent it from turning off automatically. This guide will show you how to do that.
When the screen is turned off, you will need to move the mouse, touch the screen on touchscreen devices, or press any key on the keyboard to wake it up. Windows will resume from where it left off and require you to log back into your session. This process is implemented for security reasons.
How to set how long Windows 11 screen timeout
If the default timeout period is too short for you in Windows 11, you can change the time so that it doesn’t sleep too soon or never.
Follow the steps below to get it done.
Windows 11 has a centralized location for the majority of its settings. From system configurations to creating new users and updating Windows, all can be done from the System Settings pane.
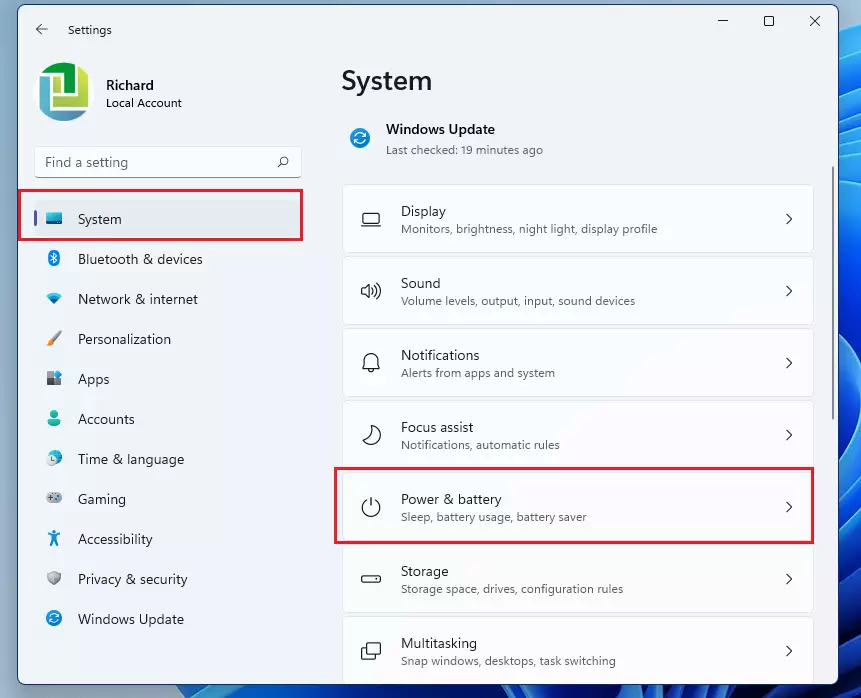
To get to System Settings, you can use the Windows key + I shortcut or click on Start ==> Settings, as shown in the image below:

Alternatively, you can use the search box on the taskbar to search for Settings. Then select to open it.
In Windows Settings, click on System, then choose Power & battery from the options on the right side of your screen, as illustrated in the image below.
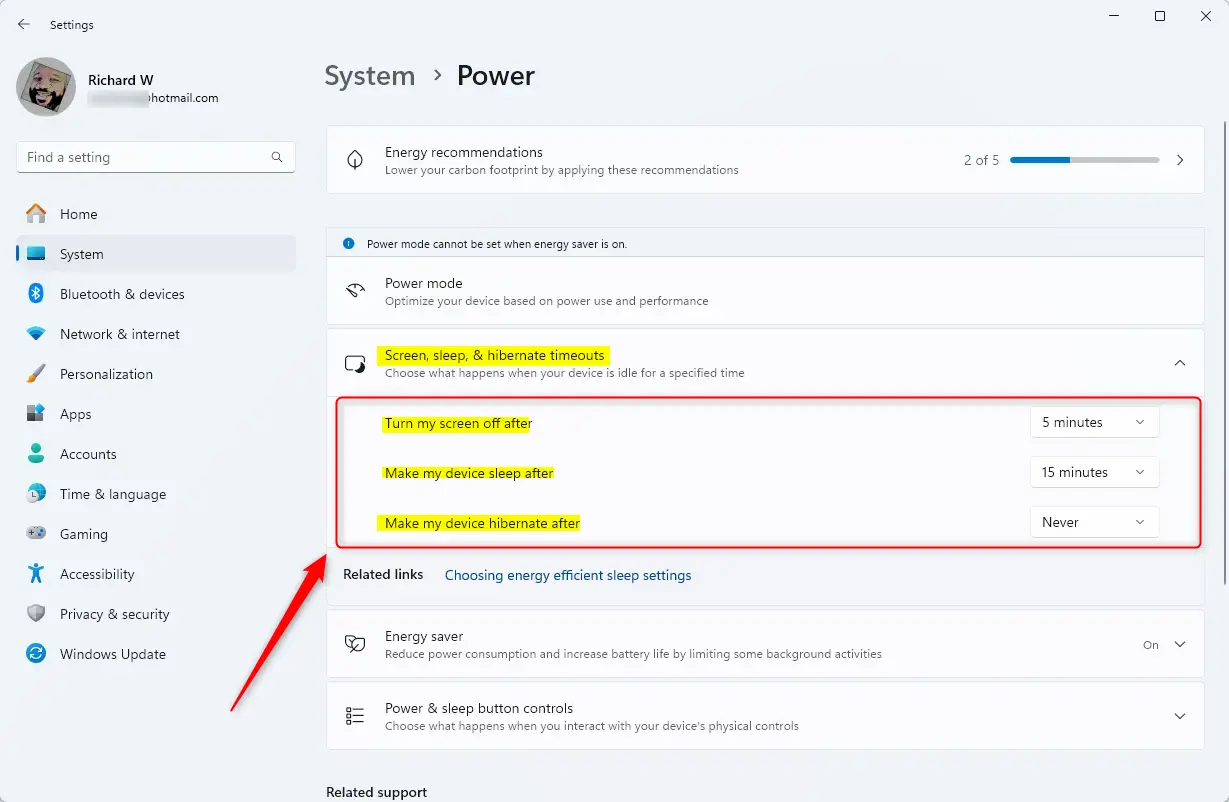
On the Power & battery settings pane, under Power, expand the Screen and Sleep section highlighted below.
Then, change the timeout period for when to turn off the Screen after a certain time for the battery or when plugged in.
The settings should take effect immediately. Simply exit and close the settings pane, and you’re done.
In some cases, Windows will want you to reboot the System before the settings can be applied fully.
If the steps above do not work, you may find the post below helpful. The post below will work on Windows 10 and 11 and change the power settings even if the device is controlled in a corporate environment.
How to keep Windows awake with PowerToys
That should do it!
Conclusion:
- Adjusting the screen timeout settings in Windows 11 is a straightforward process that can enhance your user experience.
- You can customize when the screen turns off, whether on battery or when plugged in, according to your preferences.
- The settings take effect immediately, ensuring you have control over your device’s display.
- For additional features, consider using tools like PowerToys to keep your Windows device awake if needed.
- Regularly check your settings to maintain optimal performance, especially in corporate environments.
Leave a Reply