
This tutorial will show you how to change the power saving mode of your wireless adapter in Windows 11. Your wireless adapter is the device that connects your computer to WiFi.
The Power Saving Mode setting lets you control how much power your wireless adapter uses. Think of it like adjusting the brightness on your screen — you can make it brighter for better performance or dimmer to save battery.
Why Does This Matter?
When you increase power savings, your wireless network will be slower but your battery will last longer. When you choose maximum performance, your WiFi will be faster but your battery will drain quicker.
The Four Power Saving Modes
- Maximum Performance: WiFi works at full speed. Uses more battery. This is the default when plugged in.
- Low Power Saving: WiFi is balanced between speed and battery life.
- Medium Power Saving: WiFi is balanced between speed and battery life. This is the default when on battery.
- Maximum Power Saving: WiFi uses the least power. Slowest connection.
Power Management Settings for Intel® Wireless Adapters
Option One: Using Control Panel
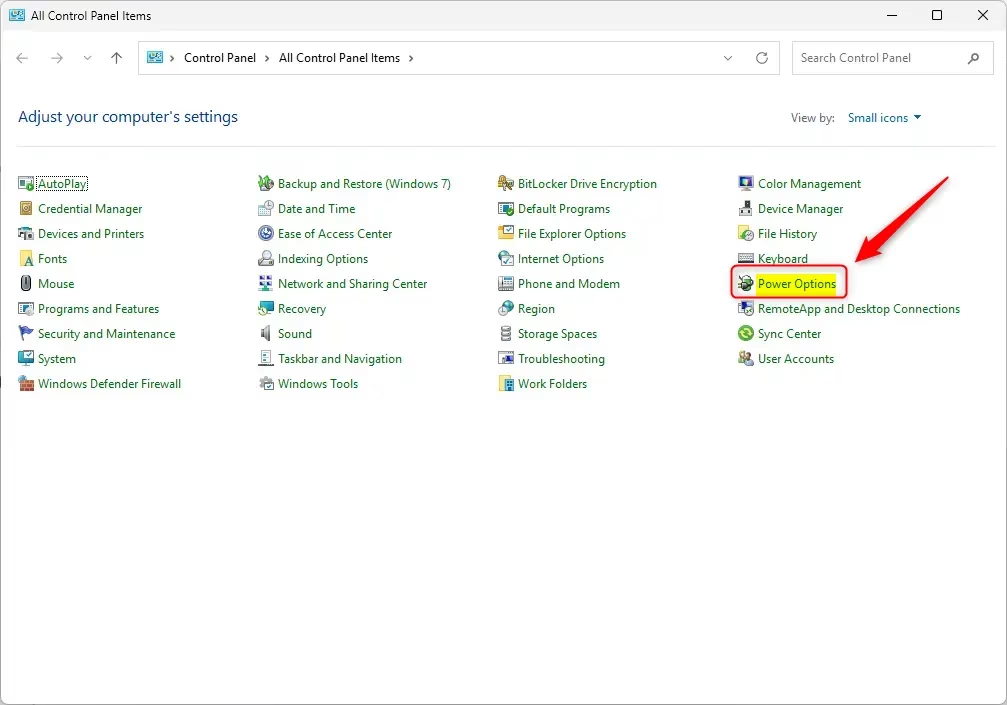
Open the Control Panel. Look for the Power Options icon and click it.
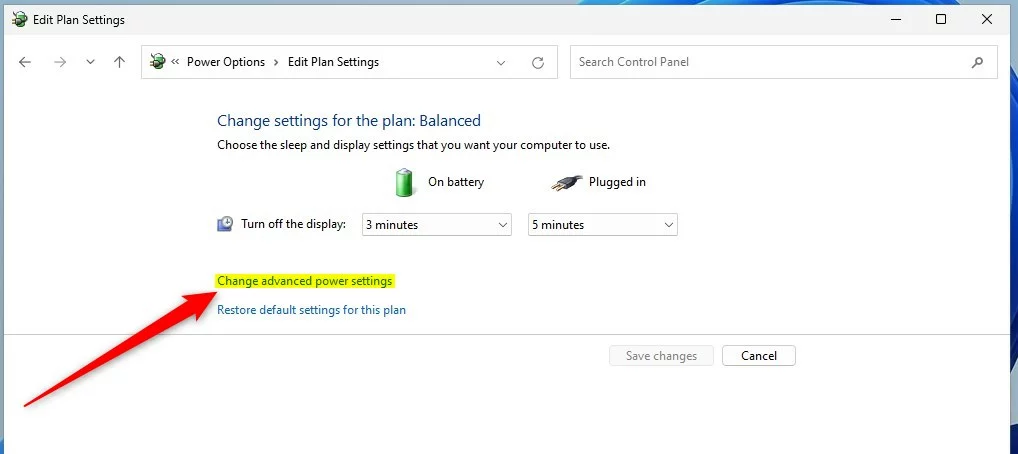
Find your active power plan (such as “Balanced”). Click the link that says Change plan settings.
Click the link that says Change advanced power settings.
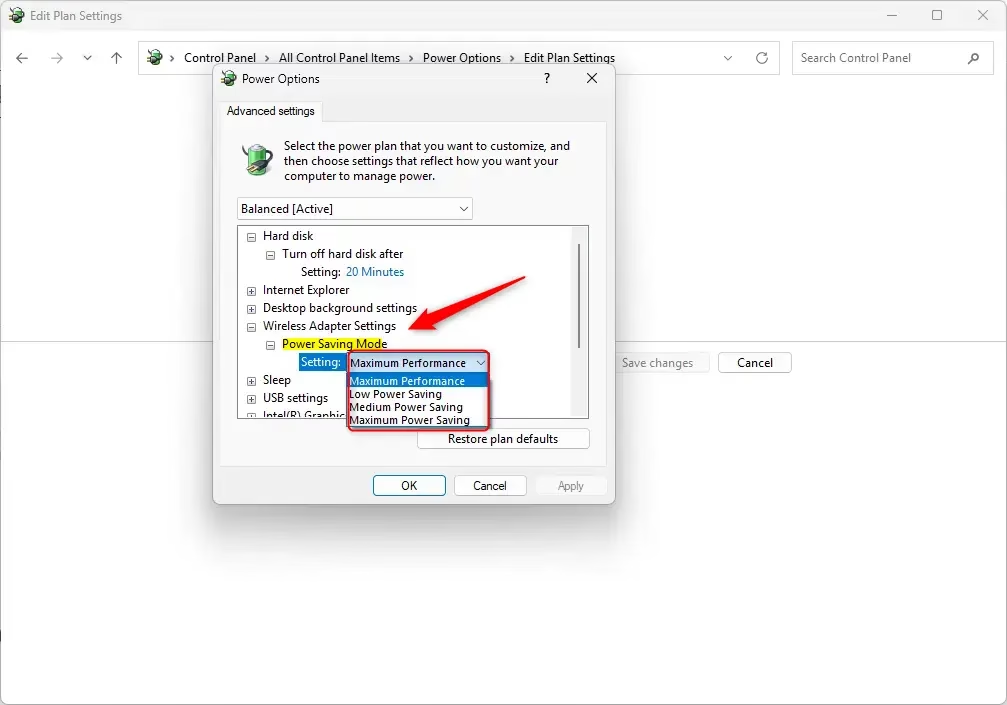
Scroll down to find Wireless Adapter Settings. Click the plus sign to expand it. Then expand Power Saving Mode.Note: If you don’t see Wireless Adapter Settings, you may need to add it first. %%SC0%%
You will see two dropdown menus: On battery and Plugged in. Choose which power saving mode you want for each. Your choices are Maximum Performance, Low Power Saving, Medium Power Saving, or Maximum Power Saving. Click OK when done.
Note: Desktop computers only show the “Plugged in” option unless they have a UPS (uninterruptible power supply) connected.
You can close Control Panel now.
Option Two: Using Command Prompt
⚠️ This option requires administrator privileges.
Right-click on Windows Terminal and select Run as administrator. Then choose Command Prompt or Windows PowerShell.
Copy and paste one of the commands below. Press Enter to run it.
For On Battery Mode:
Maximum Performance:
powercfg /SETDCVALUEINDEX SCHEME_CURRENT 19cbb8fa-5279-450e-9fac-8a3d5fedd0c1 12bbebe6-58d6-4636-95bb-3217ef867c1a 0Low Power Saving:
powercfg /SETDCVALUEINDEX SCHEME_CURRENT 19cbb8fa-5279-450e-9fac-8a3d5fedd0c1 12bbebe6-58d6-4636-95bb-3217ef867c1a 1Medium Power Saving:
powercfg /SETDCVALUEINDEX SCHEME_CURRENT 19cbb8fa-5279-450e-9fac-8a3d5fedd0c1 12bbebe6-58d6-4636-95bb-3217ef867c1a 2Maximum Power Saving:
powercfg /SETDCVALUEINDEX SCHEME_CURRENT 19cbb8fa-5279-450e-9fac-8a3d5fedd0c1 12bbebe6-58d6-4636-95bb-3217ef867c1a 3For Plugged In Mode (Desktop Computers):
Maximum Performance:
powercfg /SETACVALUEINDEX SCHEME_CURRENT 19cbb8fa-5279-450e-9fac-8a3d5fedd0c1 12bbebe6-58d6-4636-95bb-3217ef867c1a 0Low Power Saving:
powercfg /SETACVALUEINDEX SCHEME_CURRENT 19cbb8fa-5279-450e-9fac-8a3d5fedd0c1 12bbebe6-58d6-4636-95bb-3217ef867c1a 1Medium Power Saving:
powercfg /SETACVALUEINDEX SCHEME_CURRENT 19cbb8fa-5279-450e-9fac-8a3d5fedd0c1 12bbebe6-58d6-4636-95bb-3217ef867c1a 2Maximum Power Saving:
powercfg /SETACVALUEINDEX SCHEME_CURRENT 19cbb8fa-5279-450e-9fac-8a3d5fedd0c1 12bbebe6-58d6-4636-95bb-3217ef867c1a 3
Summary
You now know how to change your wireless adapter’s power saving mode in Windows 11. You can do this two ways: through Control Panel (the easy way) or through Command Prompt (the advanced way). Choose the power saving mode that works best for you. If you want faster WiFi, pick “Maximum Performance.” If you want longer battery life, pick “Maximum Power Saving.” The middle options give you a balance of both.

Leave a Reply Cancel reply