If you want your mouse wheel to scroll faster or slower on your Windows 11 PC, you can easily change the scroll speed. This guide will show you simple ways to do it.
Change Mouse Scroll Speed Using Windows Settings
Windows Settings is the easiest way to change how fast your mouse wheel scrolls. By default, your mouse scrolls 3 lines at a time, but you can increase or decrease that number.
Steps:
- Open the Settings app:
- Click the Start menu (Windows icon) and select Settings.
- Or press Windows key + I on your keyboard to open Settings quickly.
- In Settings, click on Bluetooth & devices on the left side.
- On the right, click Mouse.
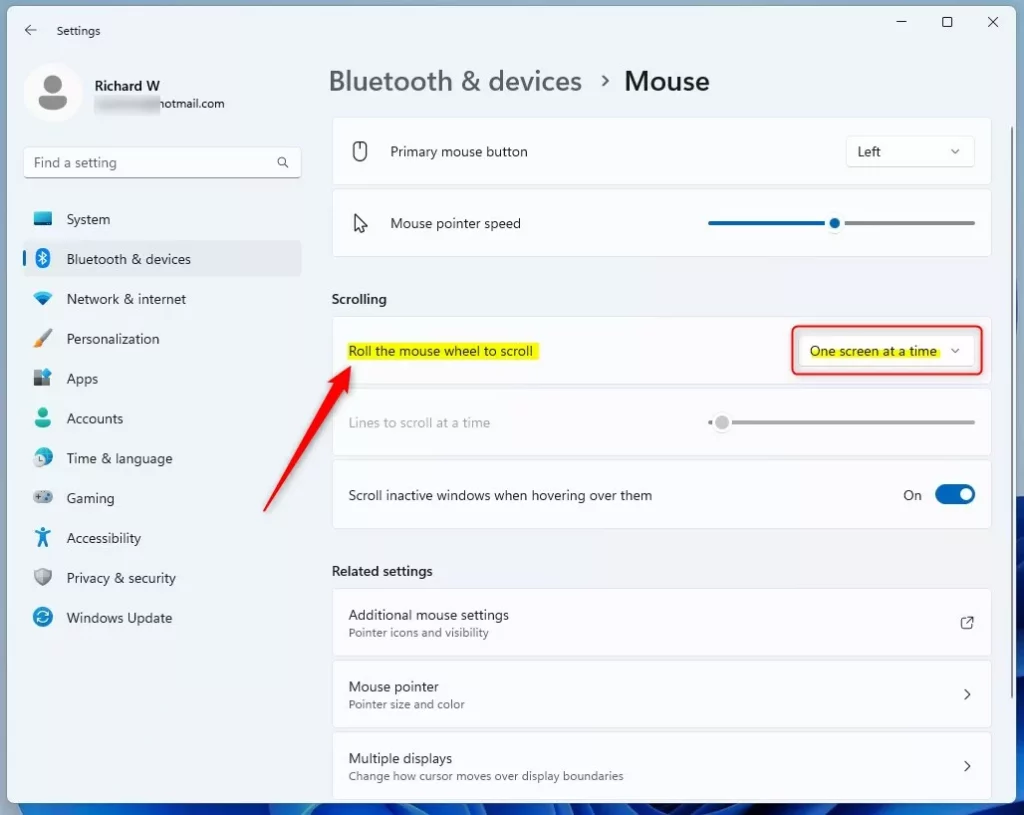
- Under Scrolling, you will see an option called “Roll the mouse wheel to scroll” with two choices:
- Multiple lines at a time (default): You can adjust how many lines to scroll using the slider.
- One screen at a time: Scrolls a whole screen with each wheel move.
Adjust the slider to set how many lines you want to scroll per wheel click. Try different numbers to find what feels best!
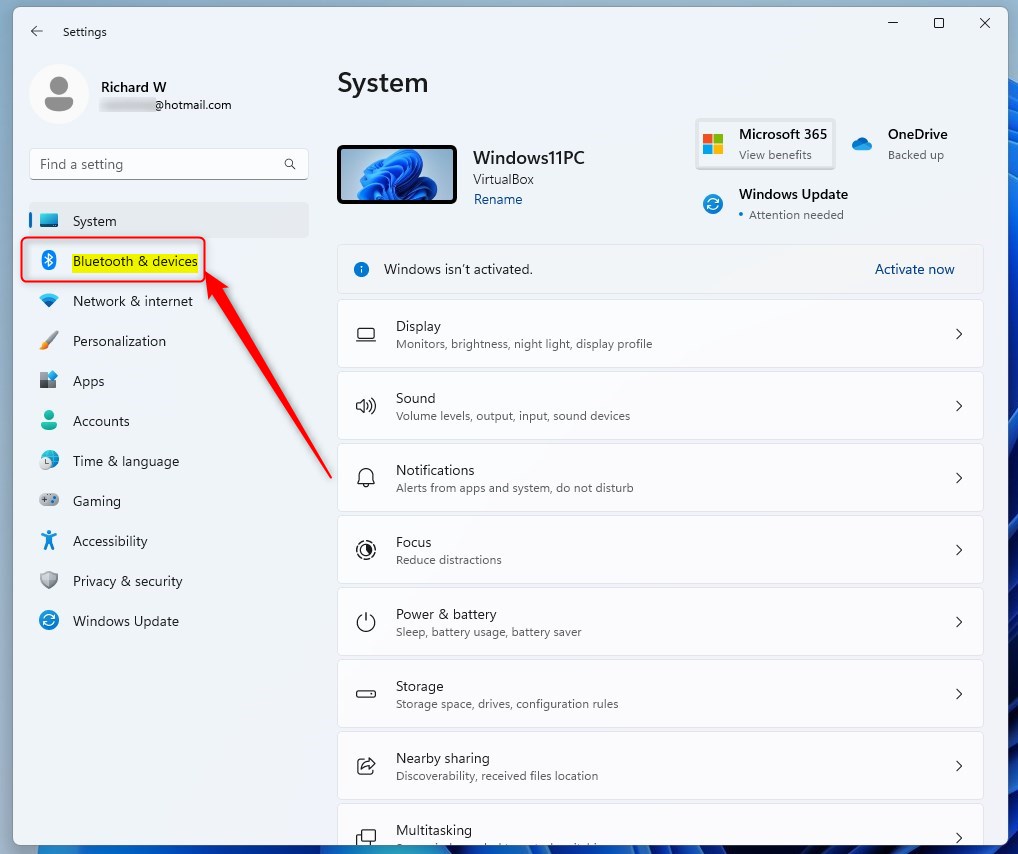
Windows 11 Bluetooth & devices settings
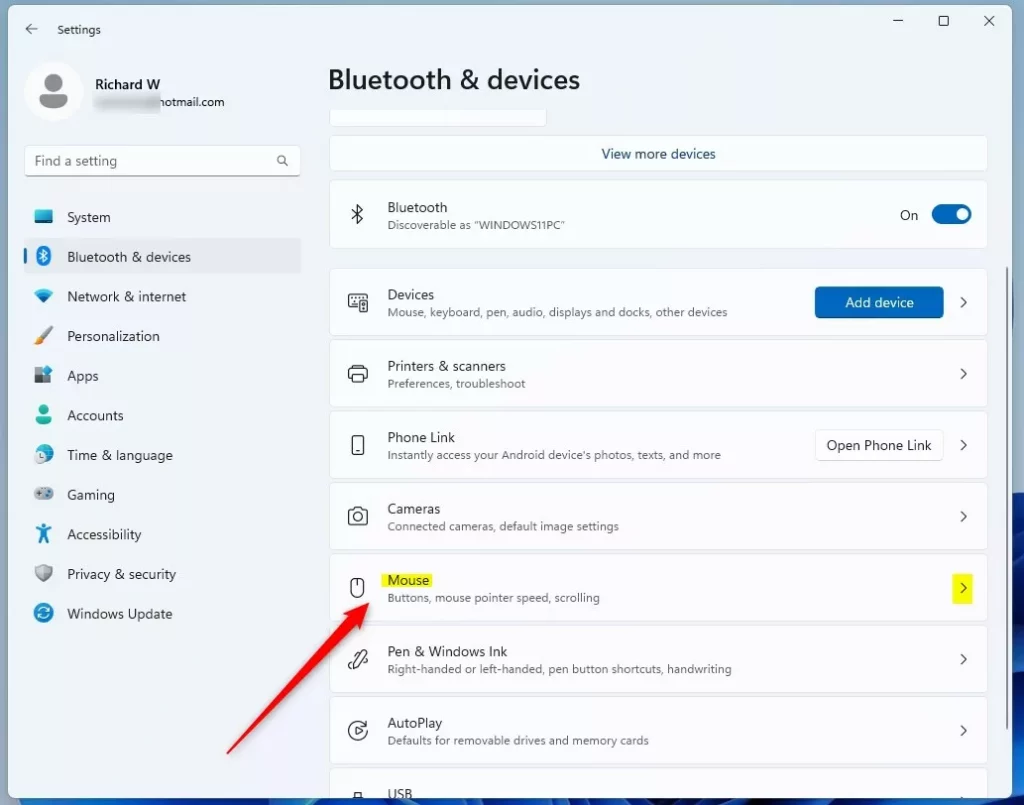
Mouse settings in Windows 11

Scrolling multiple lines at a time
Scrolling one screen at a time
Change Mouse Scroll Speed Using Control Panel
If you prefer the classic Control Panel, you can also change the scroll speed there.
Steps:
- Open the Control Panel:
- Click Start, type Control Panel, and press Enter.
- Click Hardware and Sound.
- Click Mouse under Devices and Printers.
- In the Mouse Properties window, go to the Wheel tab.
- Under Vertical Scrolling, you can:
- Choose how many lines to scroll at once by changing the number (1 to 100).
- Or select One screen at a time.
- Click Apply and then OK to save your changes.
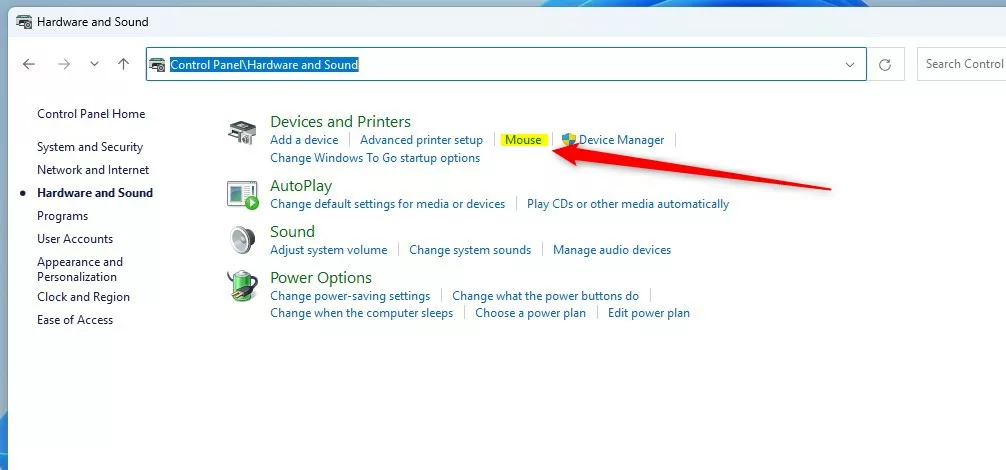
Mouse option in Control Panel

Set the number of lines to scroll
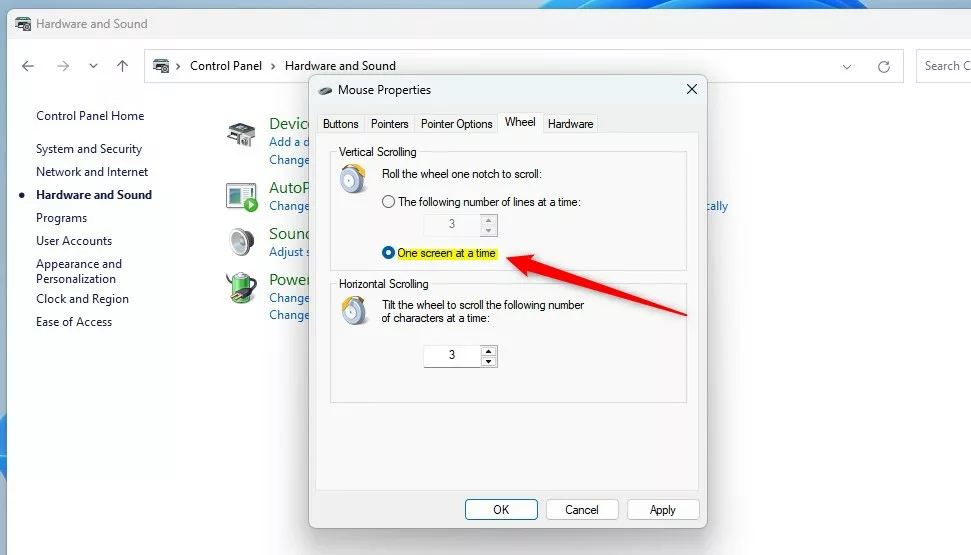
One screen at a time option
Change Mouse Scroll Speed Using Windows Registry (For Advanced Users)
If you feel comfortable making advanced changes, you can also adjust the scroll speed through the Windows Registry. Please be careful — making wrong changes can affect your computer.
Steps:
- Press Windows key + R, type
regedit, and press Enter to open the Registry Editor. - Navigate to this folder:
HKEY_CURRENT_USER\Control Panel\Desktop
- On the right side, find the WheelScrollLines entry and double-click it.
- Change the value to a number between 1 and 100 to set how many lines the wheel scrolls.
- To scroll one whole screen at a time, enter -3.
- Click OK, then close the Registry Editor.
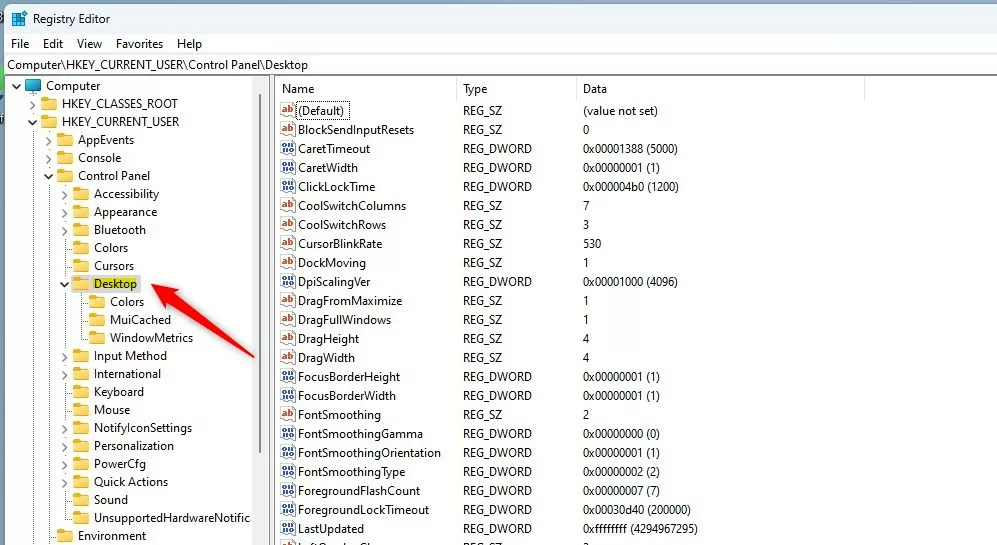
Changing mouse scroll settings in Windows Registry

Modify the WheelScrollLines value
Summary
- You can easily change how fast your mouse scrolls in Windows 11.
- The easiest way is through the Settings app, where you can pick how many lines or screens to scroll.
- The classic Control Panel also lets you adjust scroll speed with similar options.
- Advanced users can use the Registry Editor to fine-tune the scroll speed directly.
- Try these methods to find the scroll speed that feels best for you and makes using your PC more comfortable.

Leave a Reply Cancel reply