This article explains how to change or switch the mouse primary button in Windows 11.
By default, Windows 11 uses the left mouse button as a primary button for selecting, dragging, clicking, and performing normal mouse operations.
By default, the primary mouse button sits on the left-hand side of the Mouse for the benefit of right-handed users. Left-handed users usually reverse this position on Windows.
Windows allows users to change or switch the Mouse’s primary button to be on the left or right. When Windows uses the right button, all normal mouse operations like selecting, clicking, and dragging are done by the right mouse button. The left button will invoke a contextual menu in the Windows interface.
Some left-handed users prefer to use the right mouse button for normal operations and the Left for contextual menu. Whatever your reasons, you can easily switch the mouse primary button when using Windows 11, and the steps below will show you how to do it.
How to switch the mouse primary button on Windows 11
As mentioned above, Windows 11 uses the left mouse button as a primary button for selecting, dragging, clicking, and performing normal mouse operations on the left-hand side of the Mouse for the benefit of right-handed users.
If you’re a left-handed person, you can reverse the button role.
Windows 11 has a centralized location for the majority of its settings app. From system configurations to creating new users and updating Windows, all can be done from the System Settings pane.
To get to System Settings, you can use the Windows key + I shortcut or click on Start ==> Settings, as shown in the image below:

Alternatively, you can use the search box on the taskbar to search for Settings. Then select to open it.
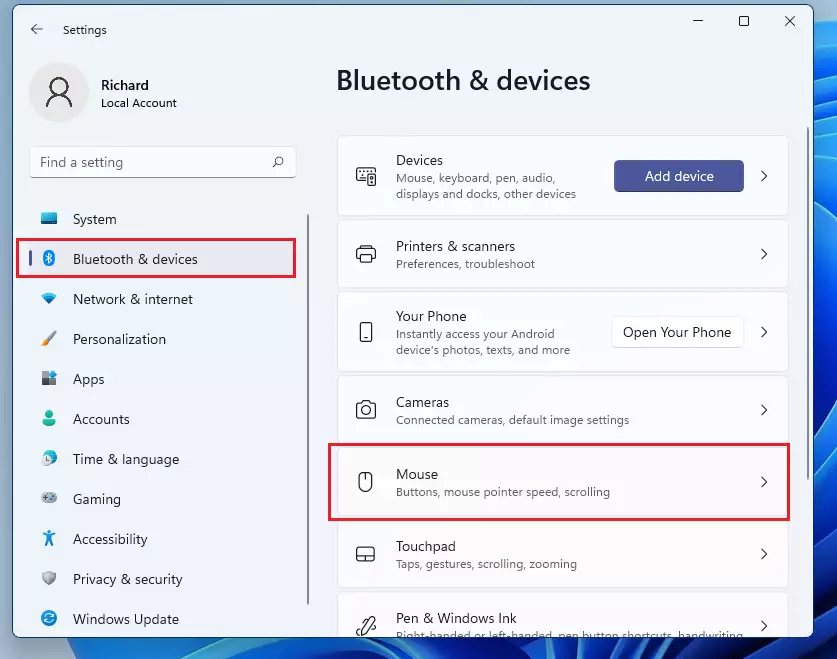
In Windows Settings, click Bluetooth & devices, and select Mouse on the right pane of your screen, shown in the image below.
On the Mouse settings pane, select the Primary mouse button tile and choose Left for right-handed people and Right for left-handed people.
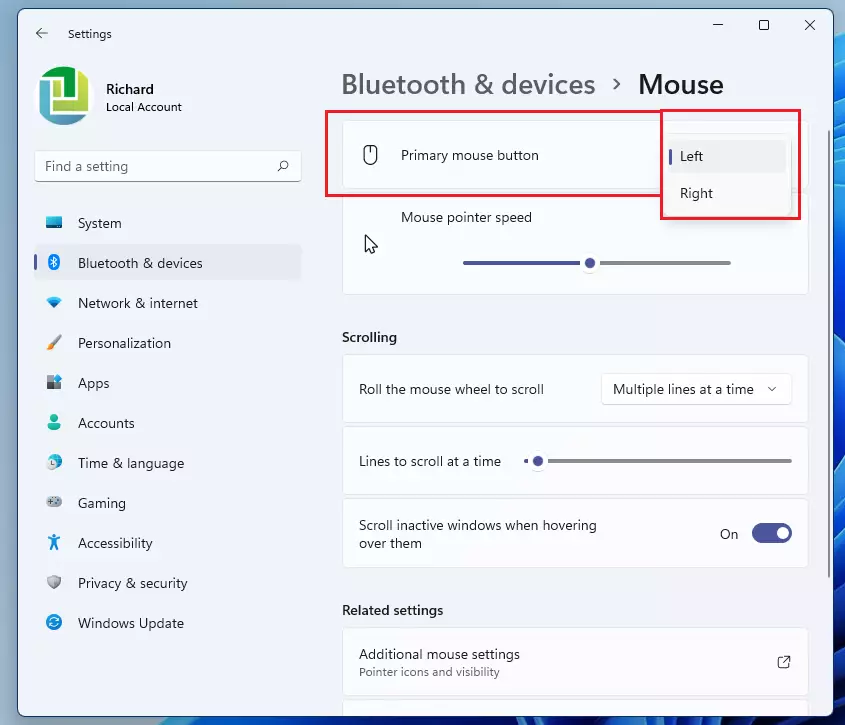
When you select the option, the Mouse immediately switches to the primary button role.
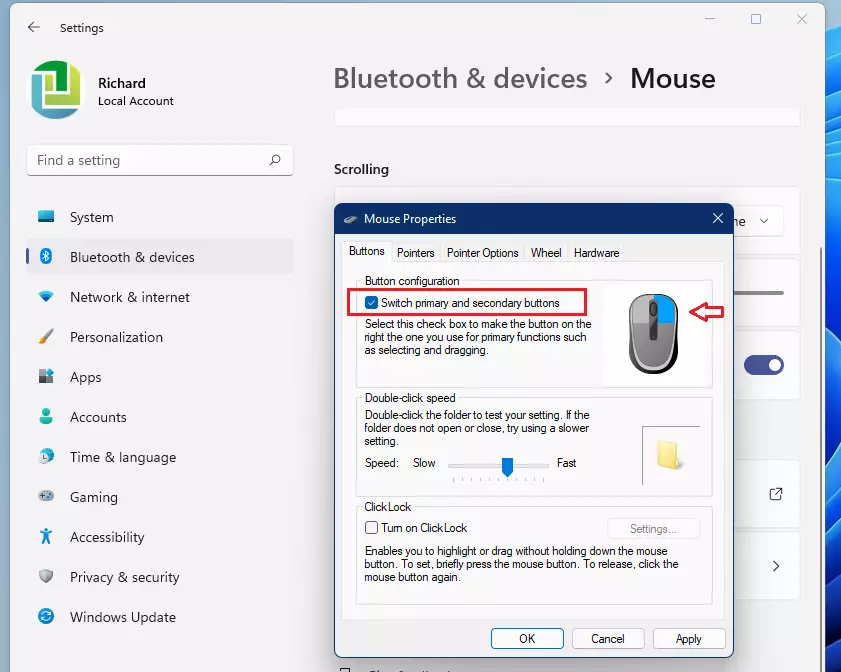
Alternatively, scroll down to the bottom of the settings pane, under Related settings, and select Additional mouse settings.
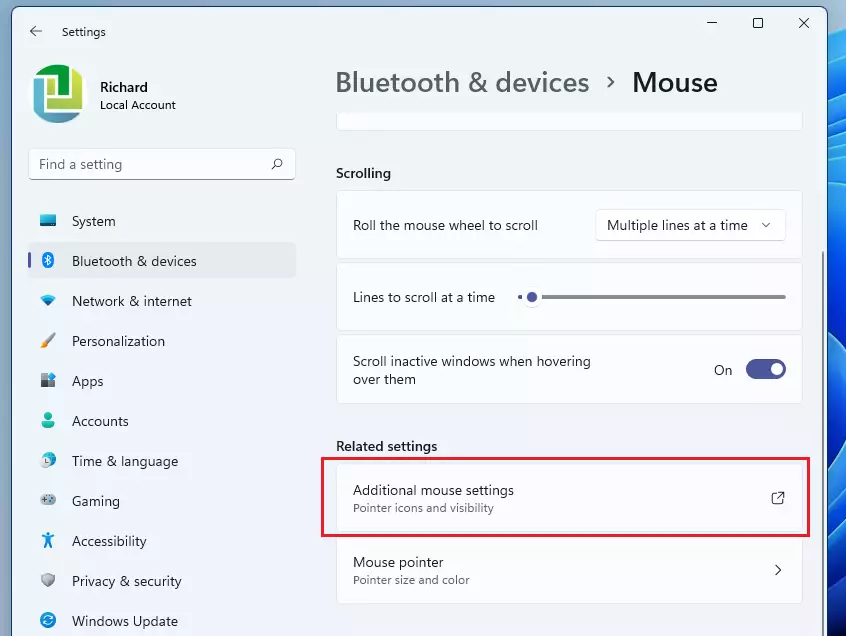
Then, under Button configuration, check the box for Switch primary and secondary buttons on the pop-up windows, as highlighted below.
You should then see the highlighted button of the Mouse as primary.
That should do it!
Conclusion:
- Changing the primary mouse button in Windows 11 is a simple process that accommodates right- and left-handed users.
- Users can access the mouse settings quickly through the System Settings pane or the search box on the taskbar.
- The settings allow you to choose between the left and right mouse buttons for normal operations, enhancing user comfort.
- Additional mouse settings provide options to switch primary and secondary buttons for further customization.
- Adjusting the primary mouse button can improve usability and efficiency for users based on their preferences.

Leave a Reply to Enabling or Disabling ClickLock for the Mouse in Windows 11 - Geek Rewind Cancel reply