

This tutorial will show you how to change your mouse pointer style, color, and size in Windows 11. Your mouse pointer (also called a cursor) is the small icon on your screen that shows where your mouse is pointing.
Windows comes with built-in pointer designs by default. But you can change how your pointer looks to make it easier to see.
Why Change Your Mouse Pointer?
Changing your mouse pointer can help if you have trouble seeing the default one. You can make it bigger, change its color, or pick a different style that works better for you.
What Happens When You Change Your Pointer?
When you change the style and color of your mouse pointer, Windows will change your pointer scheme to (None). This is because you’re using custom settings that haven’t been saved as a scheme.
Your mouse pointer settings are saved in two places in your computer’s registry:
HKEY_CURRENT_USER\Control Panel\Cursors
HKEY_CURRENT_USER\Software\Microsoft\Accessibility
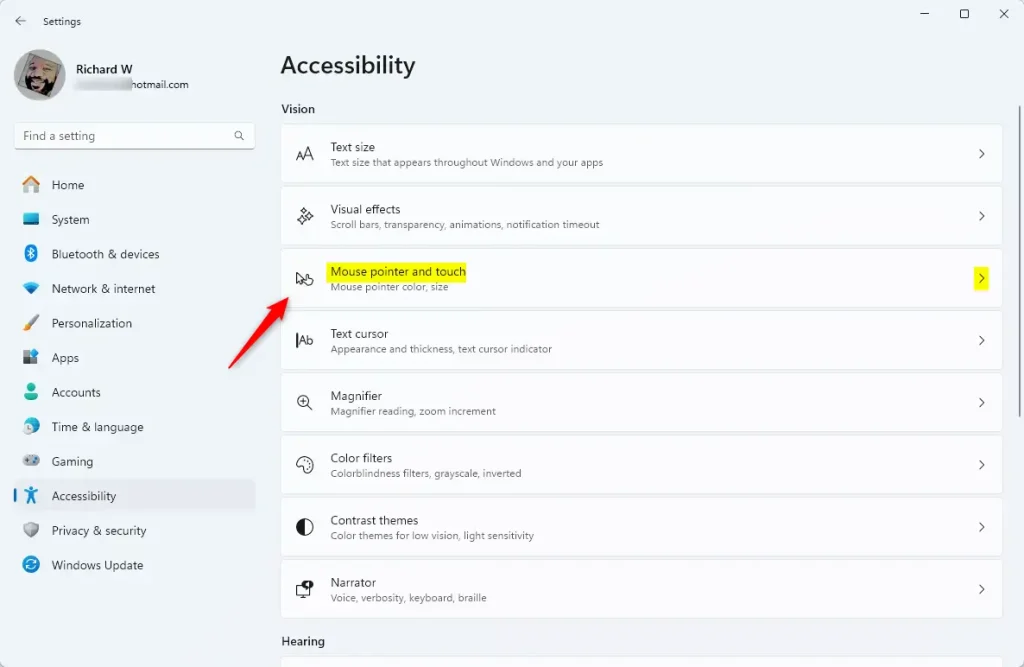
How to Change Your Mouse Pointer
- Open Settings by pressing
Win+Ion your keyboard. - Click on Accessibility on the left side. Then click on Mouse pointer and touch on the right side.
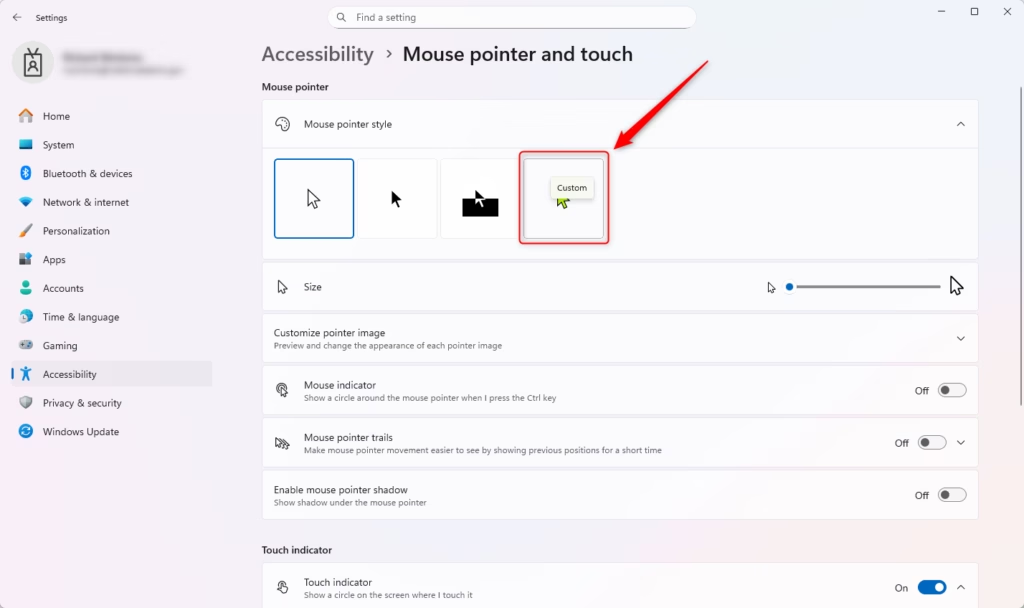
- Under Mouse pointer, choose the style you want: White (default), Black, Inverted, or Custom.
- Select the Size you want. You can choose from 1 to 15. The default size is 1.
- If you chose the Custom style, follow one of the steps below to pick a color.

Option A: Select Color from “Recommended colors”
- Look for the Recommended colors section.
- Click on the color you want.
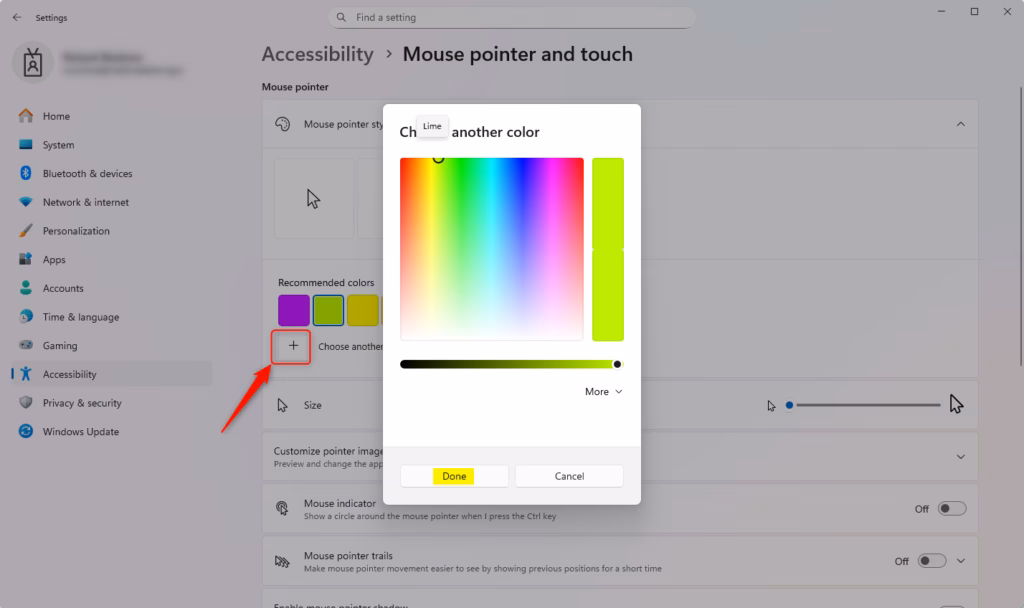
Option B: Choose Another Color
- Click on Choose another color.
- Select a base color from the left side.
- Use the slider to adjust and customize the color.
- The color shown on the right side is your current selection.
- Click on Done when you’re finished.
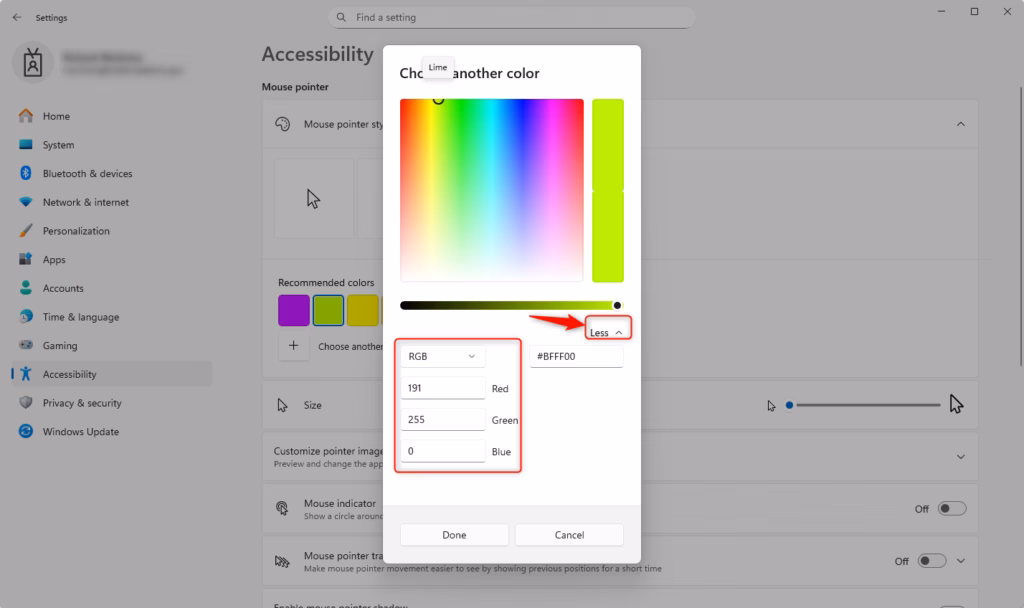
Option C: Specify Custom RGB or HSV Color
- Click on Choose another color.
- Click on More.
- From the drop-down menu, select RGB or HSV depending on which color format you want to use.
- Enter the RGB or HSV values for the custom color you want.
- Click on Done when you’re finished.
Summary
Changing your mouse pointer in Windows 11 is easy and can help you see your cursor better. You can pick from four built-in styles (White, Black, Inverted, or Custom), adjust the size from 1 to 15, and choose any color you like. Open Settings, go to Accessibility, select Mouse pointer and touch, and then customize your pointer to your preference. Your changes are saved automatically, and you can always change them again if you want a different look.

Leave a Reply Cancel reply