
This article provides instructions on how to change the display language in Windows 11.
Changing the display language in Windows 11 enables users to select their preferred language for the operating system’s user interface, including menus, dialog boxes, and various system messages.
This feature is particularly beneficial for individuals who speak multiple languages or reside in a country where their native language is not the primary one. By adjusting the display language, users can improve their Windows 11 experience, making it more comfortable and user-friendly.
Any untranslated text will be displayed in the language the program or software was originally developed, typically American English.
Change Windows 11 display language
As mentioned, users can change the display language on Windows 11.
Here’s how to do it.
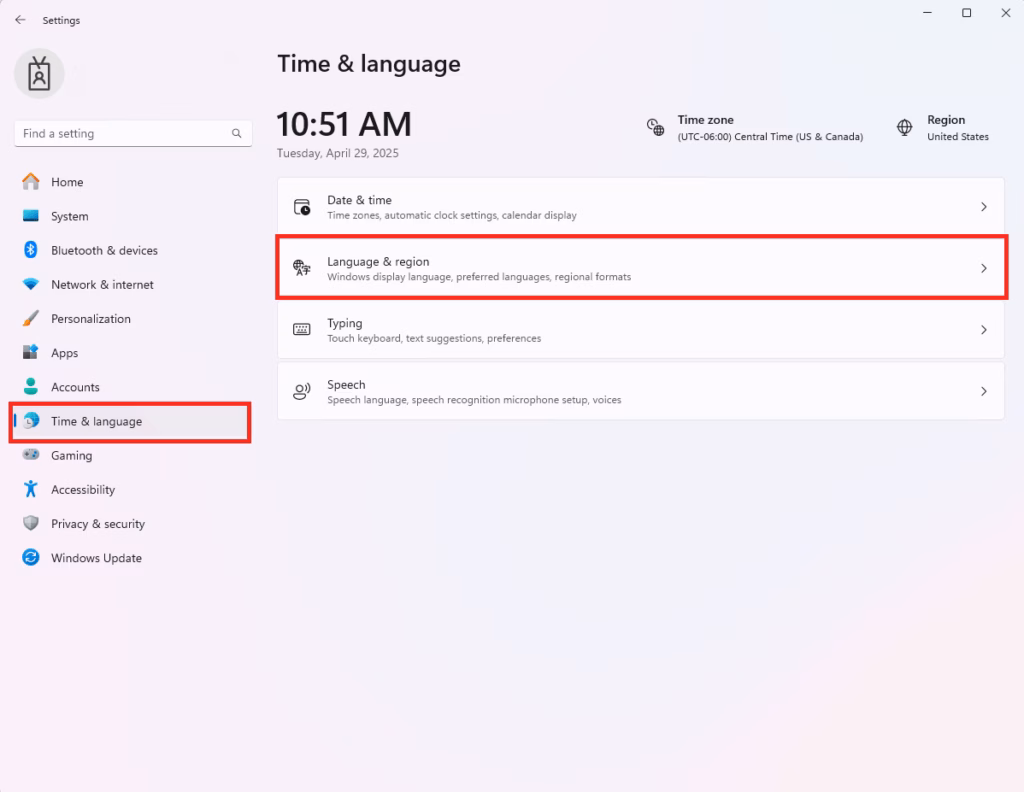
First, open the Windows Settings app.
You can do that by clicking on the Start menu and selecting Settings. Or press the keyboard shortcut (Windows key + I) to launch the Settings app.
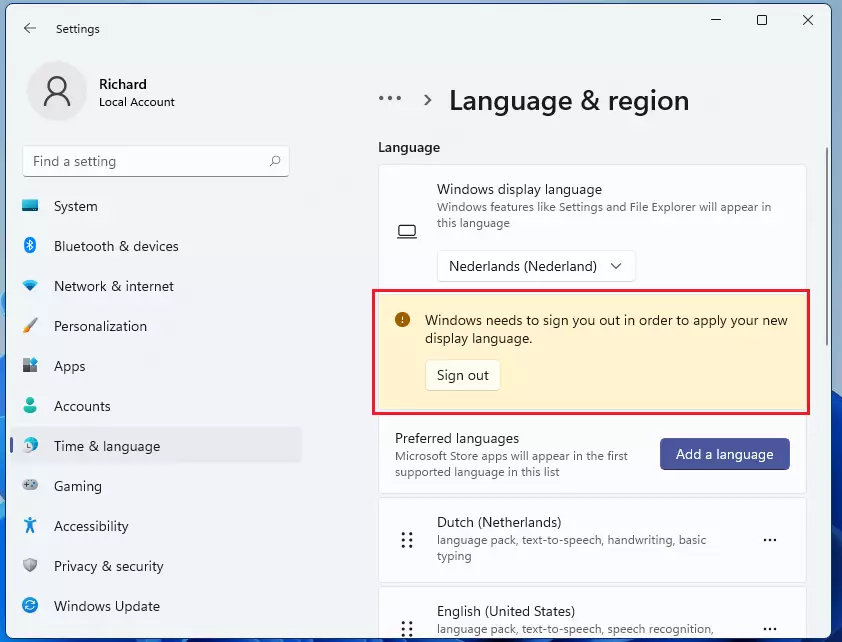
When the Settings app opens, click the Time & language button on the left. Then, select the Language & region tile on the right to expand it.
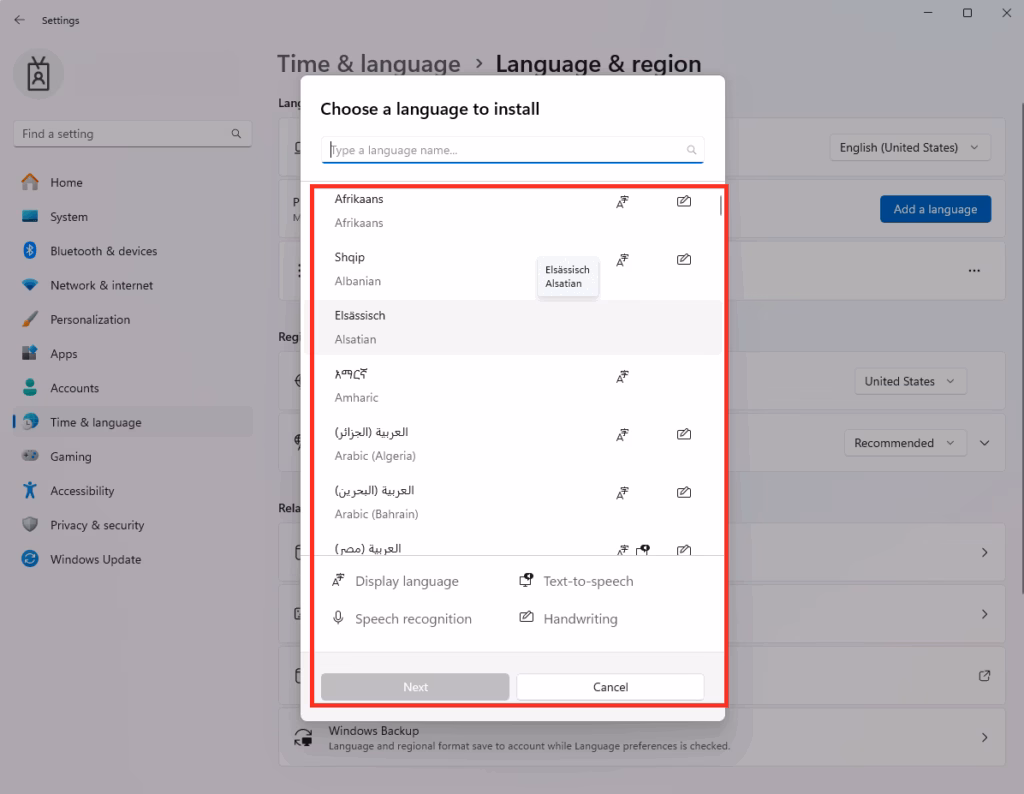
On the Language & Region settings page, click the Add a language button.

Select your preferred language from the list to install it, then click Next.
On the next screen, check the box next to “Set as my Windows display language” and click Install.
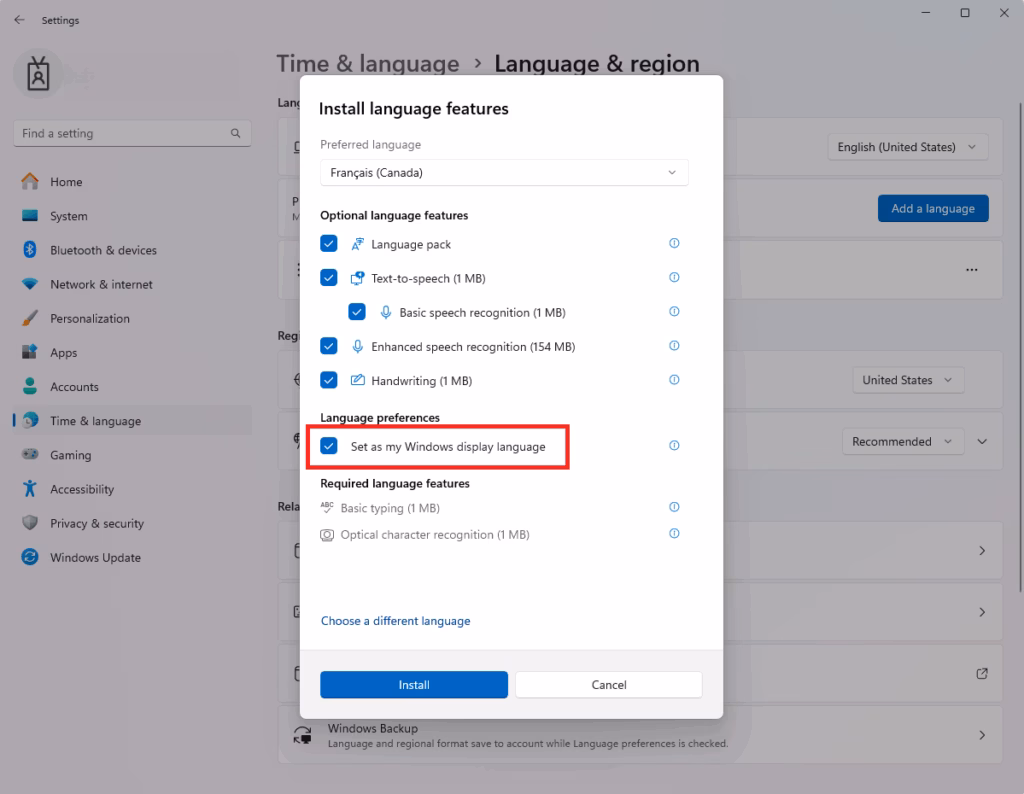
Wait for Windows to finish downloading and installing the language pack. After the download is complete, sign out and log back in for the changes to take effect.
If you want to install keyboard settings for your preferred Language, click the language option highlighted in the image below.
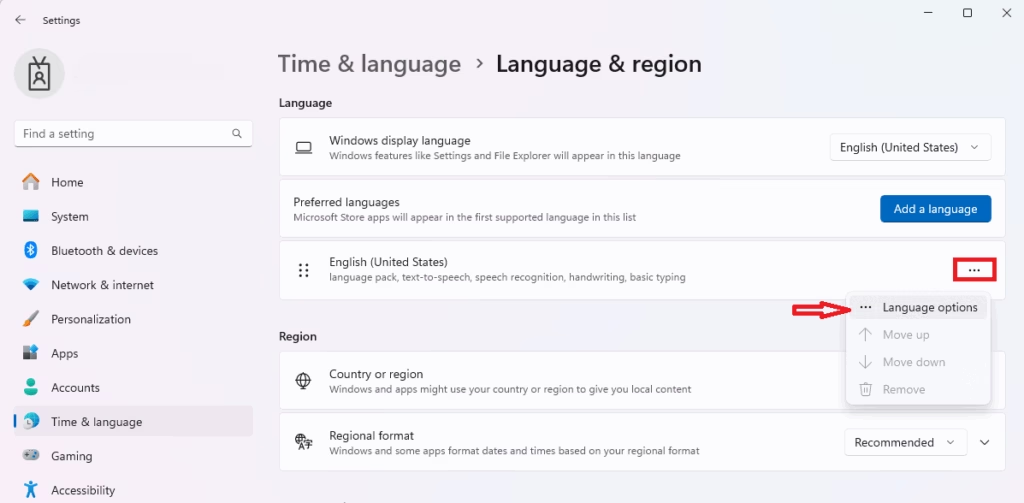
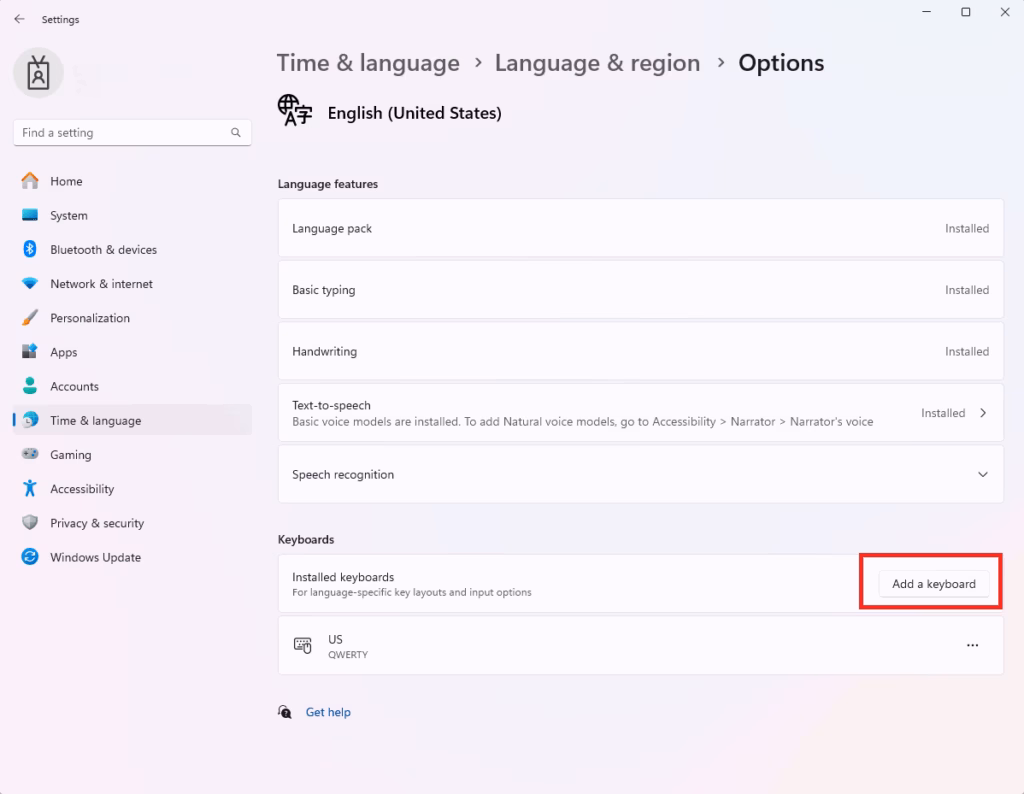
On the Language Options settings page, click on “Add a keyboard.” Choose a keyboard layout that corresponds to the language selected above.
If Windows can’t automatically install the language packs you selected, you must manually download and install them in Windows.
Some folders in your home directory contain music, pictures, and documents. These folders have common names that correspond to your chosen language. When you log back in, they will be renamed to match the standard names for your selected language.
Conclusion:
- Changing the display language in Windows 11 enhances the user experience by allowing personalization of the interface.
- The process is straightforward, involving accessing the Settings app and selecting the desired language.
- Users can also set keyboard layouts to match their preferred language for improved typing efficiency.
- After installation, remember to sign out and sign back in for the changes to take effect.
- Enjoy a more comfortable computing experience that reflects your language preferences.

Leave a Reply Cancel reply