

This article explains how to change the BitLocker drive encryption method and cipher strength in Windows 11.
BitLocker helps protect computer data so only authorized users can access it. New files created on a BitLocker-enabled drive will also be protected.
Users can protect external, fixed, and operating system drives using BitLocker. When you enable BitLocker to protect the OS drive, it automatically unlocks the drive at startup using a TPM chip.
BitLocker Device Encryption uses the XTS-AES 128-bit encryption method by default. However, you can increase the strength by using a 256-bit cipher key length for the operating system drives, fixed data drives, and removable data drives.
Change BitLocker drive encryption method and cipher in Windows
As mentioned above, users can change the BitLocker drive encryption method and cipher in Windows.
Here’s how to do it.
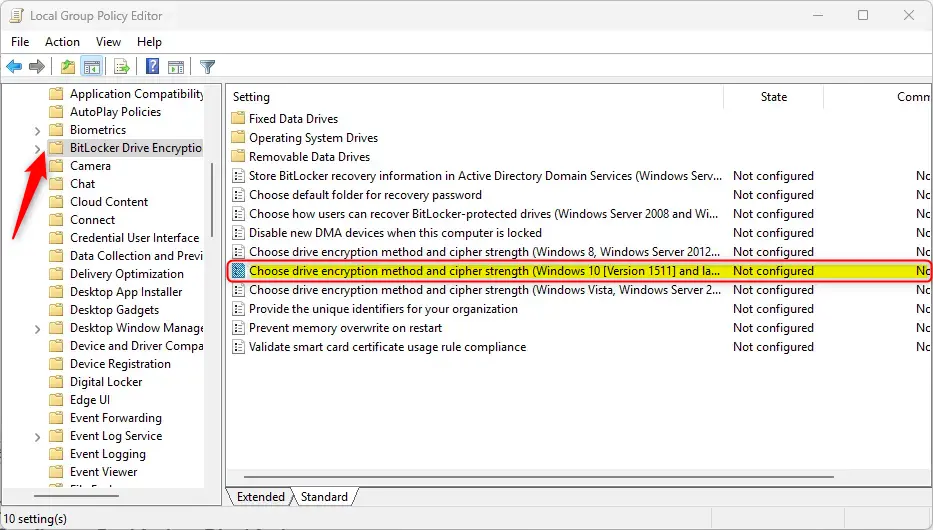
First, open the Local Group Policy Editor (gpedit.msc). (Search for “Edit group policy”) on the Start menu.
Then, navigate the folders below:
Computer Configuration -> Administrative Templates -> Windows Components -> BitLocker Drive Encryption
In the BitLocker Drive Encryption details pane on the right, locate and double-click the “Choose drive encryption method and cipher strength (Windows 10 (Version 1511) and later)” settings.
On the “Enable dev drive” window, set the option to Not Configure, Enabled, or Disabled.
- Not Configured (default)
- Enabled – under Options, select the encryption method and cipher for drives
- Disabled –BitLocker will use AES with the same bit strength (128-bit or 256-bit)
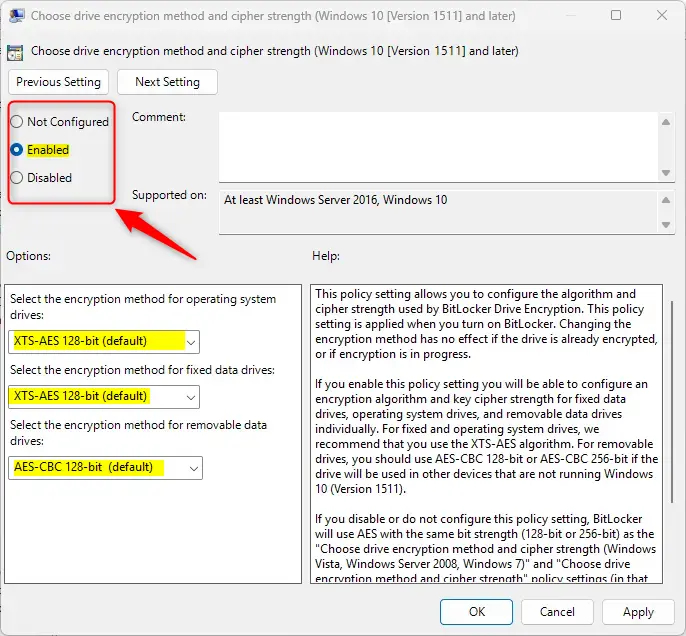
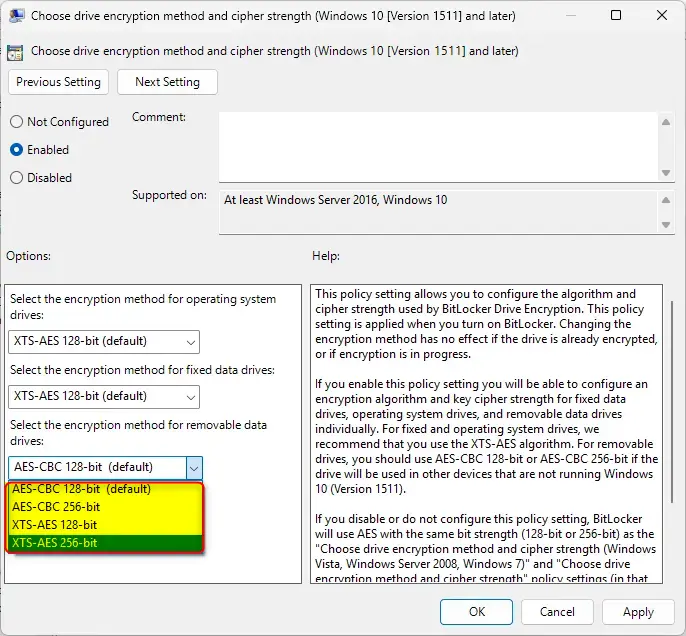
When enabled, change the encryption method and cipher from the drop-down menu under Options for the operating system drives, fixed data drives, and removable data drives.
Click OK to save your changes. You may have to reboot your device for the settings to apply.
Change encryption method and cipher using the Windows Registry Editor
Yet another way to change the BitLocker drive encryption method and cipher is to use the Windows Registry editor.
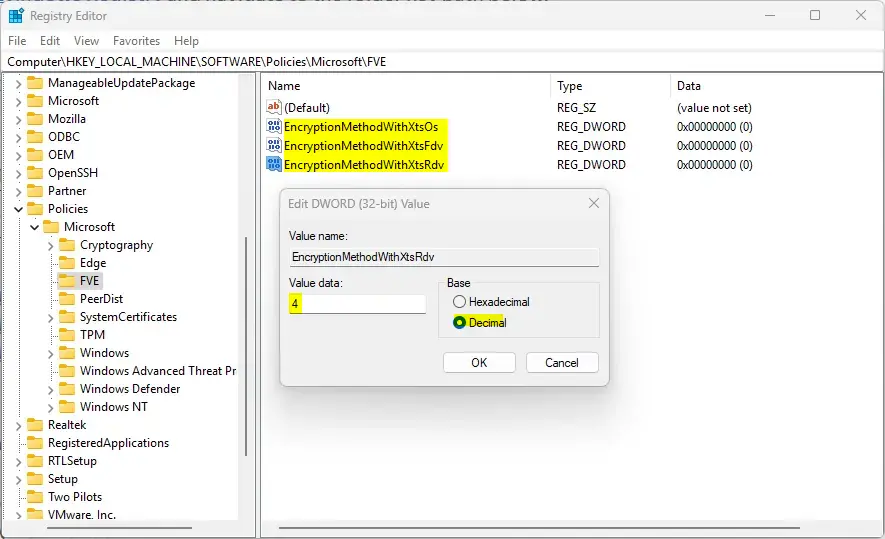
First, open the Windows Registry and navigate to the folder key path below.
ComputerHKEY_LOCAL_MACHINESOFTWAREPoliciesMicrosoftFVE
Next, double-click these two (REG_DWORD) names on the FVE key’s right pane to open it.
EncryptionMethodWithXtsOs
EncryptionMethodWithXtsFdv
EncryptionMethodWithXtsRdv
Then, enter a value 4
Enter 7 for the three items above to use XTS-AES 256-bit encryption method.
If you do not see the two items, right-click a blank area and create a new DWORD (32-bit) registry item for both.
Then, enter a value 47 for all to use the encryption method you want.
To restore the default behavior and use XTS-AES 128-bit, delete both items created above.
EncryptionMethodWithXtsOs
EncryptionMethodWithXtsFdv
EncryptionMethodWithXtsRdv
Save your changes and restart your computer.
That should do it!
Conclusion:
- Modifying the BitLocker drive encryption method and cipher in Windows 11 can enhance data security and privacy.
- Users can adjust encryption methods and cipher strength for various drives, including the operating system, fixed data, and removable data drives.
- The process involves using the Local Group Policy Editor to configure drive encryption settings and the Windows Registry Editor for further customization.
- After making the desired changes, the device must be rebooted for the revised settings to take effect.
- Following these instructions, users can tailor the BitLocker encryption to align with their specific security requirements, bolstering their data protection.


Leave a Reply Cancel reply