This article explains how to change a PC registered owner and organization in Windows 11.
When you install or purchase a Windows PC, Windows embeds the owner’s registration information in its registry. By default, Windows uses “Windows User” when you log in with a local account or your email address when you log in with your Microsoft account as the registered owner of the PC.
The registered organization name for the PC is left empty.
Some applications may reference the owner’s information and display it so that the actual owner is revealed for licensing purposes.
You can change the Windows owner’s information in its registry if it is incorrect. The steps below show you how.
Change owner and organization registered name in Windows
As mentioned, Windows will use the PC user information as the registered owner and leave the organization field blank.
Here’s how to change it.
First, open the Windows Registry Editor.
Then, navigate to the folder key below.
HKEY_LOCAL_MACHINE\SOFTWARE\Microsoft\Windows NT\CurrentVersion
In the right pane of the CurrentVersion key, locate both the RegisteredOrganization and RegisteredOwner string values.
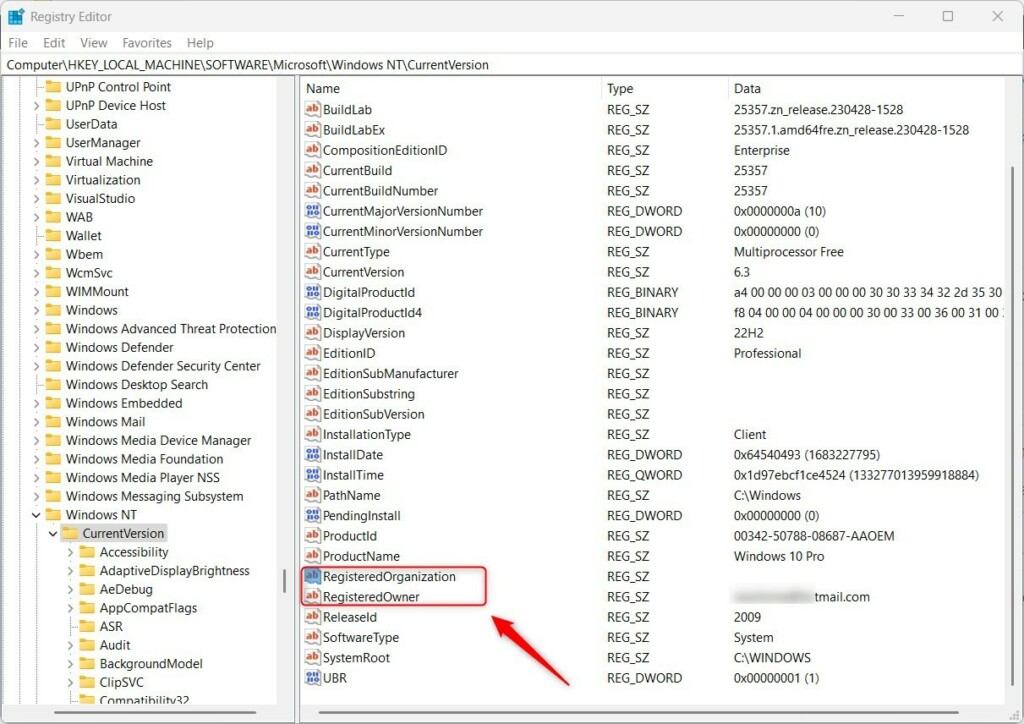
If you do not have a RegisteredOrganization string value (REG_SZ) in the right pane of the CurrentVersion key, right-click in a blank area on the right pane and, select New -> String Value, type RegisteredOrganization in the field.
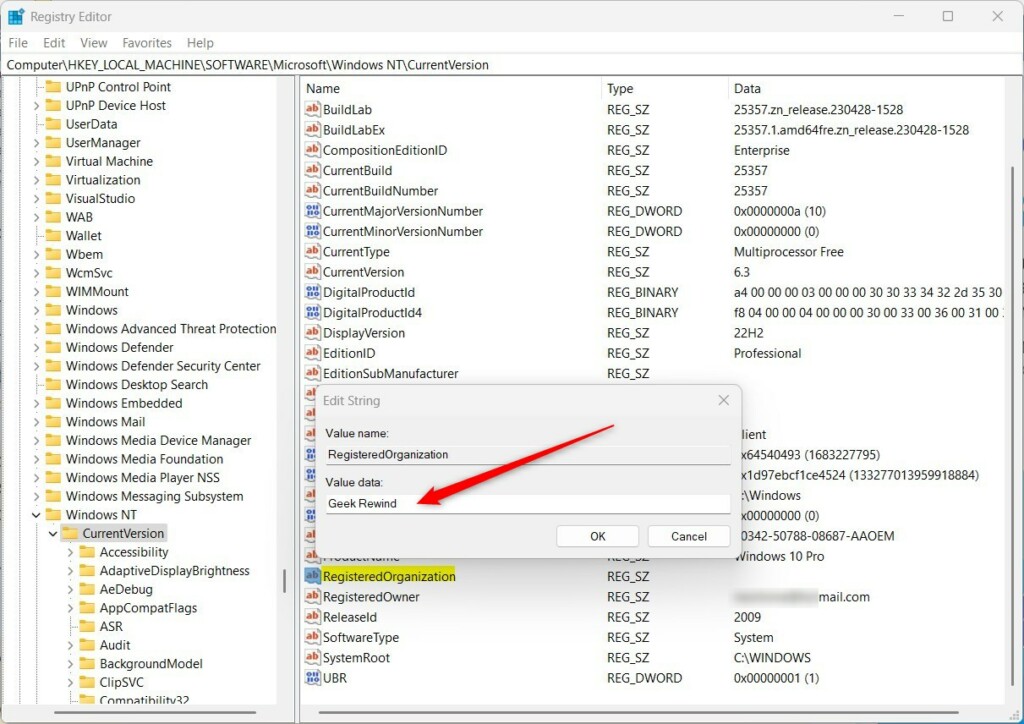
Then, double click RegisteredOrganization to open, and type in the organization’s name.
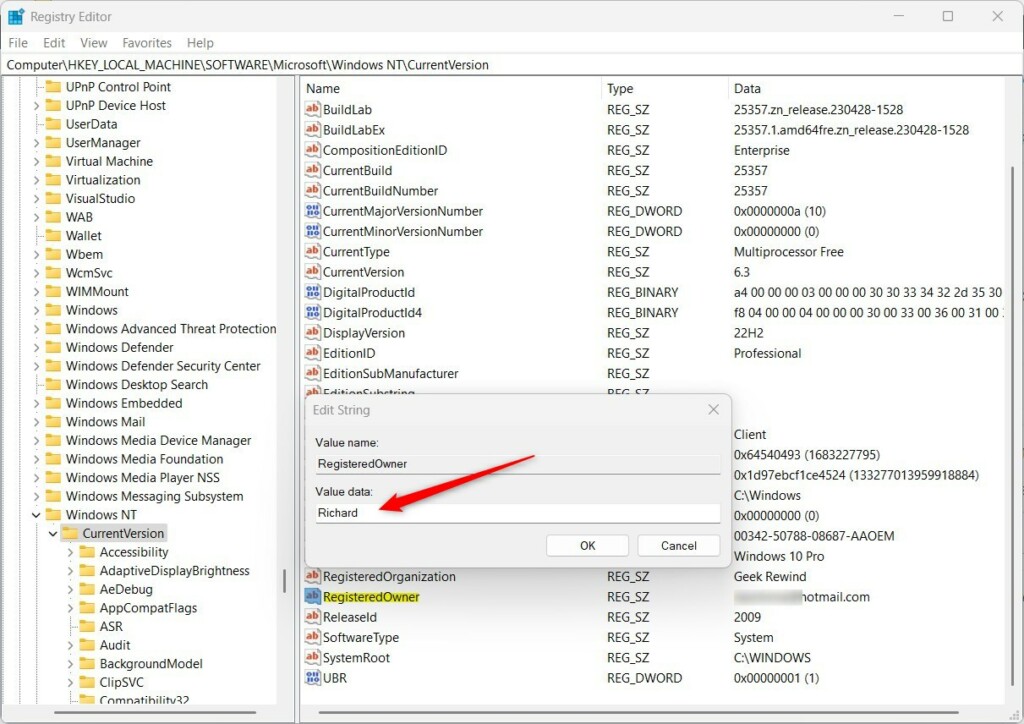
Repeat the same for the RegisteredOwner string. If you do not see the RegisteredOwner string, right-click and create one.
Then modify it and add a value data for the Owner name.
When done, run the commands below to view the registered owner and organization information.
winver.exe
That should do it!
Conclusion:
- Modifying the registered owner and organization information in Windows 11 is a straightforward process that allows you to customize the registration details according to your needs.
- Following the steps outlined in this article, you can ensure that the correct owner and organization information is recorded in the Windows registry, providing accurate details for licensing and identification purposes.
- It’s essential to accurately update this information to reflect the appropriate ownership and organizational details associated with the PC.




Leave a Reply Cancel reply