
This article describes how to boot into a device’s UEFI BIOS Firmware Settings when using Windows 11.
A few days ago, we showed you how to check your device’s UEFI BIOS firmware version in Windows 11. We said that UEFI (Unified Extensible Firmware Interface) is a standard firmware interface created by the UEFI consortium, designed to replace the older BIOS (basic input/output system).
It is designed to improve software interoperability and address the limitations of BIOS, which has been used for decades.
As of Windows 10, version 1703, Microsoft requires UEFI Specification version 2.3.1c to support the handcuff of system control from the SoC firmware boot loader to the OS.
If your device has UEFI BIOS chips and you want to boot into it and make changes, use the steps below.
Boot into the device UEFI BIOS firmware settings using the keyboard shortcuts
Most devices will allow you to boot into its UEFI BIOS settings by pressing the Boot or BIOS menu keys. Pressing the correct key at the POST screen will launch the Boot or UEFI BIOS menu.
Some keys to boot into the Boot or BIOS menu are Esc, Delete, F1, F2, F10, F11, or F12.
Check your device’s manufacturer documents or website for information on how to boot into a device Boot or BIOS menu.
The Volume up or Volume down buttons on tablet devices may get you into the UEFI BIOS.
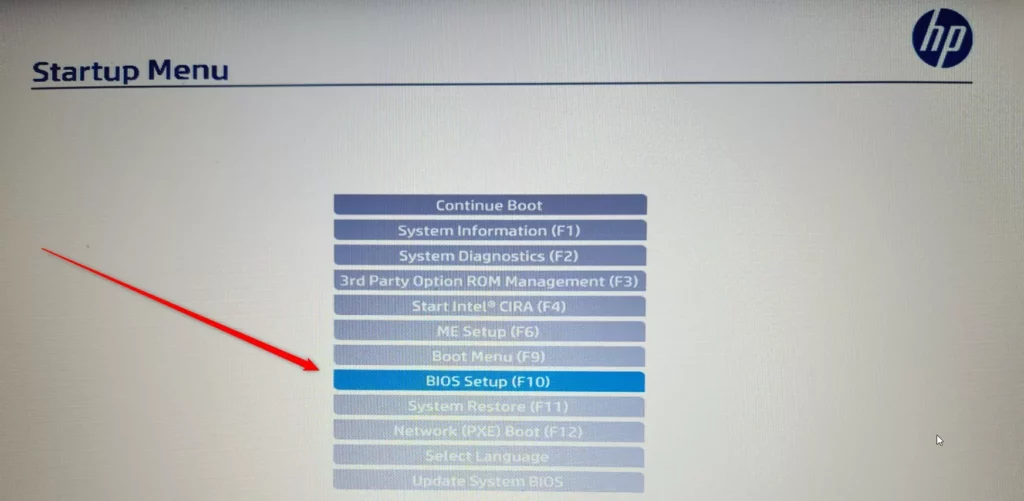
Depending on your device, you may see a screen similar to the one below.
Select BIOS Setup (F10) to boot to your device UEFI BIOS firmware.
On the UEFI BIOS screen, make all necessary changes and save, then exit.
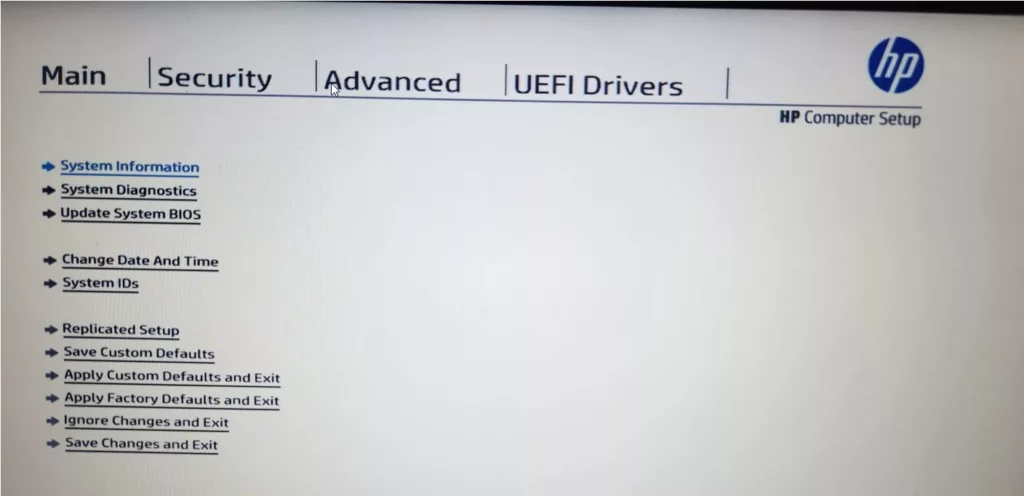
Your device may have to reboot for some changes to apply.
Boot into device UEFI BIOS firmware via Advanced Startup (WinRE)
Another way to boot into a device’s UEFI BIOS firmware settings is to use the Windows Advanced Startup (WinRE) feature.
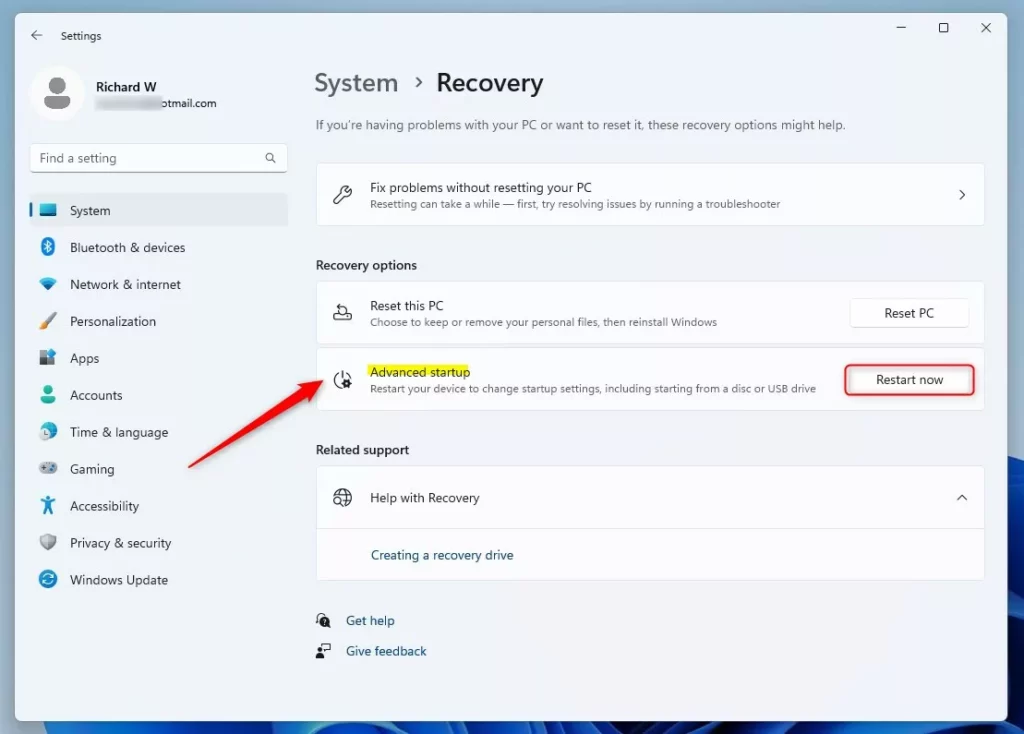
To get there, click Start -> Settings -> System -> Recovery – Advanced Startup. Then, click the Restart now button to restart.
When Windows boots into Advanced Startup, select Troubleshoot

Then select Advance options.

Finally, select UEFI Firmware Settings.
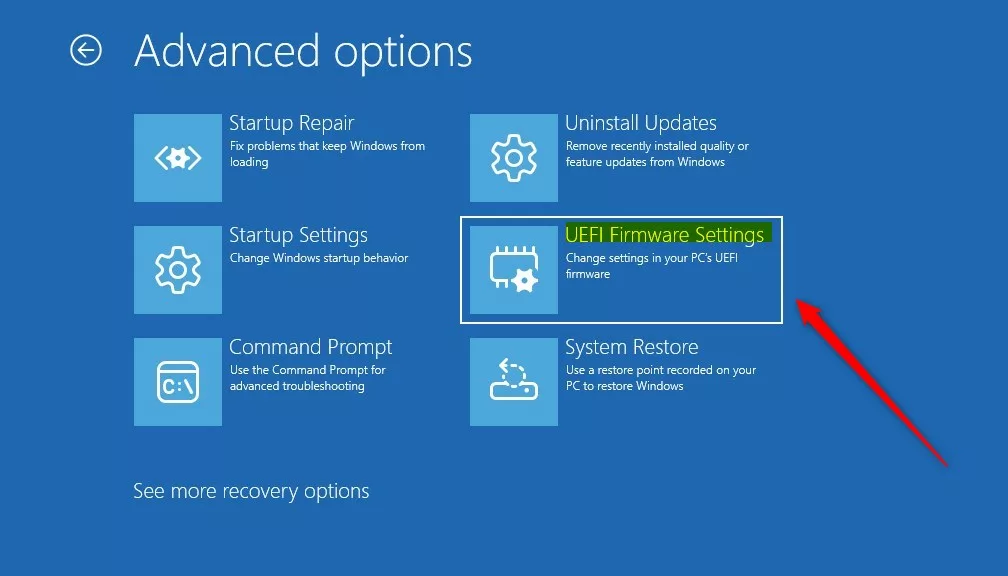
Windows will reboot into your device’s UEFI BIOS settings.
Boot into your device UEFI BIOS firmware settings using commands
Alternatively, one can use Windows Command Prompt or PowerShell to boot into a device’s UEFI BIOS firmware settings.
To do that, open the Windows Terminal app with either the Command Prompt or Windows PowerShell.
Then, run the commands below.
shutdown /r /fw /t 0
That should do it!
Reference:
Conclusion:
- Booting into UEFI BIOS firmware in Windows 11 provides access to make necessary system changes and optimizations.
- User-friendly methods like keyboard shortcuts, advanced startup, and command line further simplify the process.
- Understanding UEFI BIOS firmware functionality enhances device management and customization for a better user experience.
Leave a Reply to How to check a device’s Secure Boot status on Windows 11 - Geek Rewind Cancel reply