
This post describes steps one can take to enable or disable automatically to lock their computer after the inactivity limit in Windows 11
By default, Windows will automatically lock your computer when you are away to prevent other people from using your desktop and accessing your files.
When locked, your computer will show the lock screen by default. The lock screen is the screen or curtain you see when you turn on your computer before the sign-in screen. It is also displayed once your computer is locked after you step away or press the Windows key + L.
The Interactive logon: Machine inactivity limit security policy setting allows you to specify a number in seconds of user inactivity, and if exceeded, Windows automatically locks the computer.
Below is how to change this policy so your computer does not automatically lock or set an inactivity limit before locking.
How to enable or disable automatically locking computer after inactivity in Windows 11
As mentioned above, Windows will automatically lock your computer when you are away to prevent other people from using your desktop and accessing your files.
Below is how to change Windows security policy settings that control when and how your computer locks.
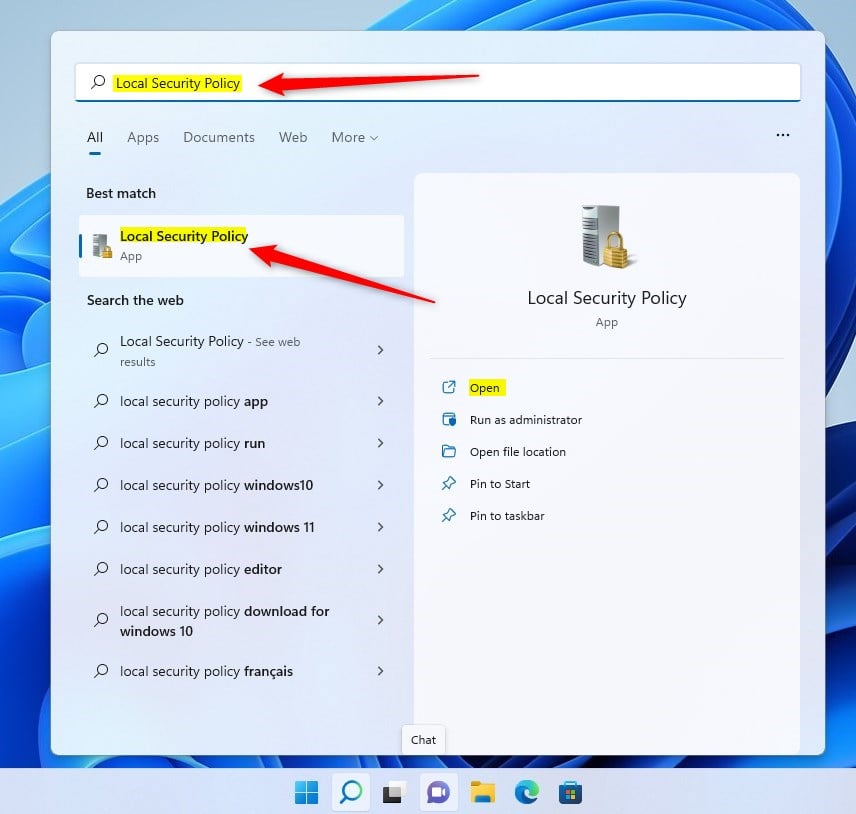
To do that, open Local Security Policy (secpol.msc) by clicking on the Start Menu and searching for Edit group policy, as highlighted below.
Under Best match, select Local Security Policy to launch Local Security Policy Editor.
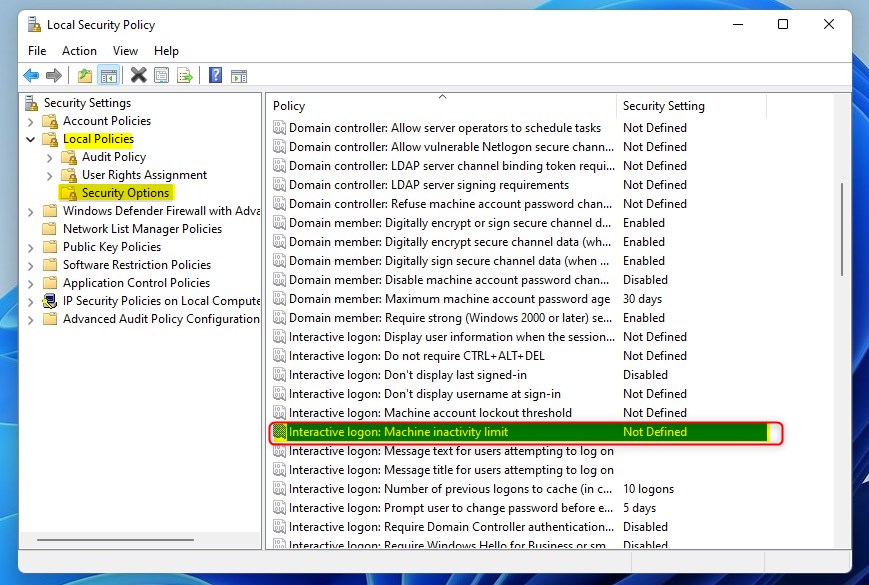
In the left pane of Local Security Policy Editor, expand the tree:
Local Policy -> Security Options
Then, locate and double-click the setting Interactive logon: Machine inactivity limit in the Security Options details pane on the right.
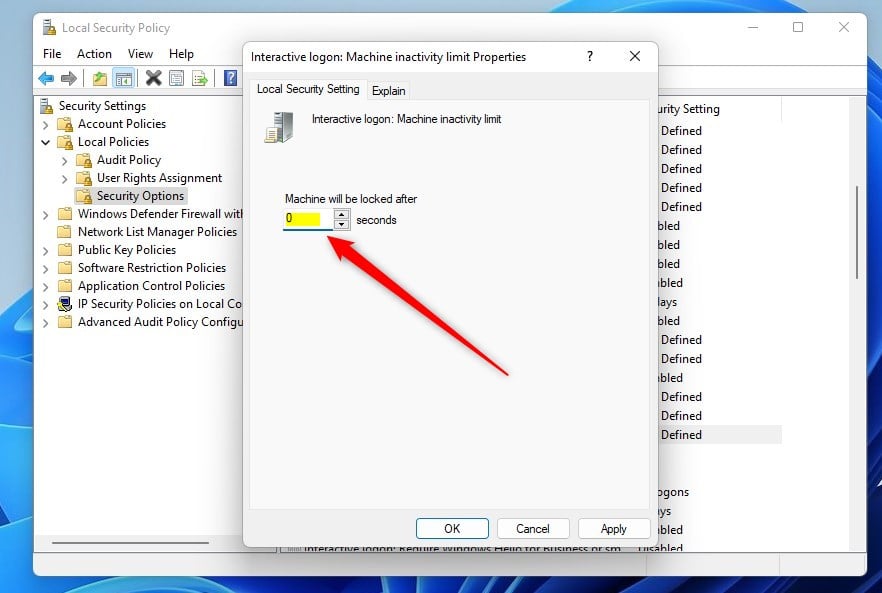
On the logon: Machine inactivity limit policy Properties window, enter a number between 0 to 599940 for when the user sign-in session will lock after inactivity, and click OK.
If the Machine is locked after it is set to zero (0) or has no value (blank), the policy setting is disabled, and a user sign-in session is never locked after any inactivity.
Local Security Policy is only available in the Windows 11 Pro, Enterprise, and Education editions.
If you run Windows Home and don’t have the Local Security Policy editor, open the Windows Registry editor to configure it there.
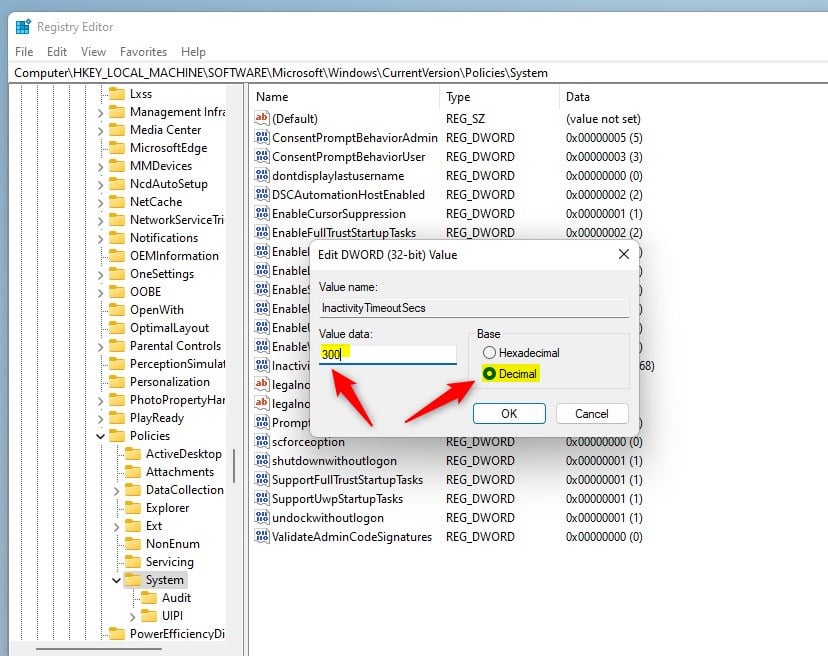
When Windows Registry opens, navigate to the tree path below:
HKEY_LOCAL_MACHINESOFTWAREMicrosoftWindowsCurrentVersionPoliciesSystem
Then, in the right pane of the System key, double-click on InactivityTimeoutSecs REG_DWORD data to open it.
Note: If you don’t see data for InactivityTimeoutSecs, right-click in a blank window area, select New, choose DWORD (32-bit) Value, and type InactivityTimeoutSecs for the name to create one.
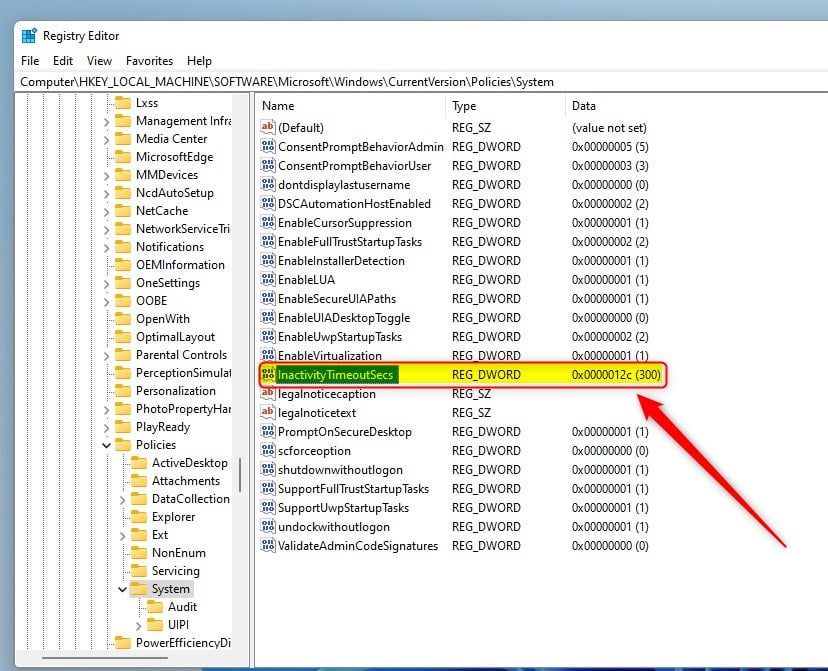
Then, change the inactivity timeout in seconds in Decimal and click OK to save.
That should do it!
Conclusion:
- This guide provides detailed steps to enable or disable the inactivity timeout before automatic computer lock in Windows 11.
- It covers using the Local Security Policy Editor and the Windows Registry Editor to adjust the inactivity limit.
- Windows 11 Pro, Enterprise, and Education users can utilize the Local Security Policy, while Windows Home users can modify the setting through the Windows Registry.
- Following these instructions allows users to customize their computer’s automatic lock behavior according to their preferences.


Leave a Reply Cancel reply