

This article describes how to add or remove the Mixed Reality pane in the Settings app when using Windows 11.
Windows Mixed Reality is the first spatial operating system. Instead of a flat screen and a 2D interface, it uses our instinctual ability to navigate three-dimensional space. Setting up Windows Mixed Reality starts with a Mixed Reality home, an environment you can navigate and personalize to make your own.
Once you plug in a compatible headset, Windows will run a PC check, download some software, connect your controllers, and create a boundary to help you avoid obstacles.
Windows will walk you through the setup process and add Mixed reality settings to the Settings app, where you can choose different settings.
Windows also lets you manually add or remove the Mixed reality pane from the Settings app on demand.
Manually add or remove the Mixed reality pane from the Settings app
As described above, the Mixed reality pane will automatically be added to the Settings app after you have set up Windows Mixed Reality. No additional steps are needed to add the Mixed Reality settings to the Windows Settings app.
However, those who want to learn how to add or remove it can use the steps below manually.
First, open the Windows Registry and navigate to the folder key path below.
HKEY_CURRENT_USER\Software\Microsoft\Windows\CurrentVersion\Holographic
If you don’t see the Holographic folder key, right-click on the CurrentVersion parent key, then create the subkey (Holographic) folder.
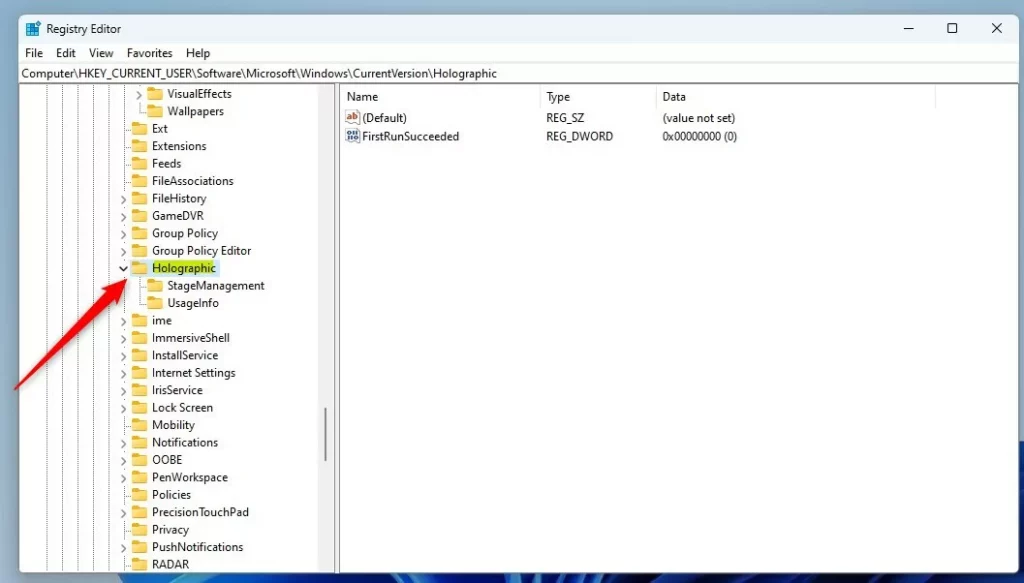
Right-click the Holographic folder key’s right pane and select New -> DWORD (32-bit) Value. Type a new key named FirstRunSucceeded.
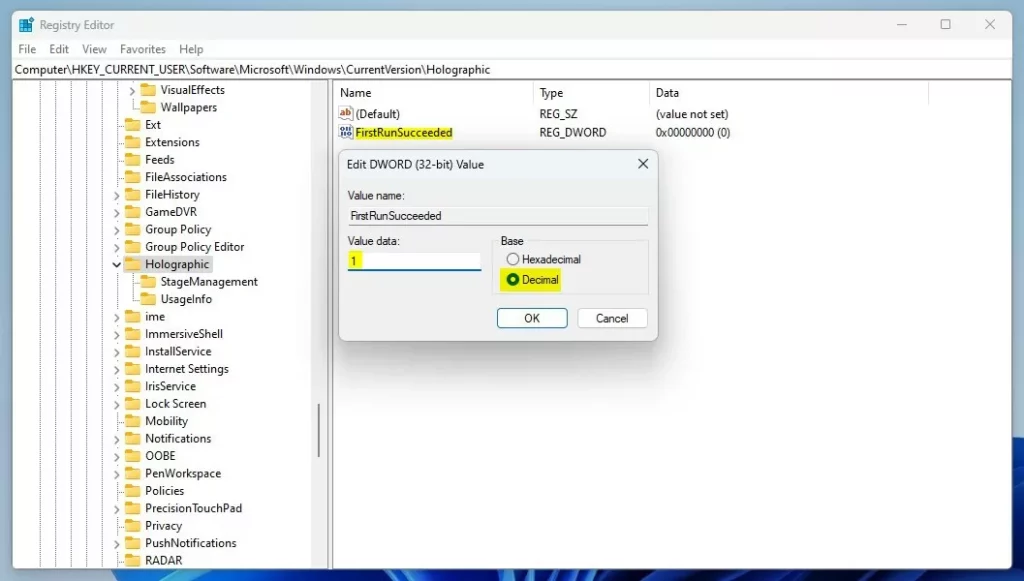
Double-click the new value name (FirstRunSucceeded) and enter the Value data of 1 to add or show the Mixed reality button in the Settings app.
A Value data of 0 will remove the Mixed reality button from the Settings app.
Once enabled, open the Windows Settings app and see a new Mixed reality button.
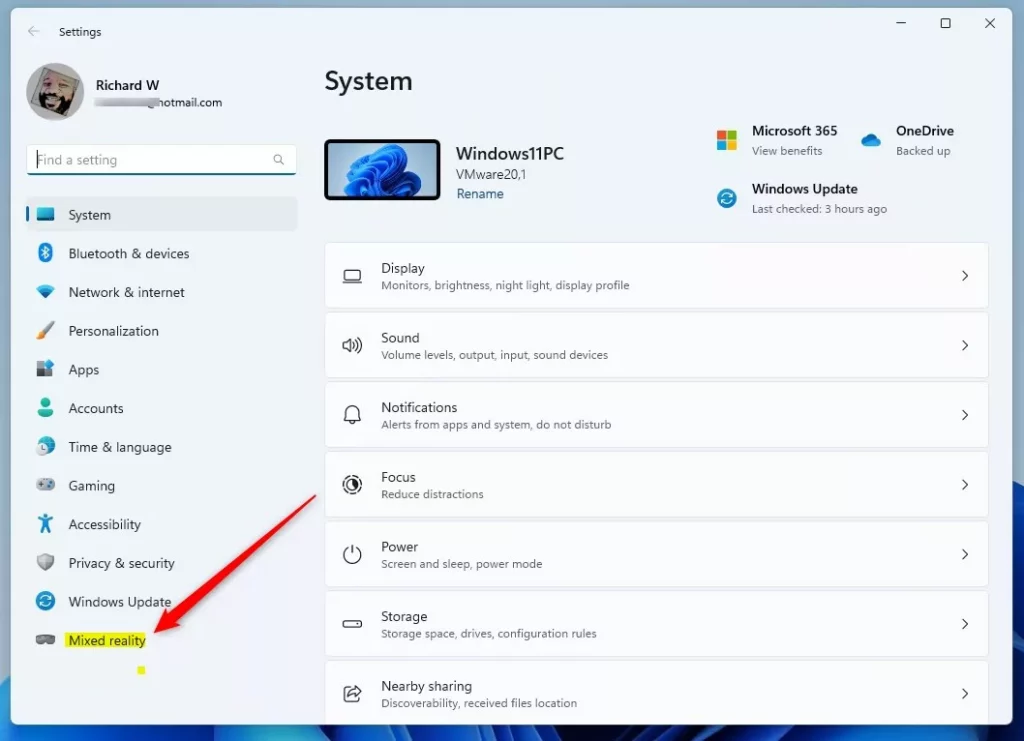
That should do it!
Reference:
Conclusion:
- Enabling or disabling the Mixed reality button in the Settings app for Windows 11 can be achieved by following the simple steps outlined in this article.
- By modifying the Windows Registry key and its associated value, users can manually add or remove the Mixed reality pane from the Settings app, providing control and customization options.
- This comprehensive guide helps users navigate the process effortlessly, ensuring a tailored Windows Mixed Reality experience.

Leave a Reply Cancel reply